Are you trying to set up a tube amp, but aren’t quite sure how to bias a guitar amp? If so, then don’t worry because you’ll get to know all about it here.
Biasing a tube amp involves connecting the amp, connecting the bias meter, calculating the bias current, and adjusting the bias. The process of how to set bias on tube amp will be easy if you know the right steps.
In this article, you’ll get to know about bias in guitar amps, how to bias a tube amp, why is tube amp bias important, how to adjust bias on tube amp, and more.
What is bias?
Before getting to know how to set bias on tube amp, it’s important to know what exactly is bias. Bias voltage is the voltage difference between the tube’s control grid and the cathode. Bias current, on the other hand, is the number of electrons that flow from the cathode to the plate without any audio signal on the control grid. An amplifier tube will control the flow of electrons running through it. The tube can either completely stop the flow (cutoff) or allow it to flow at maximum (saturation).
>>> Click here to read our review about the Top 15 Best Tube Amps <<<
For amplifying an alternating current (AC) guitar audio signal, you’ll have to set the tube idle. Moreover, set the no-signal electron flow at a point for keeping it from overheating the tube’s plate.
Normally, you’ll want to set the idle flow in the middle of cutoff and saturation. This will give enough room for the positive and negative voltage of the guitar signal. If the guitar signal is a negative voltage, it’ll make the control grid negative. This repels the negatively charged electrons that flow through the tube, slowing the flow. If the signal is a positive voltage (scarcity of electrons), the grid will go less negative. This results in fewer electrons on the grid for repelling the flow, such that the flow through the tube increases.
Tube manufacturers normally list the tube’s max bias in the tube datasheet as maximum plate dissipation in watts. Plate dissipation is the plate-to-cathode voltage x plate current. The higher the plate voltage is, the lower the plate current needs to stay under the plate dissipation limit. You’ll need to adjust the voltage difference between the control grid and the cathode. It’s important to adjust the number of electrons that are flowing from the cathode to the plate.
When working with fixed bias amps, you’ll have to adjust the grid voltage for setting the bias. For cathode-biased amps, you should change the cathode resistor value for changing the cathode voltage and adjusting the bias.
If you’re biasing the amp too hot, the power tubes could “red plate”. The plates will glow red-hot from many electrons pounding the metal plates. With the plate dissipation set at 100%, the tube can flow more electrons such that the saturation current will be greater than the max plate dissipation current.
When an AC guitar signal has been applied to the power tube grid, the tube’s current flow fluctuates above and beyond the idle current. As long as the average current flow isn’t exceeding the max plate dissipation, the tube operation will be safe. Saturation will be an absolute current limit, but max dissipation will be an average heat limit.
Why is tube amp bias important?
In simple terms, having the correct tube amp bias ensures that your power amp valves are running at their optimum. This ensures that you’ll get the best possible tone out of them as the tubes are getting fed the right voltage according to the valve’s resistance. Correctly biasing the amp means that one set of valves can have a long life as they’re running at perfect temperatures.
If you do not bias the tube amp correctly, you’ll face these scenarios –
- Running the valves too closed (over-biased) – It means that there isn’t enough voltage getting provided to the power amp valve. This will give you a thin, sterile tone without the fear of the lovely warm tube saturation. Valves will probably have a longer life as they aren’t getting overworked. However, the amp wouldn’t sound the best that it possibly can.
- Running the valves too hot (under-biased) – It means that you’ll be cooking and saturating the valves quickly. This can cause massive problems for the amp, as you’ll be allowing too much power through the power amp circuit. At best, you’ll be getting an overly saturated tone with a shorter valve life than normal. At worst, you will melt other components in the amp further down the line or cause an electrical fire.
- Running the valves at optimum – This will be somewhere between hot and cold, where the valves resist perfectly the power coming at them. Happy valves will mean a happy tone and a happy player. This will be the balance between tube life and the best tone.
How to bias a tube amp?
If your amp has fixed bias with a bias pot, make small changes when you’re adjusting the bias pot. Moreover, you should measure the plate current again and the plate voltage. You’ll need to measure the voltage each time as the voltage and current change with a bias pot change.
As you’re turning up the bias and flowing more current through the power tube, the demand on the power transformer and rectifier cause the plate voltage to drop. You should calculate the bias percentage after each bias pot adjustment and then sample the amp’s clean and overdrive tone.
- If the amp has a fixed bias without a bias pedal, you should install a bias pot. You can even replace the bias resistors for adjusting the bias.
- If the amp is cathode-biased, you should replace the cathode resistor for changing the bias level. A higher value cathode resistor cools the bias, a lower value will actually warm the bias. Cathode-biased amps will safely run at 100% plate dissipation at idle.
- If the amp has bias tremolo, you’ll have to sample the tremolo after you’ve adjusted the bias. Too hot of a bias will give you a weak tremolo.
How to adjust bias on tube amp?
Here, you’ll get to know the detailed process of how to adjust bias on tube amp to get the best sound. Remember, fixed adjustable bias amps come with a trimpot for the bias adjustment. Remember to check the model’s manual for determining if this process can apply to your amp.
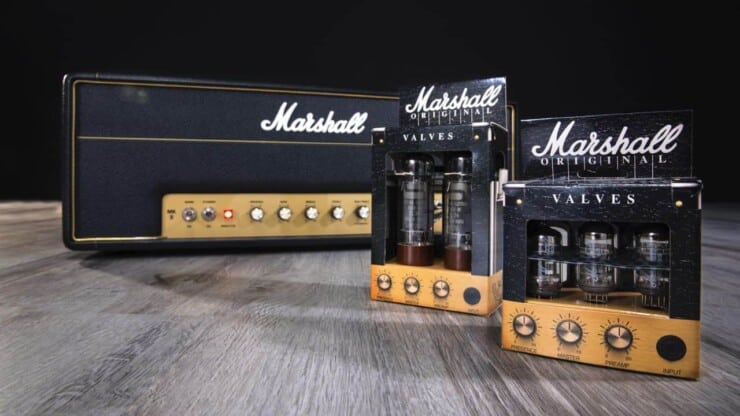
Matched tubes
Matched tubes will be important in vacuum tube power amps. Without having a matched set, it wouldn’t be possible to get proper bias. This can often result in one or more tubes not operating properly. It can also run too hot or even red-plate, which damages the tube and possibly the amp. Go for matching tubes that use state-of-the-art equipment designed and built for matching tubes used in guitars and audio amps. With a precision-matched set, you’ll be ready to bias your amp.
The trim pot
In fixed adjustable bias amps, the bias will be set using a trimpot. The potentiometer will work similarly to a volume pot on a guitar. However, it controls the level of negative voltage in the amp rather than the volume or tone of the signal. Instead of just adjusting the pot with a knob, the pot will have a slot for a screwdriver. For accessing the bias trimpot, the amp usually needs to be disassembled.
This requires removing the chassis from the cabinet or, if you’re lucky, removing a back panel on the amp. You should check the manual and then inspect the amp before removing the hardware for determining the correct way of accessing your amp trimpot.
Amplifier voltages
Even with the amp unplugged and powered off, dangerous voltages are still present in the circuit. Electrolytic capacitors potentially hold charges for indefinite periods of time. You should treat the internal circuitry as if it is holding a lethal charge unless you know that it’s safe. This will involve avoiding contact with any internal components or wiring.
Yes, it may look wonderful in your amp, but you shouldn’t touch it. If there is any situation where you’ll need to touch a component, precautions should be taken. To reference a schematic, identify the capacitors that hold the charge. These are normally electrolytic capacitors in the power supply, or they’re connected to power somewhere else in the circuit.
However, any capacitor can hold a dangerous charge. When using a discharging tool, you should safely discharge all the capacitors. Before you make contact with the component, use a multimeter for taking a voltage reading for ensuring that no voltage is present.
Connect the bias meter
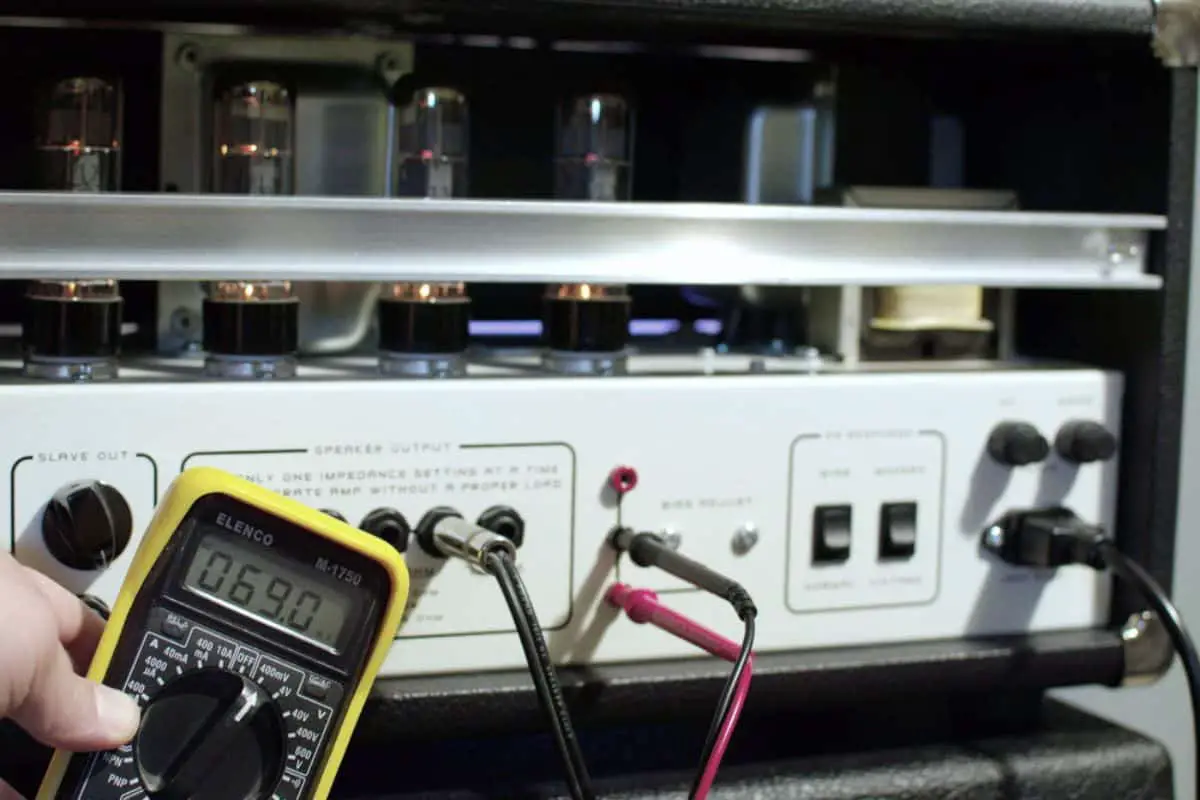
Now that you’ve gained access to the internal circuitry of the amp, the bias meter needs to be connected. A bias meter is essentially a device that measures the current in a tube amp. It makes use of a set of probes plugged into the tube sockets, and the tubes then get plugged into the probes.
This will allow the meter to jump into the circuitry of the power amp without actually needing to disconnect any wires or components. The bias of the tube amp will be measured in milliamps, which is a unit of measurement for electric current. An amp with two tubes will only require two probes. While uncommon, an amp having a single output tube and a fixed adjustable bias will only require one probe.
Measure plate voltage
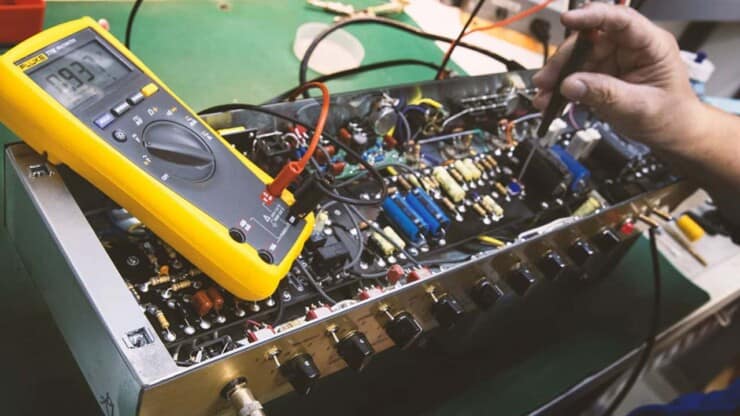
After having the bias probes and tubes installed, you’ll have to set up a multimeter for measuring the plate voltage. You’ll be doing this directly on the power tube sockets. In some cases, you’ll have to flip the chassis over. You can use the sturdy wood blocks for holding the amp up and level when flipped over. Ensure that the amp is in a steady position so that it doesn’t shift or fall over when working on it.
You’ll have to carefully prepare the amp so that you can start the measurements. Ensure that the multimeter is set to the right volts DC range. If the meter has a range covering 300-600V, this will work for most tube amps. If you aren’t certain, you can set it to the highest setting. Then, work your way down once you start getting the readings. You’ll need to turn down all the volume controls on the amp to zero. Then connect a load to the output of the amp. You’ll be using a speaker for the output load.
Some people prefer using a dummy load. As long as the load is matching the output impedance and has a power rating greater than the amp power, it’ll be fine to use. You wouldn’t be using it for sound, so you shouldn’t worry about the quality of the speaker. Ensure that you double-check the connections such that no pins are bridged. Moreover, double-check that the chassis has securely positioned on the bench top. You should be sure that you keep the hands and tools clear of the amp. There will be high voltages, sometimes close to 500V, in the circuit. You should plug in the amp and then turn on the power.
Once the tubes are warmed up, you’ll disengage the standby switch for applying the plate voltage to the power tubes. Some amps won’t have it and the meter will start to measure the plate voltage once the amp is on. As the tubes are warming up, the voltage might drift, so allow it to settle before you start the bias adjustment.
Calculating the bias current
Once you’ve got the plate voltage reading, you’ll take the reading over to any decent bias calculator to determine the bias current. You can start off by using the 70% bias point, which is a common setting for the bias.
Meanwhile, 60% is also another common choice. You also have the option to adjust the setting in the future if you aren’t certain. But for now, 70% would be a great choice for now. For EL34 tubes having a plate voltage of 456.6V, you will see the bias point to be 38.33mA. Different tubes and different plate voltages will normally result in different bias points. You’ll then have to locate the bias adjustment trimpot and then set it for 38.33mA using the bias meter.
The bias trimmer will be labeled on the PCB and comes with many nice features. The labels will show the direction to turn the trimpot for increasing/reducing the bias current. This will be somewhat uncommon, so if the amp doesn’t, you can turn the bias trimpot a bit in one direction or the other way for determining how to increase/decrease the bias.
For this particular part of the process, safety will need to be the main priority. You should keep your hands and tools clear of the circuitry in the amp. Meanwhile, the metal of the screwdriver will be conductive so you should keep it only on the plastic handle. You should be careful that you only touch the screwdriver to the adjustment slot in the bias trimmer. Many people prefer using the “One Hand Rule” when working on the live circuit. This will involve keeping one hand in your pocket. This will allow you to avoid contact with a grounded surface like the chassis of the amp.
You will be making small adjustments to the bias trimmer and moving your hand away from the amp. Then, you should check the bias meter. You’ll be repeating the process while making minor adjustments until the bias matches perfectly the bias point from the calculator. Once the bias point is finally set, you’ll observe it to ensure that it isn’t drifting. Small fluctuations will be normal. You are only ensuring that it isn’t dramatically rising or falling. Depending on the tolerance of different parts used in the amp, the bias could be slightly different for each tube. In such situations, you should set the highest number to 70%.
This step isn’t necessary, but you could connect the amp to a scope. This way, you’ll get the correct curve form as you’re getting close to the correct bias point. When you’re satisfied with the bias settings, you’ll power down the amp and then unplug it. The tubes will be hot, so you will have to allow them some time to cool down before touching them. Once they’ve cooled down, you should remove the bias probes and replace the tubes in the sockets. Finally, you should carefully reassemble the amp, keeping in mind that the capacitors may still hold a charge if they haven’t been manually discharged.
Conclusion
Thank you for reading. Hopefully, now you know a lot more about bias in guitar amps, how to bias a tube amp, why is tube amp bias important, how to adjust bias on a tube amp, and more. To bias the tube amp, it will involve connecting the amp, connecting the bias meter, calculating the bias current, and adjusting the bias.
Image Credit:
Featured Image: Peters Amplification
Images: Sweetwater

