Guitar players, are you curious about how to connect a guitar preamp to a mixer? Understanding the basics of connecting audio devices is an essential part of being a guitar player. In this article, we’ll discuss how to connect a guitar preamp to a mixer, as well as the benefits and drawbacks of doing so. So, if you want to know more about this topic, keep reading!
Overview of a guitar preamp
In the world of music, a guitar preamp is often seen as an unsung hero. It silently enhances the tonal qualities and sonic versatility of the electric guitar without getting the due credit. While often getting overshadowed by its more renowned counterparts like guitar amps and effects pedals, the guitar preamp plays a key role in shaping the sound that reaches your ears.
A guitar preamp or preamplifier is an electronic device designed for amplifying and refining the signal produced by an electric guitar before it reaches the power amplifier or audio interface. It acts as a crucial intermediary between the guitar pickups and subsequent audio processing stages, such as amplification and recording.
Purpose of a guitar preamp
One of the main functions of a guitar preamp is to increase the strength of the guitar’s signal to a level that is suitable for further processing. Electric guitars produce relatively weak electrical signals from their pickups. They must be amplified before they can be effectively manipulated or sent to an audio system.
>>> Click here to read our review about the Top 15 Best Guitar Preamps <<<
A guitar preamp allows musicians to exert control over the tonal characteristics of their instrument. By manipulating the frequency response, equalization, and gain, guitarists will be able to sculpt their sound to match their artistic vision. This will allow them to emphasize certain frequencies, attenuate unwanted ones, and achieve a wide range of tones, from clean and warm to gritty and distorted.
Guitar preamps also serve the purpose of impedance matching between the guitar and the subsequent audio processing equipment. As guitars have high impedance outputs, while audio systems need low impedance inputs, a preamp ensures a smooth transfer of the guitar signal, preventing loss of fidelity and preserving the instrument’s natural tone.
Benefits of a guitar preamp
A guitar preamp offers an impressive range of benefits, including versatility, enhanced sound quality, noise reduction, and more.
A guitar preamp opens up a world of tonal possibilities, allowing you to explore various musical genres and styles. With the ability to easily adjust the frequency response and gain, you’ll be able to create a diverse range of sounds, from sparkling cleans for intricate fingerpicking to searing overdrives for scorching solos.
By utilizing a guitar preamp, musicians will be able to refine their instrument’s sound, adding clarity, definition, and richness to their playing. Preamps often feature tone controls, such as bass, mid, and treble knobs, which enable precise sculpting of the frequency spectrum. This results in a more polished and professional sound.
Another huge advantage of guitar preamps is their ability to reduce unwanted noise and interference. By boosting the guitar signal, they effectively raise the signal-to-noise ratio, minimizing the audible hiss or hum that can detract from the overall audio quality. This is especially beneficial for recording applications when pristine sound reproduction is important.
Guitar preamps can be seamlessly integrated into various setups, including pedalboard, studio rigs, and live performances. They often come in compact pedal formats or as built-in components in amps, making them portable and adaptable to different musical environments.
How do I connect a guitar preamp to a mixer?
When it comes to achieving optimal sound quality and control, connecting a guitar preamp to a mixer is an important step for musicians and audio enthusiasts. Whether you are performing live or recording in a studio setting, you will need to know how to connect a preamp to a mixer. Here are the steps that will answer your doubts on how do I connect a guitar preamp to a mixer seamlessly.
Step 1: Prepare the preamp
Before connecting your guitar preamp to a mixer, it is important to ensure that both devices are ready for the task. First, you need to confirm that your preamp is powered on and connected to a reliable power source. Check the power indicator lights for verifying that it is receiving adequate power.
Adjust the input gain or volume knob on the preamp. Aim to set the levels to a point where the guitar signal is strong enough to avoid excessive noise or distortion but not overly loud, which can result in clipping or distortion.
Some preamps have a ground lift switch or feature. If you are experiencing any ground-related issues, such as buzz or hum, try toggling the ground lift switch to see if it resolves the problem.
Step 2: Connect the preamp to the mixer
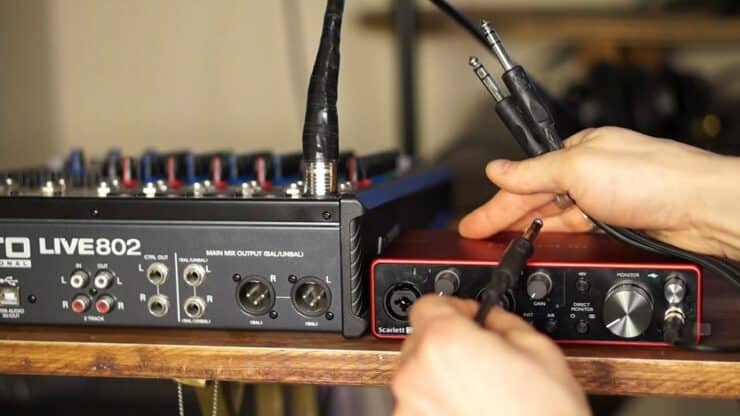
Now that your preamp is prepared, it will be time to establish the connection between the preamp and the mixer. Make sure that you have the necessary cables to connect your preamp and mixer. Typically, you’ll require an instrument cable for connecting your guitar to the preamp’s input and balanced audio cables (such as TRS or XLR) to connect the preamp’s output to the mixer input.
Identify the input and output ports on both your preamp and mixer. The preamp’s output will be labeled as the “Line Out” or “Output” whereas the mixer’s input will be labeled as “Line In” or “Input”.
Plug one end of the instrument cable into your guitar’s output jack and the other end into the preamp’s input jack. Make sure that you’ve got a secure connection. Take one end of the balanced audio cable and plug it into the preamp’s output port. Connect the other end to an available input on the mixer. Repeat this step for each channel or input you intend on using.
Double-check that you have connected the correct outputs to the corresponding inputs. This step will ensure that the signals are properly routed, preventing any audio mishaps.
Step 3: Test the connection
Once you have successfully connected the preamp to the mixer, it’ll be important to test the connection to ensure that everything is functioning as intended. Follow the volume levels on your mixer’s input channels accordingly. Start with the input gain or trim controls at a low level and gradually increase the volume while playing your guitar. Monitor the mixer’s meter or level indicators to ensure the signal is neither too soft nor clipping.
Use headphones or connect the mixer’s output to a set of speakers to monitor the sound. Listen for any distortions, noise, or inconsistencies in the audio. If you encounter any issues, revisit the cable connections and levels for troubleshooting the issues.
If the mixer has multiple input channels, test each channel individually to ensure proper functionality and balanced levels. Make necessary adjustments to the preamp and mixer settings, such as EQ, effects, and panning for achieving the desired sound.
Different types of guitar preamps
In the world of audio engineering and music production, preamps play a key role in shaping and enhancing the sound of vocals and instruments. Within the realm of preamps, there are different types of guitar preamps that offer distinct characteristics and tonal qualities. Here are the different types of guitar preamps as well as their unique features and sonic signatures.
#1. Tube preamps
Tube preamps, often revered for their warm and harmonically rich sound, harness the amplification power of vacuum tubes. These glass-encased components, reminiscent of vintage audio equipment, are known for adding a unique character and color to the audio signal.
Tube preamps introduce a pleasant form of harmonic distortion, which adds depth and warmth to the audio signal. This characteristic can be especially appealing for guitarists as it can impart a classic, vintage-inspired tone.
This type of preamp is known for its ability to respond dynamically to input signals, offering a smooth and natural compression effect. This dynamic range control can enhance the expressiveness and nuances of instruments and vocals. These preamps can be driven to achieve desirable saturation and overdrive effects, providing a creamy, smooth distortion that is highly sought after in certain musical genres like blues, rock, and jazz.
#2. Solid-state preamps
Solid-state preamps rely on transistors and integrated circuits instead of vacuum tubes and they offer a different set of characteristics compared to their tube counterparts. They’re known for their clean, transparent, and precise sound reproduction.
Solid-state preamps strive for transparent sound reproduction, faithfully capturing the input signal without coloration or distortion. They’re often preferred in applications where accuracy and clarity are paramount, such as studio recording and live sound reinforcement.
Solid-state preamps tend to have a wider frequency response, ensuring accurate reproduction of both high and low frequencies. This makes them well-suited for capturing the full spectrum of instruments, including those with extended frequency ranges, like synthesizers and electronic drums.
Solid-state preamps excel in reproducing fast transients capturing the intricate details and nuances of instruments and precision. This quantity makes them ideal for genres that require sharp attacks and percussive elements, such as metal, pop, and electronic music.
#3. Digital modeling preamps
Digital modeling preamps are a more recent development in the world of preamps. These devices utilize Digital Signal Processing (DSP) algorithms for emulating the tonal characteristics of various preamp types, including tube and solid-state. These preamps offer unparalleled versatility and flexibility.
Digital modeling preamps are capable of delivering a wide range of tonal options by simulating different preamp types and their unique characteristics. They often include presets and customizable settings, allowing musicians to explore various sonic flavors with ease.
They often incorporate not just preamp simulation but also amp and effects modeling. This comprehensive approach enables guitarists to recreate the sounds of legendary amplifiers and experiment with diverse effects within a single unit.
Moreover, they are also incredibly compact and lightweight, which makes them highly portable and suitable for both live performances and studio work. They can be seamlessly integrated into DAWs and recording setups, offering a streamlined workflow.
#4. Built-in preamps
Built-in preamps are preamp circuits integrated into electric guitars themselves. These preamps are often found in acoustic-electric guitars and electric guitars equipped with active pickups. Built-in preamps typically include controls for volume, tone shaping, and sometimes even built-in effects like reverb or chorus.
Many built-in preamps use a battery for power as they aren’t reliant on external power sources. Built-in preamps are convenient as they eliminate the need for external preamp units and allow for a quick and easy connection for amps or audio interfaces.
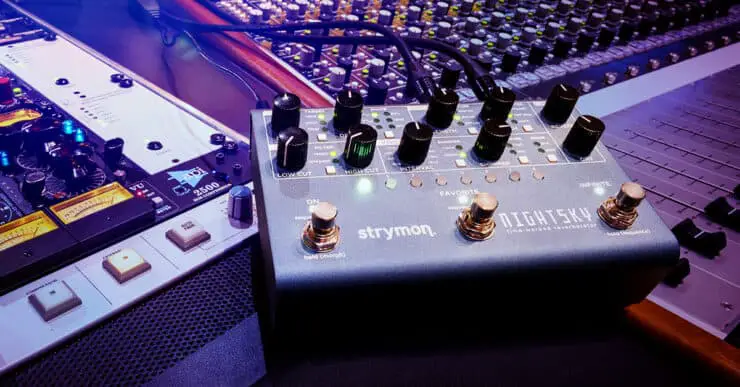
#5. Pedalboard preamps
Pedalboard preamps or also known as stompbox preamps are compact units that sit on a guitarist’s pedalboard alongside other effects pedals. These preamps offer versatility and the ability to shape the tone before it reaches the amplifier.
They often include various tone-shaping controls, such as gain, EQ, and sometimes built-in effects like overdrive or modulation. Pedalboard preamps can be seamlessly integrated into a guitarist’s effects chain, allowing for flexible signal routing and experimentation.
Pedalboard preamps are typically compact and lightweight, making them easy to transport for live performances or studio sessions.
#6. Rack-mount preamps
Rack-mount preamps are designed to be mounted in a rack unit alongside other audio equipment. These preamps are commonly used in professional studios and live sound setups. They often provide an impressive range of controls, including multiple channels, comprehensive EQ options, and various input/output connectivity options.
These preamps are known for their high-quality sound reproduction and pristine audio fidelity, making them popular in recording and professional audio environments. Rack-mount preamps can be combined with other rack-mounted gear such as power amps and effects processors for a comprehensive audio setup.

Tips for using a guitar preamp
A guitar preamp is a powerful tool that allows you to shape your guitar’s tone and achieve specific sounds that suit your musical style and preferences. By understanding how to adjust the level and utilize the preamp effectively, you’ll be able to unlock the full potential of your guitar’s sound. Here are a few valuable tips that will help out when using a guitar preamp and enhance your playing experience and achieve the best sound.
#1. Understand your preamp
Before diving into the tips, it’ll be important to familiarize yourself with the features and controls of your guitar preamp. Read the owner’s manual, explore its functions, and experiment with different settings. Understanding your preamp will empower you to make well-informed decisions and fully utilize its potential.
#2. Start with a clean slate
When using a guitar preamp, it’ll be best to begin with a natural or clean setting. Set the tone controls (bass, treble, mid) to their middle positions and the gain or drive control to zero. This will allow you to build your sound from a balanced foundation and make precise adjustments for achieving the desired tone.
#3. Adjust the level
One of the fundamental aspects of using a guitar preamp involves setting the appropriate level. You will need to adjust the gain/drive control, match input levels, output levels, and more to adjust the level effectively.
The gain or drive control on your preamp will determine the amount of signal amplification and distortion. Experiment with different settings to find the right balance between a clean, undistorted sound, and the desired amount of crunch or overdrive.
You should also make sure that you’re avoiding clipping. Clipping occurs when the input signal levels exceed the preamp’s maximum capacity, resulting in unpleasant distortion. To avoid clipping, make sure that the input signal remains within the preamp’s operating range. Monitor the preamp’s level indicator to use your eyes to determine if the signal is distorting.
If you are using multiple input sources, such as different guitars or pedals, make sure that their output levels are balanced. Adjust the level on each input source to achieve a consistent and coherent sound when using the preamp.
Consider adjusting the preamp’s output level to match the desired volume for your specific application, whether it is recording, live performance, or practicing at home. This ensures that the signal level reaching the amp, audio interface, or mixer is appropriate.
#4. Utilizing the preamp for specific sounds
A guitar preamp offers an impressive range of tonal possibilities. You can utilize a preamp for achieving specific sounds including clean tones, overdriven tones, solos, EQ shaping, and more.
For achieving a clean, transparent sound, dial back the gain or drive control on your guitar preamp. This will allow the natural character of your guitar and pickups to shine through without excessive distortion. Adjust the tone controls, such as bass, treble, and mid to achieve the desired balance and clarity.
Increase the gain or drive control on your preamp for achieving classic rock crunch or heavily overdriven tones. Experiment with different gain settings to find the right amount of saturation and distortion that suits your playing style.
Use the preamp as a solo boost for cutting through the mix and adding sustain. Increase the gain or drive control slightly when playing lead parts to add richness and sustain to your solos without overpowering the overall sound.
Take full advantage of the preamp’s tone controls for shaping the frequency response and sculpting your sound. Increase the bass for a thicker, fuller tone, boost the midrange for added presence and punch, or adjust the treble to add sparkle and brightness.
Combine your preamp with effects pedals or use the built-in effects to enhance your sound further. Experiment with different combinations and settings to create unique and captivating tones that suit your musical style.
#5. Utilize effects loops
Many guitar preamps come with built-in effects loops that allow you to integrate external effects pedals. Effects pedals come in two types – series and parallel. Series loops place the effects in the signal path after the preamp.
Series loops place the effects in the signal path after the preamp whereas parallel loops blend the effects with the preamp signal. Experiment with different effects placements to find the best configuration for your desired sound and make sure that the effects interact harmoniously with your preamp’s tone.
#6. Consider output options
Depending on the setup, you might have different options on your preamp. These can include line outputs, XLR outputs, or speaker outputs. You should consider the requirements of your intended use, such as recording or live performance, and select the appropriate output option. For instance, using the line output for direct recording or utilizing the speaker output for connecting to a guitar cabinet.
#7. Trust your ears
While these tips can definitely provide valuable insights, ultimately, your ears are certainly the best judge of the sound you want to achieve. Take time to listen carefully and make adjustments based on your personal preferences. Experiment, trust your instincts, and have fun exploring the sonic possibilities that your guitar preamp offers.
FAQs
What is a preamp and what does it do?
A preamp is an electronic device that is used to increase the level of a signal, usually from a guitar, to a level suitable for recording or feeding into a mixer. It is typically used to boost a weak signal and provide more clarity, dynamics, and presence.
What is the difference between a preamp and an amplifier?
A preamp is an electronic device used to boost a signal before it is fed into a mixer, while an amplifier is used to increase the level of a signal after it has been fed into a mixer. A preamp typically provides more clarity, dynamics, and presence, while an amplifier typically provides more power and volume.
How do I connect a guitar preamp to a mixer?
To connect a guitar preamp to a mixer, connect the instrument cable from the guitar to the input of the preamp, then connect the output of the preamp to the line-level input on the mixer. Be sure to adjust the gain on the preamp to the appropriate level. Once connected, the preamp will boost the signal from the guitar and feed it into the mixer.

