Welcome, Guitar Players! Have you been thinking about purchasing a tube amp recently but don’t really know how to properly maintain it? Or, perhaps you already own one and want to make sure that you are taking the right steps to keep it in good condition? Whatever the case may be, this article will provide you with detailed information on how to properly maintain your tube amp. Read on to learn more!
What is tube amp maintenance?
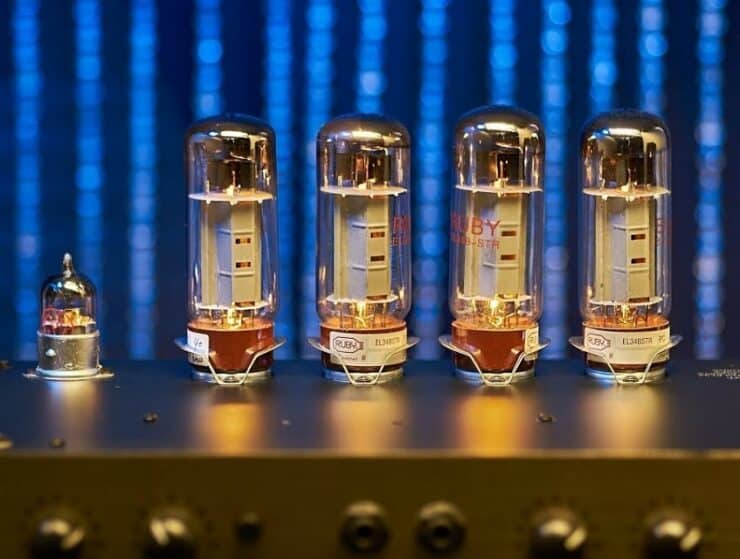
Tube amps or also known as valve amplifiers are particular favorites of musicians, guitarists, and audio enthusiasts. This type of amp is popular for its warm, rich sound and unique tonal qualities. For maintaining the exceptional performance and longevity of tube amps, regular maintenance will be important.
Tube amp maintenance is a simple yet essential aspect of owning a tube amp. It involves a series of tasks for preserving and optimizing the performance of the tube amp. For instance, inspecting the vacuum tubes regularly will be important for ensuring optimal performance. Over time, vacuum tubes can wear out, become microphonic, or experience reduced efficiency. By inspecting the tubes, you’ll be able to identify any issues and replace them if needed. You must also replace worn-out or faulty tubes as it’ll help maintain the amp’s overall performance and prevent potential damage to other components.
Regularly cleaning the tube amp will also be important as it’ll prevent the accumulation of dust and debris. Dust can affect the heat dissipation of the amp and potentially cause overheating issues. Using compressed air or a soft brush, you must carefully clean the exterior, vents, and tube sockets. This will help you remove any dust or particles that might be hindering proper airflow.
>>> Click here to read our review about the Top 15 Best Tube Amps <<<
Benefits of tube amp maintenance
Tube amp maintenance involves numerous routine tasks that will help keep your amp in top shape, preventing any issues and preserving sound quality. Here are some of the primary benefits of tube amp maintenance and why every tube amp owner must know them.
#1. Preserving sound quality
One of the primary advantages of regular tube amp maintenance will be the preservation of the sound quality. Tube amps are known for their unique tonal qualities, including rich harmonics, dynamic response, and smooth overdrive. However, over time, the performance of the vacuum tubes and other components can downgrade. This can result in a loss of conic fidelity. By maintaining your tube amp, you’ll be able to ensure proper tube performance, prevent signal degradation, and address potential issues early on.
Vacuum tubes wear out over time and require replacement. Regular maintenance will allow you to monitor the health of the tubes and replace them when needed. This will ensure that the amp continues to deliver its signature sound and maintain the desired tonal characteristics.
Dust, dirt, and oxidation will accumulate on the tube pins, potentiometers, and connectors, resulting in signal degradation and noise. Cleaning these components during maintenance will ensure a clean signal path, allowing the tube amp to produce pristine audio output.
Regular maintenance will provide an opportunity to detect and address any emerging problems before they can become more significant. This will include identifying faulty components, loose connections, or signs of wear that might affect the sound quality. Timely maintenance can prevent audio-related issues and keep the tube amp sounding its best.
#2. Extending lifespan and cost savings
Proper maintenance will significantly extend the lifespan of your tube amp, reducing the need for frequent repairs or replacements. This can help in improving tube lifespan, prevent component failure, and protect against preventable damage.
By monitoring the health of the tubes and replacing worn-out ones, you’ll be able to extend the lifespan of these critical components. This will save you the cost and hassle of premature tube replacement.
Routine maintenance will allow you to identify and address potential issues before they escalate into major failures. By catching problems early on, you’ll be able to avoid costly repairs or the need to replace other amp components.
Dust, debris, and excessive heat will harm the internal components of a tube amp. Regular cleaning, inspection, and monitoring of temperature will ensure that the tube amp operates within safe parameters. This reduces the risk of component damage while increasing its overall lifespan.
#3. Reliable performance
Tube amp maintenance will also benefit as it’ll ensure the reliability of the amp. Through this, you won’t get any performance issues, enhanced stability, early detection of operational issues, and more.
Loose or faulty connections can result in intermittent faults or signal dropouts. Regular maintenance will involve inspecting and tightening all wiring and connections, minimizing the chances of performance issues caused by poor connections.
By setting the bias correctly and maintaining proper voltage regulation, your tube amp will operate much more stably and consistently. This will promote reliable performance and reduce the likelihood of sudden volume changes, distortion, and other irregularities.
Regular maintenance will allow you to spot operational issues like abnormal noises or temperature fluctuations at an early stage. This will allow you to take appropriate action before the issue worsens and compromises the amp’s performance during critical situations like live performances or recording sessions.
How do I properly maintain a tube amp?
Maintaining a tube amp will be crucial for preserving its tremendous sound quality and longevity. Regular maintenance will not only extend the lifespan of the amp but also ensure consistent performance. By following the steps mentioned below, you will get the answer to how do I properly maintain a tube amp. Moreover, you’ll also be able to keep your amp in excellent condition and enjoy the best possible audio experience.
#1. Cleaning the amp
Cleaning the tube amp is the first step in ideal tube amp maintenance. Dust and debris can easily accumulate over time and affect the amp’s performance. To do that, first, you will need to power off and unplug the amp. You should ensure that the amp is disconnected from the power source before you clean the amp.
Make use of a soft brush or compressed air to gently brush or blow away dust from the amp’s exterior, vents, and controls. Pay close attention to the tube sockets and any cooling fins to remove the accumulated dust or debris.
Remember to avoid moisture and abrasive cleaners. You shouldn’t be using any liquid cleaners or harsh abrasives on your tube amp as they could damage the components. Stick to dry cleaning methods for avoiding any potential harm.
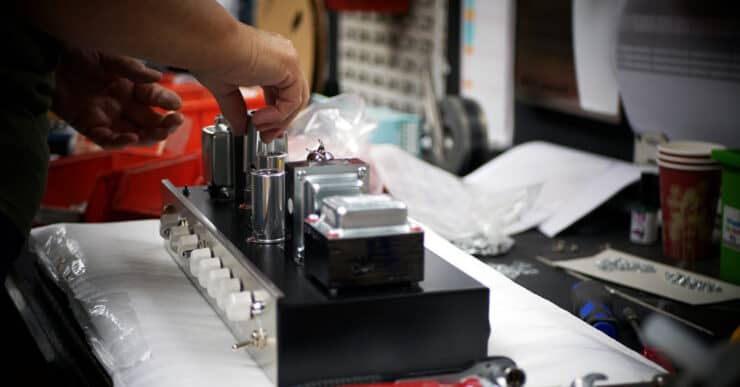
#2. Replacing tubes
Vacuum tubes are the heart of a tube amp and they will eventually wear out over time. Replacing worn-out or faulty tubes will be crucial to maintaining optimal performance. To do that, first, you will need to identify the tube type. Each tube comes with a specific identification number or code. Make sure that you have the correct replacement tubes for your amp by referencing the amp’s manual or consulting a reputed tube supplier.
Allow your amp to cool down. Before you replace the tubes, you should ensure that the amp has been turned off and allowed to cool down completely to avoid burns. Tubes operate at high voltages and can be quite fragile so you should handle them carefully. Wear gloves and use a clean cloth for protecting the tubes from skin oils and fingerprints. You must carefully remove the old tube by gently wiggling and pulling it straight out. Then, align the pins of the new tube with the socket and then push it firmly but gently into place.
Some tube amps might also require bias adjustment after tube replacement. You must consult the amp’s manual or seek professional assistance to make sure you get proper biasing or optimal performance and tube longevity.
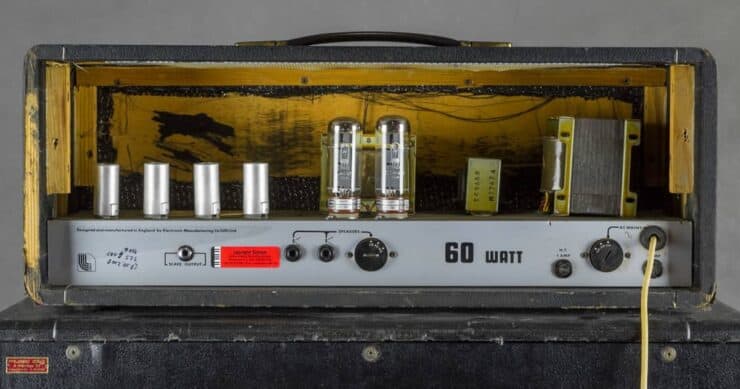
#3. Checking wiring and connections
Regularly checking the wiring and connections within the tube amp is important for ensuring reliable operation. Loose or faulty connections will cause intermittent faults or signal degradation. You must inspect cable connections and ensure all cables, including speaker cables and input/output connections are securely plugged into their respective jacks. You must look for any signs of damage or fraying.
Carefully inspect the solder joints on the circuit board for any loose or cracked connections. If you come across any issues, you must consult a qualified technician for repair. You should also clean the tube sockets. Over time, tube sockets can accumulate oxidation or debris. Make use of contact cleaner and a soft brush for gently cleaning the tube socket pins, ensuring reliable electrical connections.
#4. Testing the amp
Once you have carried out the above-mentioned maintenance steps, it’ll be important that you test the amp to ensure everything is functioning correctly. For doing that, you will need to carry out a number of steps. First, you should connect the amp to the power source and turn it on. Let the tubes warm up for a few minutes before testing.
You must check for any abnormal noises. Listen for unusual noises, such as hums, crackles, or excessive background noise. They can indicate problems with the tubes or other components. You must also verify signal integrity. Connect an audio source and play music or test tones through the tube amp. Make sure that the signal is clean, without distortion or intermittent dropouts.
During operation, you should be monitoring the temperature of the tubes and other components. Excessive heat will indicate a problem that requires attention. If necessary, you must seek professional assistance. When you encounter any persistent issues or have concerns about the amp’s performance, it’ll be best to consult a qualified technician for further diagnostics and repairs.
Tips to prolong the tube life in a tube amp
Tube amps are quite impressive whether you’re a musician or a guitarist as they provide incredible sound characteristics and warm tones. To ensure optimal performance and extend the lifespan of the tubes in your amp, regular care and maintenance will be important. To help you with that, there are certain tips that you must keep in mind. These tips will help you maximize the longevity and performance of your tube amp.
#1. Setting the bias
Bias refers to the optimal operating point of the tubes in a tube amp. Setting the bias correctly will be crucial for maintaining tube health and longevity. Improperly biased tubes can result in premature wear, reduced performance, and even tube failure. Every tube amp comes with specific instructions for bias adjustment. You must consult the owner’s manual to locate the bias adjustment points, recommended bias range, and the type of equipment necessary for bias adjustment.
Allow your tube amp to warm up. Before you adjust the bias, allow your amp to warm up for at least 15-30 minutes. This will ensure that the tubes have reached their stable operating temperature. A bias probe or multimeter will be required to measure the voltage across the bias points. Make sure you are following the manufacturer’s instructions and safety precautions when using this equipment.
Using the appropriate tools, you should be adjusting the bias voltage within the recommended range specified by the amp’s manufacturer. This range will ensure that tube tubes operate optimally without being under-biased or over-biased. Remember to monitor and recheck periodically. Once you have set the bias, monitor the tubes for any signs of excessive heating or abnormal behavior. Recheck the bias periodically for ensuring that it remains within the proper range.
#2. Adjust the level
The proper level adjustment will be important for maintaining tube longevity and preventing premature wear. If the amp’s level is excessively high, the tubes might be overdriven. This can result in increased stress and shorter tube life. There are certain steps to follow the level correctly.
Start off by setting the level control to a moderate position. This will ensure that you aren’t driving the tubes too hard right from the start. Then, you should listen for distortion. Gradually increase the volume when listening for any distortion or harshness in the sound. If you hear any distortion, you must back off the level slightly until the sound is clean and free from clipping.
You should avoid using any excessive gain or boosting in the preamp stage. Excessive gain could push the tubes into overdrive, increasing the risk of premature tube failure. Experiment with different level settings to find the sweet spot between volume and tube health. Striking the right balance will ensure that you aren’t pushing the tubes beyond their limits while still enjoying the desired sound quality.
#3. Utilizing a power conditioner
Power conditioners also play a key role in protecting tube amps from power fluctuations, surges, and electrical noise. A stable and clean power supply will be crucial for tube longevity. A power conditioner can help as it provides benefits like voltage regulation, surge protection, filtering electrical noise, proper grounding, and more.
Power conditioners will stabilize the incoming voltage, ensuring that your tube amp receives consistent power within the optimal range. This will help prevent stress on the tubes caused by voltage fluctuations. They also include surge protection mechanisms that safeguard your amp from voltage spikes and power surges. These sudden power fluctuations could damage sensitive tube components.
Power conditioners also feature noise filters that reduce electrical noise and interference from the power supply. By offering cleaner power, they will minimize the strain on the tubes and preserve their performance. Power conditioners will also provide proper grounding to eliminate ground loops and reduce hum and interference. This contributes to a cleaner and quieter audio signal, enhancing the overall performance of your tube amp.
Troubleshooting common tube amp problems
Although tube amps are incredibly popular among musicians, guitarists, and audiophiles and they come with several pros, they aren’t without their issues. Like any other audio equipment, tube amps also encounter common problems that could affect performance. Here, you will get to know about some of those common tube amp problems and how to troubleshoot them. These troubleshooting tips will help you identify the issues and resolve them, ensuring optimal performance and audio enjoyment.
#1. Humming or buzzing
Humming or buzzing noises are among the most common issues that are encountered with tube amps. These noises can be caused by various factors, such as grounding issues, interference, or improper tube seating. You need to follow certain troubleshooting steps to address the humming or buzzing issue.
First, you should ensure that the power cord is securely plugged into a grounded outlet. You must verify that the tube amp’s ground connection is solid and free from any loose or damaged wires. Moreover, you should be keeping the power and audio cables away from each other to minimize the chance of electrical interference.
You should temporarily disconnect or move away from any electronic devices or appliances near the amp that might be causing electromagnetic interference. For instance, fluorescent lights, cell phones, and Wi-Fi routers. You must make sure that all the tubes are properly seated in their sockets. You need to gently wiggle each tube to make sure there is a secure connection.
If these steps do not resolve the issue, it’ll be possible that a tube is causing the humming or buzzing. Replace the suspect tubes one at a time to identify the problematic one.
#2. Distorted sound
Distorted sound from a tube amp can also be a frustrating problem that might impact the listening experience. The common causes of distortion include improper bias, faulty tubes, or improper settings.
Improper biasing can often result in distortion. You need to consult the tube amp’s manual or seek professional assistance to make sure that the tubes are biased correctly. Further, worn-out or faulty tubes can also result in distortion. You must replace suspect tubes one at a time to identify the problematic tube. You should ensure that you use high-quality, matched tubes for optimal performance.
Improper input/output settings like using high-gain settings when unnecessary or mismatched impedance will introduce distortion. You need to experiment with different settings to find the cleanest and most balanced sound.
Dirty or oxidized potentiometers and switches can introduce crackling or distortion. Make use of a contact cleaner to clean these components carefully.
Further, you should also ensure proper speaker connections. Loose or faulty speaker connections could cause distortion. Check that the speaker cables are securely plugged into the appropriate jacks and that the speakers are functioning correctly.
#3. Low volume
Experimenting with low-volume output from a tube amp can be disappointing. Various factors can contribute to this issue, including correct settings, faulty tubes, or speaker-related problems. You must check the volume and gain controls. You should ensure that the volume and gain controls are set appropriately. Adjust them so that you can increase the output level.
Further, you should test with different inputs and sources. Connect different audio sources or instruments to the amp for determining if the low volume issue is specific to one input. This can help in identifying whether the problem lies in the amp or the audio source. Faulty or worn-out tubes can also result in low volume. You must replace suspect tubes one at a time so that you can identify the problematic one.
You must double-check the speaker connections to make sure they are securely plugged into the appropriate jacks. Additionally, you should examine the speaker cables for any damage or loose connections. If possible, you should try to connect different speakers to the amp to determine if the issues lie with the speakers themselves. This will help in identifying if the issue is related to the amp or the speakers.
FAQs
What are the general maintenance tips for a tube amp?
Tube amps require regular maintenance in order to keep them in optimal condition. It is important to keep the tubes clean and free of dust, to replace them when necessary, and to check the connections regularly. It is also important to check the power supply and wiring for any loose connections or signs of wear and tear.
What should I do to keep my tube amp in good condition?
To keep your tube amp in good condition, it is important to use the appropriate power supply and maintain a stable operating temperature. It is also important to ensure that the tubes are properly seated and to replace them when necessary. Finally, it is important to regularly inspect the wiring and connections for any signs of corrosion or wear.
What should I do if my tube amp stops working?
If your tube amp stops working, the first step is to check the power supply and connections for any signs of damage or corrosion. If the power supply and connections appear to be in good condition, then it may be necessary to replace the tubes. If replacing the tubes does not resolve the issue, then it may be necessary to check the wiring for any loose connections or signs of wear and tear.

