Are you tired of your tube amp not giving you the same sound you used to get? Do you want to know how to replace the tube and get back to your perfect sound? If you are a guitar player, then this article is for you! Learn how to replace a tube in a tube amp in a few simple steps, and you’ll be back to rocking out in no time!
Definition of tube amps
A tube amp is an electronic amp that uses vacuum tubes for amplifying the audio signal from an electric guitar or other audio source. Tube amps were developed back in the 1920s, and they’ve been used extensively in audio equipment, including guitar amps.
The basic function of a tube amp is to take the low-level audio signal from the guitar or other audio source and increase the voltage and current to a level that can be projected through a speaker. Tube amps consist of a preamp section, a power amp section, and an output transformer. The preamp section amplifies the guitar signal to a level that can then be further amplified by the power amp section. The power amp section will then amplify the signal further and send it to the output transformer, which matches the impedance of the amp to that of the speaker.
One of the unique characteristics of a tube amp is its warm and natural tone. Tube amps are typically preferred by guitarists for their ability to produce a natural-sounding overdrive and distortion. This is because vacuum tubes have a nonlinear response to the input signal, which can create a pleasing harmonic distortion when pushed to their limits.
>>> Click here to read our review about the Top 15 Best Tube Amps <<<
Another significant trait of tube amps is their dynamic response. Tube amps are often described as having a “spongy” or “elastic” feel, which means that they respond to the player’s touch and playing dynamics in a way solid-state amps do not.
However, tube amps aren’t without their negatives. They can be quite expensive and require more maintenance than solid-state amps. Vacuum tubes can also be fragile and have to be replaced periodically. Moreover, tube amps tend to be heavier and bulkier than solid-state amps.
A tube amp is composed of various components that work together to produce the desired sound. The different components of a tube amp include –
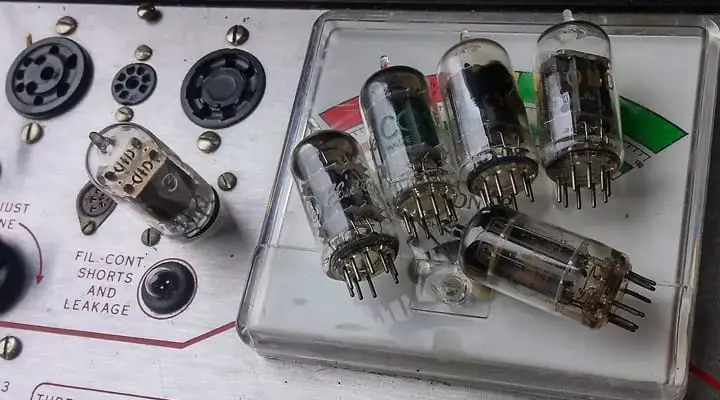
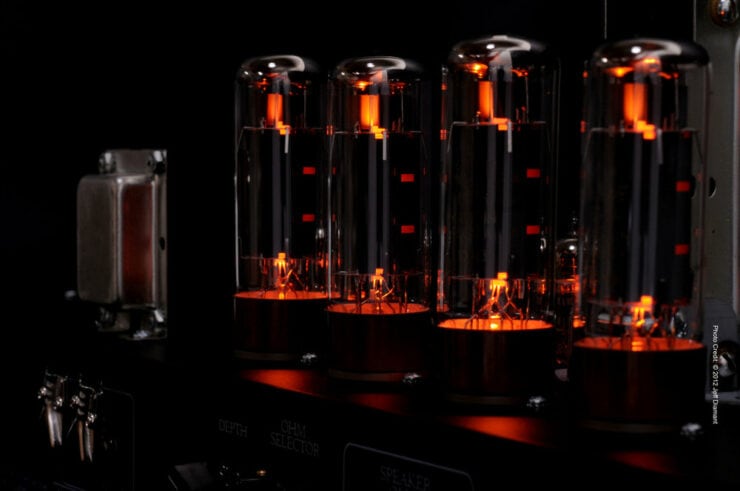
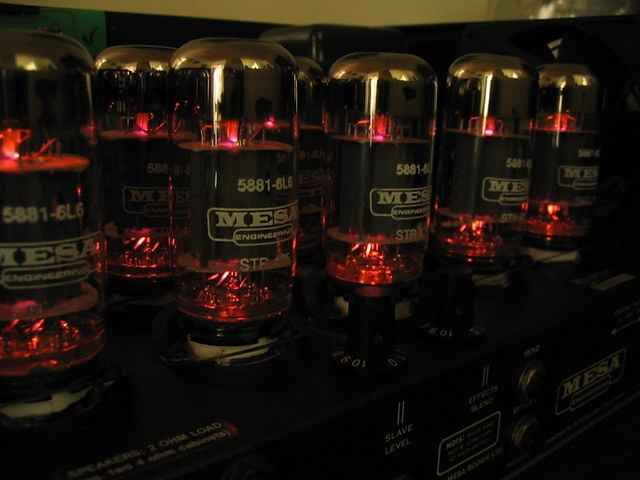
#1. Vacuum tubes
The vacuum tubes or also known as valves are the heart of a tube amp. They are responsible for amplifying the electric signal and creating the unique tone of the amp. The most common types of tubes used in guitar amps are preamp tubes and power tubes. Preamp tubes amplify the guitar’s signal to a level that can be further amplified using the power tubes. This will then drive the output transformer and speaker.
#2. Power supply
The power supply is responsible for providing the high voltage needed for operating the vacuum tubes. It typically consists of a transformer that steps up the voltage from the wall outlet and a rectifier that converts the AC voltage to DC voltage. The DC voltage will then get filtered to remove any residual AC noise and stabilized for ensuring a consistent voltage supply to the tubes.
#3. Preamp section
The preamp section is responsible for shaping the guitar’s tone before it reaches the power amp section. It typically consists of one or more preamp tubes and various tone controls like bass, treble, mid, and presence. The tone control allows the musician or guitarist to adjust the frequency response of the amp to their liking.
#4. Power amp section
The power amp section is responsible for amplifying the preamp signal to a level that can drive the output transformer and speaker. It typically consists of one or more power tubes and a driver circuit that provides the necessary signal to drive the power tubes. The power amp section usually has a master volume control, which controls the overall volume of the amp.
#5. Output transformer
The output transformer matches the impedance of the amp to that of the speaker. It also provides a means of adjusting the output level of the amp by selecting the different taps on the transformer.
#6. Speaker
The speaker converts the electrical signal from the amp into sound waves that can be heard by the listener. The size and type of speaker can have a significant impact on the tone and volume of the amp.
How do you replace a tube in a tube amp?
Replacing the tubes in a tube amp is an important part of routine maintenance that can help keep your tube amp sounding its best. If you are new to tube amps or if you have been using one for years but haven’t changed the tubes in a while, then you might be wondering what is the exact way to change tubes in a tube amp. Changing the tubes or valves might be a daunting task that can leave you wondering what you are supposed to do. While it may seem daunting at first, with the right tools and knowledge, it can be a straightforward process. Here, you will get to know the right steps to replace a tube in a tube amp and get it up and running again.
Step 1: Preparation
Before you replace the tubes, it will be important to make sure that your amp is unplugged. So, you should turn off the power at the wall and remove the amp’s plug from the wall socket. As long as your tube amp isn’t turned on, then changing the tubes will be safe. However, the safest way would be to turn off the power at the wall and unplug the amp so that there’s no power flowing to the amp.
Further, you should give your amp enough time to cool down. The tubes can get quite hot during use, and attempting to replace them while they are still hot can be dangerous. If you have tube retainers, you’ll need to remove them. If you have metal spring-type tube retainers, you should unclip them from the tube such that the tube is free to be removed. If you’ve got the metal shield-style covers, you should push them down, twist the covers until the lugs are lining up with the notches, and then the spring should push up toward the shield so that they can be easily removed.
Further, you will also want to make sure you have the right type of replacement tubes for your amp. Check the owner’s manual or consult a knowledgeable technician to ensure you have the correct type and rating.
Step 2: Remove the old tubes
For removing the old tubes, start by locating the tube sockets on the amplifier. These are typically located near the back of the amp and may be labeled with the type of tube that should be inserted. To remove the tubes, grip them firmly by the base and gently wiggle them out of the socket. Avoid pulling on the glass envelope of the tube, as this can cause damage. You may need to use a pair of pliers to help loosen the tube if it is stuck.
Step 3: Install the new tubes
Once the old tubes have been removed, it’s time to install the new ones. Take out the new tubes from the boxes before lining them up on the table. The tubes should roughly be in line with the sockets they’ll go into. You should take special note if you’ve got a mix of preamp tubes like 12AT7 and 12AX7 or 12AY7 and 12AX7 to ensure that you’re putting the right tubes into the appropriate sockets. Further, make note of any balanced tubes that you’re putting into particular positions in the amp.
Then, you should put the new tubes into your tube amp. If you’re using octal power tubes – 6V6, 6L6, EL34, 6550, and more, then you should ensure that you’re lining up the lug/tube guide key on the tubes with the keyhole in the socket before you try to push the tube into the socket. You wouldn’t want to break the guide key on the tube, as the damage could end up releasing the vacuum in the tube. For 9-pin tubes like 12AT7, 12AX7, 12BH7, EL84, and more, you’ll have to line up the gap between the 1st and 9th pin with the same gap as it was in the socket.
To put the new tubes in the amp, similar to when you removed the tubes, you’ll have to wiggle the tubes gently from one side to the other. Do this while pushing the tubes into the sockets gently. They will slide in rather easily and will sit in the sockets and flat once the pins are in as far as they’ll go.
Step 4: Power up the amp
After the new tubes have been installed, it’s important to let the amp warm up for a few minutes before use. This allows the tubes to reach their proper operating temperature and can help prevent damage. Once the amp has warmed up, it’s a good idea to test it at a low-volume first to ensure everything is working properly. For amps that need biasing, the tube amp must be biased after you have replaced the power tubes.
Different types of tubes in a tube amp
Tubes are undoubtedly an essential component of tube amps and without tubes, you won’t be able to get the sound from your tube amps. There are different types of tubes available for tube amps that produce different sounds and characteristics. If you know the different types of tubes used in a tube amp, it’ll help you make the right decision over what is best for your tube amp. Here are the most common types of tubes used in tube amps and their unique properties –
#1. Preamp tubes
Preamp tubes, or also known as small signal tubes, are responsible for amplifying the incoming guitar signal. These types of tubes typically come with a smaller glass envelope than power tubes, and they’re rated at lower power. Some popular types of preamp tubes include the 12AX7, 12AT7, and 12AU7. The 12AX7 is one of the most common types of preamp tubes and is known for its high gain and bright sound.
#2. Power tubes
Power tubes or also known as output tubes are responsible for amplifying the signals to a level that can drive the speaker. They typically come with a larger glass envelope than preamp tubes, and they’re rated at higher power. The power types of power tubes include 6L6, EL34, and EL84. The EL34 is a classic tube known best for its warm, rich sound, whereas the 6L6 is known for its clean and clear tone.
#3. Rectifier tubes
Rectifier tubes convert the alternating current (AC) from the outlet into direct current (DC) for use by the amplifier. Some popular types of rectifier tubes include the 5U4, 5AR4, and GZ34 among others. Rectifier tubes can have a major impact on the feel and responsiveness of the amp, with some types producing a sag or compression that can add to the tube amp’s character.
#4. Rectifier diodes
While not technically tubes, rectifier diodes are sometimes used in place of rectifier tubes in modern tube amps. They offer a more reliable and consistent supply of DC power and can be more efficient than tube rectifiers. However, some guitarists prefer the sag and compression produced by rectifier tubes and go for amps that use them.
#5. Specialty tubes
Aside from the more common types of tubes, there are also a wide variety of specialty tubes used in tube amps. These can include reverb tubes, driver tubes, and phase inverted tubes among others. Each type of specialty tube serves a specific purpose in the amp’s circuit and can have a unique impact on the overall sound and performance of the amp.
Tips for replacing tubes in a tube amp
Replacing the tubes in a tube amp can be a tricky task for many musicians and guitarists, especially beginners. However, it is still an important maintenance step for ensuring your amp continues to sound its best. Here are some common tips for replacing tubes in a tube amp.
#1. Match the tube type
There are different types of tubes available for tube amps, and they come with different tonal qualities. This is why it will be important to choose the right tubes for your amp, as it’ll allow you to achieve the desired sound. You can easily choose tubes from different models and manufacturers but ensure that they are compatible with your amp.
Interestingly, tube amps are designed to work with specific types of amps. This is why you should match the replacement tube to the original type. For instance, if your amp uses EL34 power tubes, then you will need to replace them with EL34 tubes of the same brand and the same model. Using the wrong type of tube might result in poor performance or even damage to your tube amp.
#2. Check the tube’s bias
The bias of a tube refers to the amount of current that is flowing through the amp. Setting the bias correctly will help you ensure that the tube is operating at optimal levels and can help extend its lifespan. For checking the tube’s bias, you will require a bias probe or multimeter and some basic knowledge of electronics and tube amps.
Different types of tubes in your tube amp will require different bias settings. This bias setting for the particular tube will be specified by the manufacturer, and it can be found in the owner’s manual of the tube amp or the tube’s datasheet. To properly adjust the bias for different tubes, you’ll have to find the bias adjustment potentiometer on the amp’s circuit board.
After that, you should connect a multimeter to the bias test points on the circuit board. With your tube amp turned on and idling, you will need to measure the voltage across the test points. Adjust the potentiometer until the voltage reaches the desired value. However, you should be extremely careful when adjusting the bias, as excessive current flow can potentially damage the tubes or other components in your amp. It is important that you follow the manufacturer’s instructions or look for the help of a qualified technician if you aren’t comfortable with this process.
#3. Know which tubes need replacing
Before you replace any tubes in your tube amp, you will need to determine which tubes have to be replaced. Tube amps usually come with preamp tubes and power tubes, and they have to be replaced at different times. If you aren’t sure which tubes to replace, you should feel free to consult the owner’s manual or take your tube amp to a professional technician for guidance.
#4. Replace the tubes in pairs
When you’re replacing the tubes in a tube amp, it’ll be best to replace them in pairs. This ensures that both tubes are operating at the same level, and they’re able to maintain a balanced tone. For instance, if you are replacing a power tube, you should replace both tubes on that side of the amp.
#5. Allow some time for tube break-in
When you are installing new tubes in your amp, it will be important to allow time for them to break in. This means playing your tube amp at a moderate volume for a while to let the tubes settle in. This can take you anywhere from a few hours to even a few days depending on the type of tube and your playing style. During this tone, you might sound slightly different than before, but it will eventually settle into a smoother and more balanced sound over time.
#6. Handle the tubes with extreme care
When you are handling the tubes, it will be important that you are extremely gentle and avoid dropping the tubes. Tubes are quite fragile and can break easily, so you should take special care when removing them from the amp and installing the new ones. You can also wear protective gloves to avoid getting any oils or fingerprints on the tubes.
FAQs
What tools are needed to replace a tube in a tube amp?
Replacing a tube in a tube amp requires a few tools, including a Phillips head screwdriver, a tube tester, and a vacuum tube. It is also important to have an amp manual so that you know how to rewire the amp properly after replacing the tube.
What is the process for replacing a tube in a tube amp?
To replace a tube in a tube amp, first make sure to turn off the power and unplug the amp. Then, use the Phillips head screwdriver to remove the screws and gently lift off the back panel of the amp. Once the back panel is removed, use the tube tester to identify which tube needs to be replaced. Then, replace the old tube with a new one and rewire the amp, using the instructions provided in the amp manual. Finally, turn the power back on and test the amp to make sure the new tube is working properly.
What safety precautions should I take when replacing a tube in a tube amp?
When replacing a tube in a tube amp, it is important to take safety precautions. First, make sure to turn off the power and unplug the amp before beginning the process. It is also important

