Are you an ambitious guitarist looking to build your first guitar pedalboard? If yes, then you’re in the right place.
Building a pedalboard is as much about building it, as it is about choosing the right elements to add. You’ll have to choose the best tuners to include, the right size of the pedalboard, the correct arrangement, and more.
In this article, you will get to know all about how to build a pedalboard, how to set up a pedalboard, the correct power supply option, the best tuners to include, and other important details to keep in mind. Stick around to know all the answers.
Know how to make a pedalboard and take your guitar game to another level
If you are an expert guitarist, you will know what a big difference a pedalboard makes. Knowing how to build a pedalboard for guitar effects will elevate your guitar game tremendously. Whether you’re a professional or a beginner guitarist, it’s important to know how to build a pedalboard from scratch. You’ll need to know everything from choosing the right-sized pedalboard to powering it up and laying out the guitar pedals.
The more effect pedals you’re using, the more you’ll require a pedalboard. Even the most basic, unpowered boards will offer a useful platform to securely hold the pedals, manage the cables, and keep things from sliding around on stage. The powered pedalboards will come with the added function to supply electrical connections to the pedals. This way, they’ll eliminate the need for power strips and wall marts. These can easily take up a lot of space while creating a nest of dangerous wires in the performance area.
If you’re working with more specialized or complex rigs, a custom DIY pedalboard will meet specific requirements. If you’ve thorough knowledge of how to make a pedalboard, performance headaches will be a thing of the past.
How to build a pedalboard from scratch?
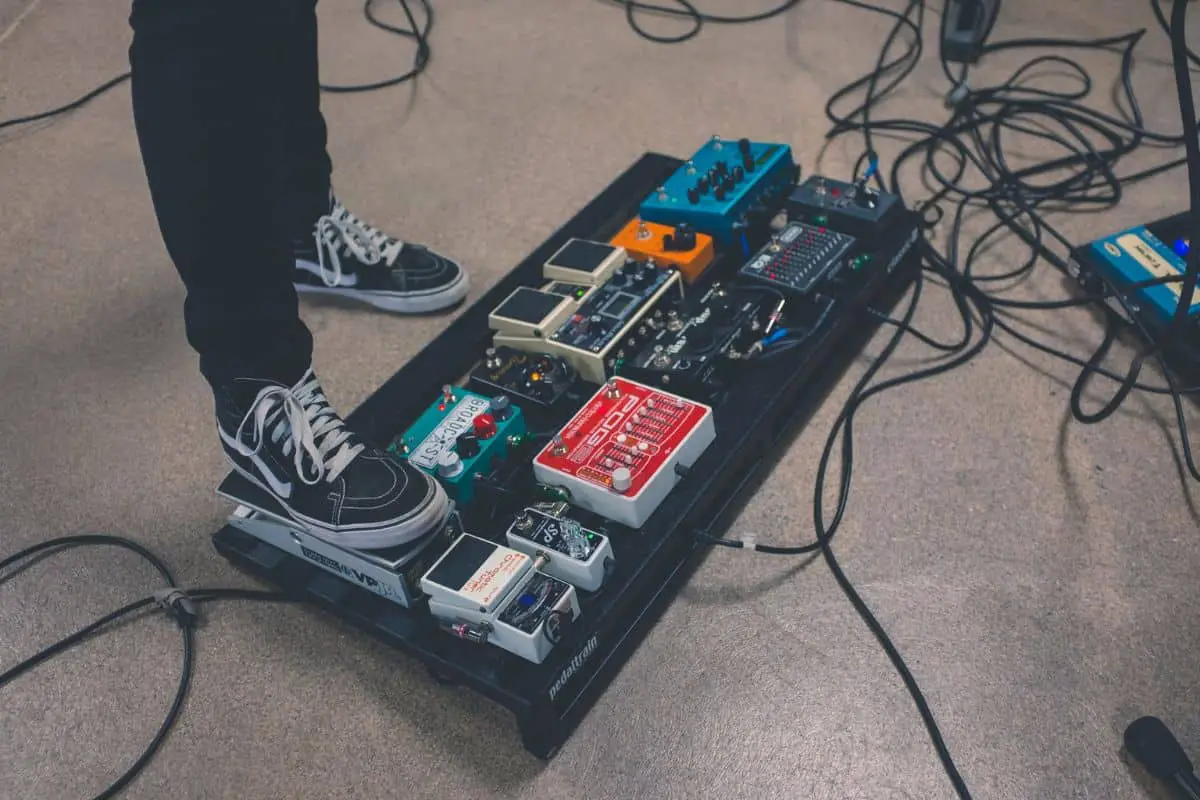
Pedalboards will make it significantly easier for a guitarist to access the effects and pedals without having them scattered around. DIY pedalboards from scratch allow you to switch between different effects and always stay in command of the stage area. This step-by-step guide on how to build your own pedalboard will be of great help.
Choose the size of your pedalboard
The choice of going for a small, medium, or large pedalboard will ultimately come down to the size and number of pedals you’ll be using. If you’re using five or fewer standard-size pedals and aren’t planning on adding more, a small pedalboard will be enough. If you have between 5 and 10 pedals, you should consider a medium board. If you are going to use over 10 pedals, you need to consider a large-sized pedalboard.
If you’re planning to use five pedals and then add 2-3 pedals in the future, it’ll be smart to plan ahead and go for a large pedalboard in advance. Remember, pedals having large footprints will take up more space. Even a small setup that consists of oversized pedals will require a large pedalboard for preventing overcrowding. When you’re setting up the initial blueprint, leave enough space between the pedals for facilitating cabling. Moreover, consider creating a clean, uncluttered, and easy-to-access layout. If you’re struggling to visualize the size of the pedalboard, there are websites that will help you with this step. These sites will allow you to add the pedals and see what size of pedalboard you’ll need.
Select the right power supply
Whether you’re choosing a power supply for an existing powerboard or choosing a DIY pedalboard, ensure that it meets the voltage requirements. Most pedalboards operate on 9V of power, but some require 12V, 16V, 18V, or even 24V. Before selecting the power supply, remember to check the power requirements of each pedal you’ll be using.
Choose a power supply that’s robust enough to deliver ample voltage and has enough outputs for the pedals you’re using. Moreover, choose a supply that features an isolated output section for eliminating ground loops, hum, and interactions between your pedals.
Choose the best cables for your pedalboard setup
There are two key rules that should be considered here. Firstly, use cables having the right-angle plugs, as they’re more compact than straight plugs. Secondly, keep the cable lengths at a minimum, as it’ll reduce the clutter while ensuring the quietest, shortest signal path.
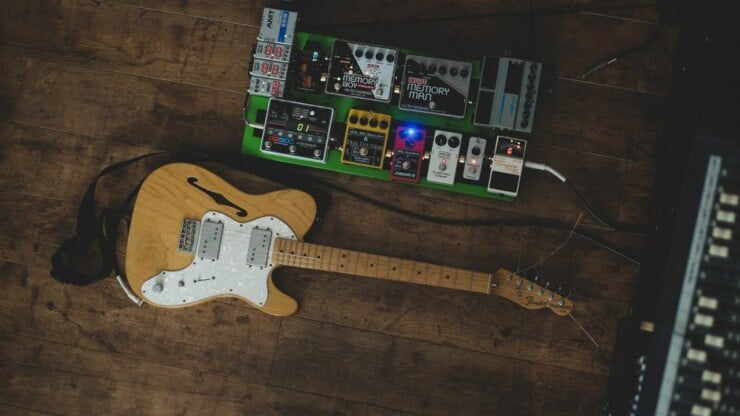
Select the layout of the pedalboard
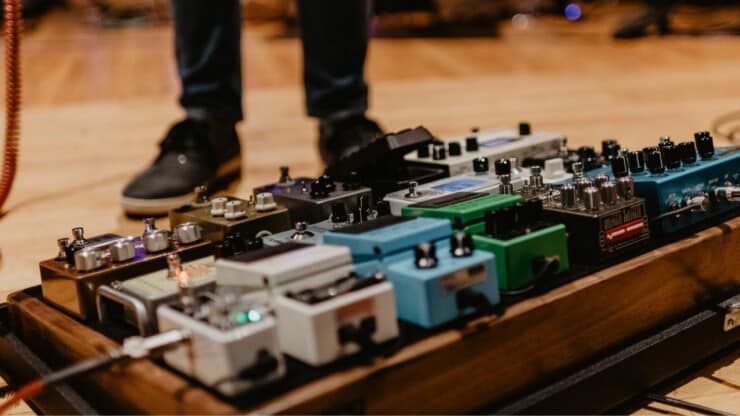
Before adding pedals to the pedalboard, take time to think about the most effective and easy-to-navigate way of arranging them. Generally, lay the pedals from left to right in the order of how you’ll be connecting them together. Pedalboards are typically deep from front to back for accommodating two or sometimes even three rows of pedals. This will give you an entirely new dimension to consider when you’re planning the layout.
It’ll be best if you’re keeping the most-used pedals nearest to you. This way, you’ll find it very easy to adjust and reach the pedals with your preferred foot. Staggering the pedals between the front and back edges will make it easier to navigate the pedalboard. Moreover, it’ll help you avoid any confusion in the heat of the performance.
In what order will you be placing the pedals on your DIY pedalboard?
When you’re setting up the effect signal chain, there will be no definitive right or wrong way. Some guitarists just love experimenting with the order of their pedals to harness unusual tones that aren’t normally expected. If you’re looking for a versatile pedalboard that functions in a rational way, you can try this order of placing pedals.
While there are individual ways of laying out the pedals, there is an ideal way of doing it. The ideal way would be based on practical considerations, such as placing the reverb pedal last rather than in front of the distortion pedal, where it could muddy up the sound. Your individual way will be all about how you make your setup work for you. Some professionals prefer placing their Wah pedal before distortion. Meanwhile, others prefer putting it after to get a more pronounced and dirty tone.
The traditional way includes filters, compressors, and all kinds of distortion and overdrive pedals. Meanwhile, tone modifiers like chorus, phase, and flangers will go next. They’ll be followed by ambiance effects like delay, reverb, and echo. The effects in the signal chain can be easily arranged and grouped into four distinct categories –
- Pitch shifters, filters, harmonizers, and dynamic pedals
- Distortion, fuzz, boost, overdrive, and EQ pedals
- Modulation pedals like chorus, phaser, and flangers
- Time-based effects like echo, delay, reverb, and tremolo
Pitch shifters, filters, harmonizers, and dynamic pedals
These pedals will typically work best placed at the front of the signal chain. This is where they’ll act upon the pure signal from the guitar.
Filters generally include pedals like low-pass filters and wahs. Harmonizers and pitch shifters will include the popular Whammy pedal, all of which will benefit from having a strong, unaffected signal from your guitar. This way, they can easily track the notes accurately and cleanly. Dynamic pedals normally include compressors that squeeze a signal’s dynamic range.
Compressors normally feature volume or make-up gain controls, allowing you to boost the overall signal. This way, it can compensate for the lower volume that comes from compressing. For that matter, auto-wahs and envelope filters are dynamic filters that allow the filter’s frequency cutoff for responding to changes in signal response. You should be careful of the effect order in this category. For instance, a compressor placed after the EQ pedal is more responsive to the frequencies as the EQ is boosting. This happens as the compressor seeks out the loudest part of the signal while reducing the volume.
It’ll be better if you place the compressor before the EQ where it could respond to the guitar’s signal. This would be the better way in comparison to the frequencies boosted by the EQ pedal. Conversely, placing a compressor before an auto-wah reduces the guitar signal’s dynamic range while impeding the auto-wah’s expressiveness. Meanwhile, if you place a compressor before the wah pedal, it’ll help you control some of the signal’s inherent brightness. It could make some wahs sound more shrill and piercing towards the top end of their range. Some of these considerations will change if you’re raising the compressor’s make-up gain to the point it’s increasing the signal like a gain boost.
Distortion, fuzz, boost, overdrive, and EQ pedals
Distortion, fuzz pedals, and overdrive will affect the harmonic content by enhancing the overtones and compressing peaks of the signal. Their purpose will be to simulate the sound of the cranked amp through the speaker cabinet. In the natural order, the pedals will go after filters and EQ, similar to the amp’s output and speakers.
These will follow the compression pedal, whose responsibility is to flatten the peaks while ensuring the entire signal is hotter. Now, it is also important to know why you shouldn’t be putting a compressor after the distortion pedal. The reason is that they’ll add volume to everything that comes before them. This includes the noise generated by effects like distortion, fuzz pedals, and overdrive.
Most modern fuzz pedals will work tremendously well after wah pedals, but the same cannot be said for vintage fuzz units. If you’re using an old fuzz pedal that doesn’t sound great when placed after the wah, you should move it before the wah and then check if there is any improvement. If you’re using boost or EQ pedals for giving your tone a kick, place them after distortion and overdrive. This helps in raising your overall level without having any undue impact on your sound. As always, you shouldn’t hesitate in experimenting with what works best and what doesn’t work for the pedals in your setup.
Modulation pedals (phaser, chorus, and flangers)
These pedals are essentially tone modifiers and sweeteners and include effects like phasers, chorus, flange, and vibrato. Conventionally, they’re considered to be noisy effects. They should be placed before gain-increasing pedals like compression or distortion, as it’ll intensify the noise.
Additionally, chorus, phasing, and flanging will introduce pitch fluctuations and time delays. This will create a sense of spatial movement very similar to what normally happens in the physical world. If you place them after amplification-style effects like overdrives and distortions, the results fall in line with naturally occurring sounds.
Moreover, the extra boost that the signal gets from an overdrive pedal helps emphasize the oscillation of the modulation effects. Obviously, many professional players prefer putting modulation effects like Uni-Vibes while using phasers before distortion. Legends like Eddie Van Halen (with MXR Phase 90) and Jimi Hendrix (with Uni-Vibe) use this order. This arrangement will deliver more harmonic content to the distortion box, resulting in more dramatic and animated effects.
Time-based effects (echo, delay, reverb, and tremolo)
Lastly, you will need to include time-based effects on your pedalboard. Delay, reverb, and echo are the necessary ambiance effects that define how sounds are affected in room environments. Naturally, they’ll go towards the end of the chain. Tremolo will be the amplitude modulation (amp on, amp off) and should be added at the end of the signal chain.
Top off your pedalboard by adding tuners
Although tuners aren’t effects, they’re a part of every guitarist’s setup. It’ll be important to think of where they’ll go in the signal chain. Some guitarists prefer having tuners at the front of the chain. Meanwhile, most guitarists prefer it if the tuners are added at the end.
If you’re placing your tuner at the head of the chain, activating it silences your guitar without silencing the pedals. This will be fine if you’re looking to allow time-based effects to continue to trail off while you’re tuning up. However, it isn’t ideal if you wish to silence the rig between songs. To do that, you’ll have to place the tuner at the end of the chain. However, doing this will require you to turn off the distortion and other effects before tuning. As it would be evident, there will be trade-offs to either scenario. You must pick the option that works best for your arrangement.
Conclusion
Thank you for reading. Hopefully, now you know a lot more about using pedalboards, how to build a pedalboard, the step-by-step method to create your DIY pedalboard, and more. Ultimately, how to build a pedalboard from scratch will be subjective and vary from one player to the other. If you’re looking to nail down a certain guitarist’s tone, it’ll be useful to know what effects they use. Moreover, you should know the order in which they’re placed on the pedalboard.
When it comes to tones, you’ll have to decide for yourself what works best for you. Experimenting will be fun, so you should plug away. You shouldn’t worry, as there is no right or wrong order. The best part about pedalboards is that you’ll always have the option to move around things as your needs change.

