Have you purchased a new guitar amp and used it for a while, but you don’t know how to clean guitar amp pots? If so, then this article is just what you need.
Cleaning guitar amp pots is important for the proper functioning of a guitar amp. The easiest way to clean guitar amp pots is by using a contact cleaner, as it dries quickly and gives a thorough cleaning.
In this article, you’ll get to know all about cleaning guitar amp pots, how to clean pots on guitar amp, the problems with dirty guitar amp pots, how to clean guitar amp pots of different types, and more. Stick around to know all the answers that you’re looking for.
Why you should regularly clean guitar amp pots?
Although they’re generally sealed away inside the body of the amp, switches and pots are still susceptible to unwanted stuff. Things like dirt, dust, and debris can find their way into the body and onto the connections that carry the guitar’s signal to the amp. The changes in heat and humidity can easily render soldering points inactive. Sometimes, even air can cause thin layers of oxidation or corrosion on the terminals.
Naturally, it’ll be important to clan these components, especially if there aren’t any signs of corrosion. Scratchy-sounding pots can be easily prevented by blowing compressed air into the pot’s housing. You can then follow up with a few quirts of a deoxidizing spray for cleaning the connection. You should ensure that you’re turning the pot’s shaft when spraying. Moreover, make sure that the solvent is making even contact with the amp’s interior. Beginning with compressed air before using the deoxidizing spray will be highly recommended. This way, the spray only moistens dust and makes the problem worse.
Cleaning a switch will be a bit different in practice, but almost identical in principle. Failing connections could be cleaned easily by removing corrosion on the terminals. For the Gibson-style, three-position switch, you can easily run a thin strip of 400-grit double-sided sandpaper between the tabs. Then, put the switch into the blend position and slowly move the sandpaper back and forth to clean the terminals. You’ll only require a couple of passes before you can visibly see the difference and hear it too.
Fender-style fan-blade switches will be a bit more delicate, but they can be cleaned out with a quick spray of deoxidizer onto the terminals. Follow it up by throwing the switch through each position. Similar to turning the pot’s shaft while spraying, move the switch back and forth. This will help work the solvent work its way into the nooks and crannies of the connections.
Box-style switches will be impressively straightforward. Although the terminals and connections will be sealed up in a shielded housing, there’s normally an opening wide enough to spray through. The deoxidizer and compressed air work wonders if the switch has any issues.
Cleaning guitar amp pots and switches using chemicals
It’ll be important to ensure that your guitar amp pots on your electric guitar or bass are clean. Every guitarist has had to work with dirty pots and switches at some point, as they sound noisy and scratchy. The very first and simplest diagnosis would be that the pots are just dirty and not damaged. The simple fix would be to clean them.
Sometimes, simply turning the knobs and working the switch back and forth will be sufficient. It’ll clear the connection while dispelling unwanted noise. It if it doesn’t work, you’ll need to bust out a chemical cleaner.
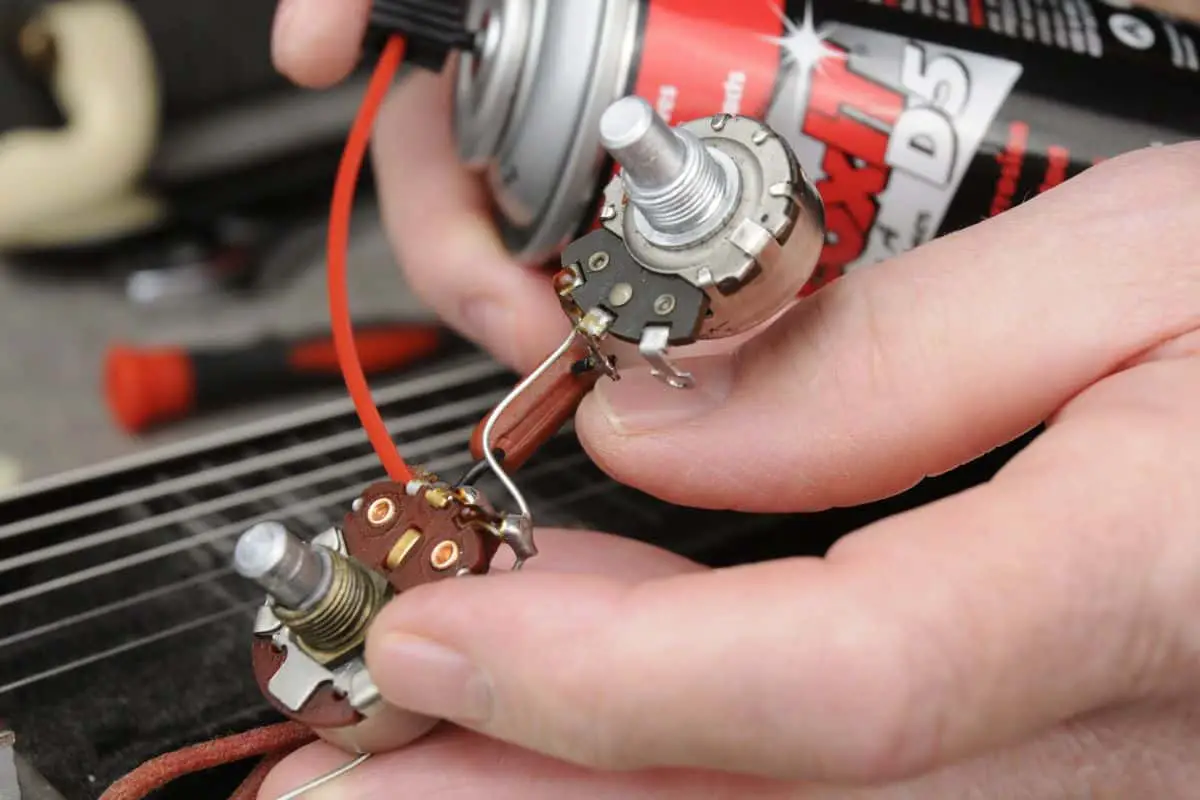
There are many spray-cleaner brands that are easily found online or in hardware stores. The most popular one used by guitarists is called Deoxit while the alternatives are Permatex, CRC, and Max Professional.
You can simply spray the stuff into the switch or pot. This will often necessitate removing control knobs, removing the pickguard, and removing the pots or switches. When spraying cleaner into the pots is that you should wrap or cover the surrounding area with a paper towel. It’ll help you catch the overspray. Remember that you shouldn’t inhale it. Let it reach into your pots, turn the knob back and forth, and let the chemical cleaner work its magic.
If there’s too much damage and your pots have deteriorated to the point they’re too far gone, replace them. Cleaning them will be a routine part of your guitar amp’s care and maintenance.
What happens if you don’t clean your guitar amp pots?
The issues associated with dirty electrical components like guitar amp pots typically reveal themselves automatically. These issues will come in the form of unwanted noise and humming in the signal coming out of the guitar. These noises are sometimes described as scratchy (especially in amp pots), humming, popping, or dead spots. If you’re getting weird noises coming from the guitar when plugged into an amp, there’s an issue with the components.
The most common issue that you’ll find is with the potentiometers or amp pots. The tone and volume controls tend to attract dust and debris onto the resistive strip. It causes a scratchy noise when you’re sweeping the knob back and forth.
Cleaning your guitar amp needs to be done regularly. This needs to be a part of your standard maintenance schedule. If you’re cleaning the components regularly, they’ll last a lot longer than if you only clean them after noticing problems. Most of the time, light preventative maintenance will keep your components in great shape. However, if they’ve been dirty for much too long, there might be a chance that they have to be replaced.
How to clean guitar amp pots?
Prep the amp
Before cleaning the amp pots, ensure that nothing is plugged into the amp. Moreover, it shouldn’t be plugged into power and have anything turned on. After turning it off and unplugging things, give the amp 30 seconds or so to cool off. If it’s a tube amp, it’ll probably release any built-up static. Place the amp on the table such that it becomes easier to work and reach different corners.
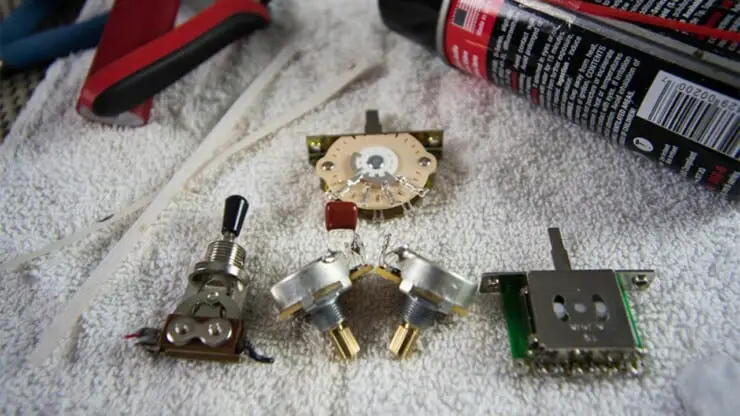
Then, remove the knobs by turning them to the left and then pull them off. Some knobs may need extra strength to pull, in which case, you can grip them with the plyers. Some knobs are attached to the potentiometer with screws. In that case, you should just unscrew them. If you’ve got a closed-back amp, remove the amp’s back panels as well.
How to clean pots on guitar amp
Potentiometers are among the most common sources of unwanted noise in the guitar. Due to the small amount of electricity flowing through them alongside static buildup that occurs on your guitar, small bits of debris and dust could cling inside the pots.
A guitar amp pot is a simple device that’ll allow you for variable resistance. It’s better known as variable resistors in other parts of the electronics circle. It will consist of two major parts. The first one is the resistive element, a semi-circle material that increases in resistance from one side to the other. Secondly, there’s a wiper connected to the shaft and used for selecting the desired setting.
The contact between the wiper and the resistive element has to be clean, solid, and free from debris. Otherwise, you’ll only hear the tell-tale sign of a dirty guitar amp pot. It’ll scratch every time you’re moving that knob back and forth. More often than not, dirty pots can be cleaned easily by spraying them with a contact cleaner. Then, you can manually rotate the pot shaft back and forth. Cleaning guitar amp pots will be easy to do so.
How to clean strat pots?
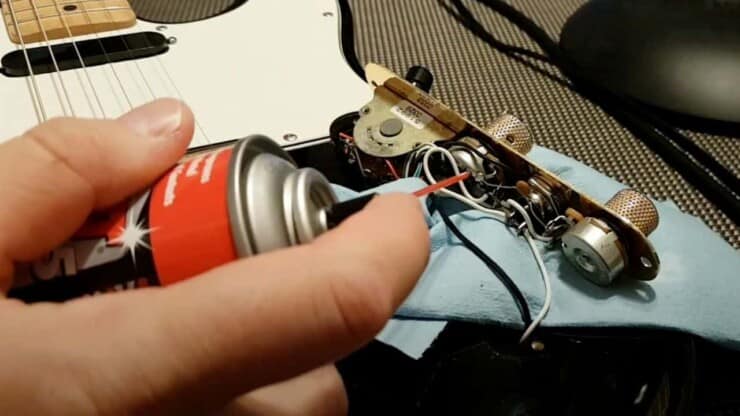
When cleaning the pots on a strat-style guitar, the pickguard will have to be removed. This is the case because the pots are mounted towards the back of it. You’ll need to loosen the strings and then remove the pickguard screws. You’ll now be able to lift the pickguard off the guitar. The electrical components on the pickguard will be connected to the guitar in two spots. The first one is the lead wire, which will be the tip of the output jack. The second one will be the ground one, which connects all the electronics and the metal hardware of the guitar.
The ground is usually soldered or bolted to the bridge or the tremolo system. You should be careful that you’re pulling the pickguard off gently so that you don’t disconnect or break the wires. Throw a cloth down on the guitar, flip over the pickguard, and start the cleaning.
Once you’ve got the pickguard off the guitar, the hard part is more or less over. Spray a couple of squirts of contact cleaner into the opening on the side of the pot. This is where the lugs will go into the component. Then, manually move the pot back and forth by the knob to clean and release the unwanted dust or debris.
Contact cleaner dries rather quickly, so you’ll need to work very fast. If an excess cleaner is dripping anywhere, you should clean it up using a cloth. Most finishes can handle a bit of contact cleaner on them without any issues. However, you should always keep a cloth to catch any excess contact cleaner. This is even more important when you’re working with older, possibly cracked lacquer finishes. You will need to be extra careful so that you don’t drop any unwanted fluid or cleaner on the guitar.
The guitar pot will now be cleaned out. You can sweep back and forth without any capping or scratching. If you’re still hearing the noise, repeat the contact cleaner process until the pot stops making noise.
How to clean tele pots?
Cleaning the pots on a tele-style guitar will be a lot easier. This is the case as the control plate for the pickup selector, volume knob, and tone will be small. Moreover, they’ll be held in place by screws. Similar to the Strat cleaning method, you can just unscrew the plate and access the underside of the pots. Squirt a few drops of contact cleaner on the switch and the inside of the pot chassis, and you’ll be good to go.
How to clean semi-hollow pots?
Cleaning pots on a hollow-body or semi-hollow guitar can be slightly trickier. Most likely, there won’t be access to the backs of the pots, although some have control plates at the back. This can be removed for servicing electronics. You’ll have to do it either through the pickup slot or the F-hole that is closest to the pot.
Most of the time, you’ll be able to loosen the note on a pot and turn the pot such that the opening is facing the f-hole. Then, you can finagle the straw of the contact cleaner there. This is the easiest way to do it, and a set of dental tools will be invaluable to getting into the hard-to-reach areas. Remember, due to some types of wiring, it could be impossible to turn the pot the way you need to.
For instance, certain grounding circuits use heavy wire for linking the pots. This more or less freezes them into place wherever they are. In that case, servicing must be done through a pickup hole.
In some cases, it’ll be easier to pull the guitar pots through the bridge pickup hole. You might have to pull the pickups for diagnosing other issues. This access will allow you to thoroughly clean all the electronics before you put them back. If you’ve tried something like that before, you’ll know that it can be very difficult to get the output jack into place. A homemade old jack epoxied to a 1/4″ tube with a string attached could do the job well.
How to know if you need to replace a guitar pot?
Long-term damage can eventually occur on most guitar pots, which can easily result in corrosion of the resistive elements. Most often in such circumstances, the scratching and popping will turn into dead spots in the range of the pot where the guitar’s sound cuts out entirely. A spot like that wouldn’t allow the guitar’s signal to run through the components and a short circuit could occur. During such situations, you’ll have to replace the guitar pot entirely. Luckily, there’s an easy fix, as long as you’ve got a soldering iron and solder.
You can check the pot electrically as well. Grab a multimeter and put it on ohm or resistance mode. Connect the ground lead to one of the outside lugs and the positive lead to the middle lug or wiper. Move the guitar pot back and forth slowly and see what your meter is registering. You shouldn’t be getting any high values as you’re sweeping the wiper across the resistance element. This is only on a pot that isn’t installed on the guitar, but you should get the idea. Any part of the sweet needs to have a resistance value that isn’t 1. This would mean that there’s a break in the electrical connection.
Open pots vs. closed pots
Some pots don’t come with an open slot at the back where the lugs generally enter the pot’s body. These pots are designed in a way to not open, which will keep the dust and other particles away from sticking to the resistive strip.
Although more expensive, these pots last a very long time. There’s a cap that fits over the top of the shaft of a pot. There will be a hole for the contact cleaner straw, and via the cap or knob of the pot, you can fit it over the shaft and squirt a bit of cleaner through the hole. This will direct the cleaner into the pot through the shaft. It’ll be better to get the cleaner directly onto the resistive strip, but in a pinch, it’s a great option.
How to clean other components of the guitar?
Output jacks can easily oxidize, rust, and corrode. This creates an issue where the jack isn’t making proper physical contact with the jack in the guitar’s body. It happens in two spots, in the tip and the barrel. If you’ve got easy access to the input jack, this will be very easy to clean. However, on guitars like ES-137, it can get a bit harder.
One of the best ways of cleaning an output jack will be through a screwdriver and steel wool. You can pull off a chunk of steel wool and then wrap it around the screwdriver shaft. Ensure that the screwdriver can easily fit inside the jack’s diameter. If you’re wrapping the steel wool correctly, you’ll be able to clean the jack’s barrel and the tip at once. Hit the inside of the jack with a few squirts of contact cleaner and then do it again.
After that, test with the guitar plugged in for ensuring that there isn’t any excessive hum or popping noise. The most common problem associated with dirty output jacks is the humming from bad ground connections. Moreover, there’s also popping from the ground or hot lead losing contact with the plug.
In case things get terrible, steel wool may not be enough after all. A round file helps in such situations, as you’ll be able to take off any excessive corrosion. However, be careful that you do not take the metal off the jack. If the jack is that bad, it may need to be replaced.
The switches can get corroded as well and develop a thin layer of gunk. It won’t allow the guitar signal to flow freely and result in unwanted noise. More often than not, a couple of squirts of contact cleaner and manually moving the guitar switch back and forth loosens the grime and get your switch working again.
If the switch is still popping when you’re moving it back and forth, a small piece of 400-grit sandpaper slid between the conductive elements must do the trick. Again, you should be careful that you don’t take any actual metal off your switch. Moreover, ensure you aren’t bending the tabs, as they can be delicate and won’t return to their original position. Lastly, if the problem still persists, the switch might have to be replaced.
Conclusion
Thank you for reading. Hopefully, now you know a lot more about cleaning guitar amp pots, how to clean pots on guitar amp, the problems with dirty guitar amp pots, how to clean guitar amp pots of different types, and more. Cleaning your guitar amp pots is essential for proper functioning of your guitar amp.
The easiest way of doing that would be by using a contact cleaner and squirting it and thoroughly cleaning it. You can look to clean your guitar amp pots once every 4-6 months. This will be a decent rate to prevent any problems with your pots and keep any scratching or popping away.
Image Credit:
Featured Image: stewmac
Images: Guitars and Tech, Fuel Rocks

