Did you purchase a Shure SM57, and now you’re looking to find out how to mic a guitar amp with an SM57? If so, then you’re definitely in the right place.
Micing a guitar amp with an SM57 is simple and involves plugging the mic into an audio interface using a 3-pin XLR cable. After that, remember to position the mic correctly and at a proper distance from the amp.
In this article, you’ll get to know all about the Shure SM57, how to mic a guitar amp with an SM57, different techniques on how to mic guitar amp SM57, how far should you position your mic, and more. Stick around to know all the answers that you’re looking for.
Shure SM57 – The perfect microphone to mic to a guitar amp
Playing the electric guitar is essentially an art. Every chord, every melody, every riff, and every twist of the bar will work together to create a breathtaking symphony.
For capturing the wonderful tones, you’ll want to use a high-quality microphone for recording electric guitar. This is where the Shure SM57 comes into play, as it is the perfect mic to use on your guitar amp. None of the complexity will be lost as the mic will pick up every note. Everything will be reproduced in such fine quality that you’ll feel as if you’re listening to it live. If you care deeply about the quality of your music when you present it to the world, then this will be the perfect mic for your studio.
The history of the Shure SM57 can be traced back to 1937 with the design of the Unidyne mic capsule. In 1959, there was a major leap when the Unidyne III was created, and it was here that the SM57 was born.
The Shure SM57 dynamic mic was built to handle any musical instruments that produce high sound pressure levels. It can be anything from electric guitars to percussion instruments. Because of the mic’s ability to reduce background noise, it’s able to reproduce the sound from instruments in crisp clarity. Not only will it recreate the energy of live instruments, but it’s also suited for vocal use. Shure SM57 became the rock & roll standard when it was used by the iconic Elvis Presley.
Ever since its introduction, the SM57 has undergone several upgrades, creating the perfect blend of classic design and modern technology. These days, every recording studio features the SM57. The recording artists and producers can benefit from SM57’s ability to capture any studio performance accurately. Durability is another great aspect of the SM57. Its bulletproof design will mean that it can withstand vigorous use. This makes it perfect for live performances and touring.
The SM57 is highly reliable and capable of producing high-quality sound for years and years. The best thing is that you won’t even need to break the bank for it. The mic is a very affordable option for recording your electric guitar to a high standard.
Who can use the Shure SM57 mic?
Interestingly, every US president since Lyndon B. Johnson has used the Shure SM57 for delivering speeches. This is how amazing the quality of SM57 is. This microphone has been the lectern mic of the White House Communications Agency ever since 1965. But you don’t necessarily need to be the President of the United States to use the SM57. Any musician, guitarist, or recording artist can have access to the benefits of SM57 in their recording studio.
Even though the SM57 is largely used by vocalists and instrumental performances, anyone looking to record their music will be an ideal candidate for using this mic. Whether you’re a music icon like Elvis Presley or creating your first recording, it’ll guarantee high-quality and pitch-perfect sound.
The Shure SM57 will be extremely useful when it comes to recording electric guitars. This mic’s contoured frequency response will mean that it can produce impeccable instrumental sounds. It is built to amplify sounds, as it’ll draw attention to the intricate details of the music you’re recording. Anyone who is passionate about electric guitars will appreciate the depth of the quality the SM57 can capture. There’s something for everyone when it comes to using the SM57. Whether you’re a guitarist, producer, sound engineer, or producer, very few mics are capable of capturing the beauty and power of your performance like this one.
How to mic a guitar amp with an SM57?
If you’re looking to get the best out of your amp, you should plug your SM57 into an audio interface. For that, you’ll require a 3-pin XLR. If you’ve got an XLR or USB cable, you can record it on your PC and bypass the audio interface. However, you can get better recordings with the mic going through preamps in a high-quality audio interface. Once your SM57 is plugged in, you will be good to go.
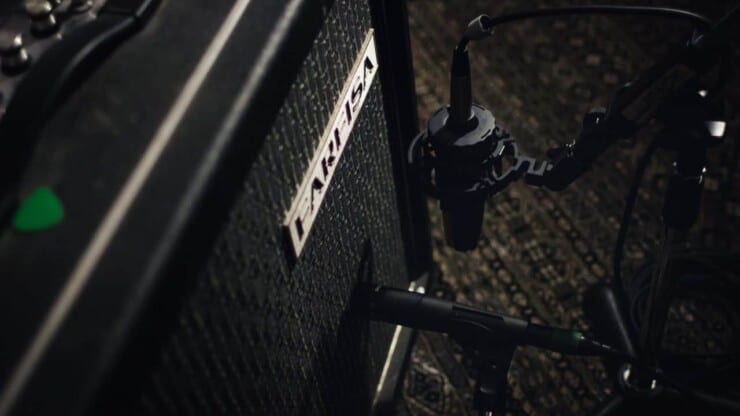
If you’re using your SM57 for an electric guitar, the position of the microphone is important. It’ll influence the recording quality and what you’re hearing on the playback. Here are a few tips on how to mic a guitar amp with an SM57 and record music.
- Position the SM57 as close to the guitar amp grill as you possibly can
- If you’re using a guitar amp, it’ll be helpful to place the SM57 directly on the surface of the amp
- Use a mic stand for placing the mic wherever you want to place it
- Ensure that you’re having a high-quality audio interface for picking up the quality of the mic
- In case you’re recording multiple guitars at the same time or both guitars and vocals, keep the microphones as far away from one another as possible
Once you know how to mic a guitar amp with an SM57, you can achieve high-quality recording using the SM57. The microphone’s design and functionality will take care of everything for you. All you need to do is place the mic in the right position and let it work its magic.
Different recording techniques for how to mic guitar amp SM57
There are multiple ways you can mic up your SM57 with the amp and get a high-quality tone and all kinds of unique sounds. Here are some of the common ways how to mic guitar amp SM57 and record music.
Paired micing technique
The Paired micing technique is easily the most common way of micing a guitar amp out of the three techniques. The idea behind this micing technique will be to put two dynamic mics very close together. Then, you should point the mics towards the speaker. One of the most important things that you must consider when pairing microphones is that you’ll likely experience phase issues. It means that if the mic’s distance with the amp and between themselves isn’t accurate, the two sounds being captured will get canceled out. This makes the sound rather thin.
The best way of avoiding this would be by following the 3:1 rule. This dictates that you should place the microphones three times apart from one another in relation to the amp’s distance. The best way of doing this would be by placing them in front of the amp’s cloth. It makes the distance so small that you’ll be able to put two mics close to each other. Moreover, you’ll also be able to prevent any phase issues.
Using a Shure SM57 and Sennheiser MD 421 together will be a great combination to try out for this technique.
X/Y Stereo Recording
The second method to mic a guitar amp will be through X/Y Stereo Recording. The Stereo Recording technique is a great tool for giving your guitar sound a bit more depth and clarity. Stereo Recording is one of the most common techniques used for instruments like guitar, drums, piano, and more.
The way it works is by placing two Shure SM57 mics together. In case you’re using condensers, ensure that the polar pattern is set to cardioid. Moreover, it should be at an angle between 90°-135° such that the capsules coincide at a single point. Using multiple Shure SM57s will be a great way of exploring the X/Y Stereo Recording technique.
Mid/Side Stereo Recording
Out of the three techniques on how to mic a guitar amp with an SM57, this one offers the most scope for experimentation. For the Mid/Side Stereo Recording technique, you’ll require a dynamic mic like an SM57 with a cardioid pattern. You can even use a condenser mic or a ribbon mic with a Figure-8 pattern.
The figure-8 mic must be placed at a 90° angle from the amplifier, functioning as the “side” part of “mid/side”. The cardioid mic will be placed in front of the amp, and it’ll function as “mid”. The tricky part is that once you’ve started the recording, you’ll want to use the DAW to duplicate the “side” recording. Then, you can pan them both hard right and left. You’ll then be able to reverse the phase of the duplicate for creating a mid/side stereo sound.
This might sound much more complex than it actually is, but once you understand the process, it’ll be simple. It’s a great recording technique as it’ll give your guitar amp’s sound an interesting spin. Using a Shure SM57 and Royer 121 will work perfectly with this technique.
Finding the correct mic placement spot for your SM57 microphone?
Finding the sweet spot for your SM57, where it can pick up accurate tones from the instrument, will depend on the type of pickup pattern. Shure SM57, just like other dynamic mics, generally comes with a tight cardioid pattern. Here are a few placement rules on how to get the correct mic placement for your SM57.
Position in the room
Whether it’s a home recording setup or a professional recording studio, never position your mic in the center. It can result in standing waves, which might cause disruptions. At the same time, the microphone needs to be away from any walls or other reflective surfaces. In short, you should place it slightly off the center of the room. This way, you wouldn’t be in the center of the room while being away from the walls.
Distance from the source
You should be looking to keep the SM57 close to the source so that it avoids any leakage and noise. It’ll grant you a lot more flexibility in balancing. Moreover, the heart-shaped pickup pattern of the dynamic mic usually rejects any sound that’s off the axis.
You can then place the dynamic microphone as close to the source as possible. But make sure that you’re not polluting the source’s sound with high-intensity sounds. In fact, you could put it within an inch of the source and get low frequencies accurately. Of course, it isn’t quite as sensitive to higher frequencies and might even produce feedback. It’ll be crucial that you aren’t placing the front end of the microphone directly in front of the speaker.
Other variables to keep in mind
Another important variable to consider for the correct placement of your mic will be the source of the sound. Having the best recording equipment doesn’t necessarily mean you’ll always get the most accurate sounds. The biggest variable will be the instrument and the musician playing it. It’ll contribute to around 50% of the accuracy.
The acoustics in the room, on the other hand, will contribute to around 20% of the final sound. Hence, it’ll be crucial to make sure that you have proper acoustics in the room before you start recording. You might instantly want to reach for the EQ when something isn’t sounding right. However, you should try out the following first –
- Change the sound’s source (e.g. the instrument)
- Try to tweak the mic preamp
- Alter the position of the SM57 until you’ve found the most balanced position
- Try out a different room
- Change the musician at the source
Different mic positions for different purposes
The placement of your Shure SM57 will also depend on the type of musical instrument you’re recording. Here are a few pointers to consider for the most common instruments.
For vocals
It’ll be best to palace your SM57 as close to the source as possible. In the studio, it is recommended to use a light filter. A light filter is a small screen that’ll be placed between the source and the microphone that prevents over-pronunciation of syllables starting with “P”. Otherwise, your vocals could be littered with popping wind sounds.
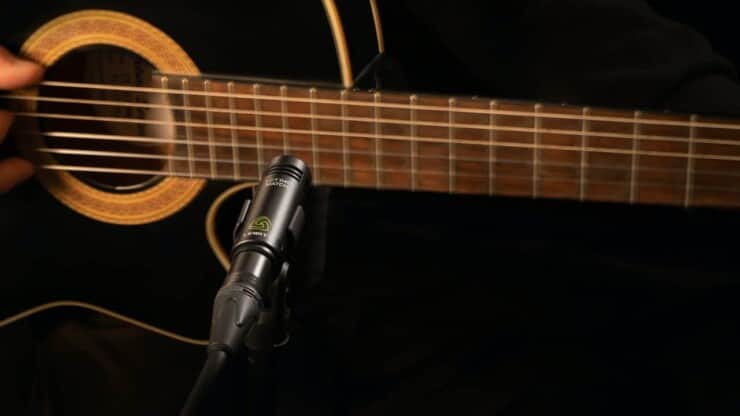
For guitars
To get the best and astoundingly clear sounds, place your Shure SM57 mic 3-4 inches off the sound hole. As a result, you’ll notice that the low frequencies have also been captured beautifully.
Brass instruments
With dynamic mics, it’ll be best to blow directly into the guitar amp. It’ll capture the low frequencies far more accurately.
For flute
During a performance, ask the flutist to step up to the Shure SM57 and place their mouthpiece near it. Try to find the sweet spot such that the frequencies are balanced.
For drums
Use a large-diaphragm dynamic microphone in front of the kick drums. You should place it in the hole located on the front head. Moreover, place it at the snare head as well. Remember that you shouldn’t use a bunch of dynamic microphones together. Otherwise, you’ll start hearing annoying sounds like buzzing and screeching during your performance.
Key tips to remember when micing an SM57 to the guitar amp and recording
Whether you’re recording music in your home studio or at a high-end studio, there are certain recording tips to remember. These tips will have a huge impact on the sound that you’re laying down.
Put the SM57 directly on the cabinet
To achieve the in-your-face sound, try taking the classic Shure SM57 and then jamming it right into the cabinet. It should be just to the left or right of the cone’s center. You will be able to get a proximity effect, which will basically have some added response. You should use it to your advantage, and then look to keep the EQ’ing to a minimum.
Axis, bold as tone
Take the SM57 mic and slightly change its angle in relation to the speaker that you’re miking “off-axis”. The tonal character will likely change slightly, and at this point, the potential of experimentation will be key. If possible, have a friend or bandmate move it slightly at the time you’re listening on headphones or when you’re in the control room. Eventually, you’ll hear the magic spot. Once you find it, remember to click a picture so that you can remember the exact positioning.
Change your amp tubes
If you’re using a tube amp, you shouldn’t just assume that the tubes are good. You would ideally change the strings in anticipation of the recording, right? You should give the tubes of your tube amp similar consideration. Always keep a second set of tubes on hand. Unless you’re a traditionalist, you can try a set from different manufacturers than the originals. All tubes will have slightly different attacks and breakups, even the amps of the same rating and type. You should use your ears and not be lazy.
Use multiple microphones
Even if you are recording for yourself, you shouldn’t settle on using only one mic. If you need to, you can borrow an extra microphone from a friend. You can place the second microphone either on the cabinet beside the first one or farther back into the studio. Any functioning microphone will be worth a try, it doesn’t necessarily need to be an SM57.
Compress the recording room mic
If the second mic is used as a room mic, you should place it 3-4 feet away from the cabinet. If possible, you can place it even further back. Then, when you’re listening back, you should apply a huge amount of compression to the room mic. Ensure that you’re not compressing the attack out of the tones. You should simply get enough such that it squashes the peaks down a bit. You can even use the compressor’s makeup gain for getting even more volume.
Make use of wide panning
When you’re mixing your two amp-mic tracks, pan the two tracks oppositely. In simple words, pan one of them hard left and the other one hard right. You will notice that the soundstage in the Left/Right field has opened up. Then, you can experiment with putting a short delay on the room mic (about 30-50ms). A nice stereo image can be held using two simple microphones and a delay.
Use multiple amps
If you have the necessary gear for it, split the signal and run your guitar with multiple amps. Similar to having two microphones, the two separate amp sounds will give you many more options at mixdown. When you’re recording heavily distorted parts, try and minimize the distortion on a second amp. After that, increase a bit of treble as it’ll help them pick attack cut through the dense mix.
Conclusion
Thank you for reading. Hopefully, now you know a lot more about the Shure SM57, how to mic a guitar amp with an SM57, different techniques how to mic guitar amp SM57, how far should you position your mic, and more. Micing a guitar amp with a Shure SM57 is simple. All you’ll need to do is plug the mic into an audio interface via a 3-pin XLR cable. Make sure that you’re positioning the mic properly and that it’s at an appropriate height and distance from the source.
A Shure SM57 is one of the best options when it comes to micing to a guitar amp and recording the guitar. It’ll produce every intricate sound and deliver a great tone. Not only will it bring your guitar recordings to life, but it won’t cost a lot. It’ll bring you guaranteed success for years to come.

