Are you tired of recording guitar through a DAW and using effect pedals, and want to try recording a proper guitar amp in a live setting? If so, then you’ll be glad that you stumbled upon this article.
Recording guitar amp is easy, and the best thing is that you get to experiment. Recording involves choosing the right type of amp, the type of mic, positioning them at the right distance, and recording the instrumental.
In this article, you’ll get to know all about how to record guitar amp, what size of guitar amp to choose, which microphone you should choose, how to record a guitar amp without a microphone, and much more. Continue reading to get all the answers that you’re looking for.
What type/size of guitar amp is best for home recording studios?
The size of the amp is comparatively less important than getting an amp with the tone quality that you like. For home studios, space and budget are often two causes of concern. You shouldn’t worry as there is no need to spend a massive amount on a huge amp and speaker cabinet that you see your favorite bands using on stage.
Head and cabinet vs. combo amp
When using amps, there are two categories of guitar amps that you’ll come across. The first one is the head and cabinet type. This is where you’ll get to the “head”, which is the amplifier but without the speakers. The head will contain the circuitry associated with creating the guitar sound. It includes the valves, tone settings, reverb, and more. The cabinet is where your speakers are housed. Here, the signal sent from the head gets converted into an audible sound. Neither of these parts will work well without the other.
Although most people talk about guitar amps, what they’re most likely referring to is an amplifier and speaker. A combo amp is where the head and the cabinet get combined into a single unit. This is generally a comparatively cheaper solution and takes up less space. However, a potential downside is that you won’t get the flexibility that a head and cabinet model offers. You can still upgrade to a bigger speaker later if needed.
How big does the guitar amp need to be?
When figuring out how to record a guitar amp, it’s normal to think about how big the amp should be. A smaller speaker size will result in fewer low-end frequencies while giving you a more trebly/bright tone. This is why most people prefer avoiding anything too small. With large speakers, you’ll get more low-end, which means the sound will travel further. This can potentially annoy your neighbors, which is a common concern for home studio owners.
Unsurprisingly, the amp having bigger speakers will cost you more money as well. With that in mind, it’s recommended that you should go for something in the middle. Look for an affordable option that provides a decent range of sound frequencies. Buying 10-12” speaker cones will do the job just fine. You can go for a cabinet or combo amp with two speakers or more to give more flexibility. Having multiple speakers will allow you to place a mic in front of each speaker.
Different types of mic to consider when recording guitar amp
There are many techniques that you can use for mic-ing up the guitar amp and getting a wonderful live sound. The sound depends on the type of mic you’re using, the number of mics, and the positioning of the mics.
Dynamic microphones
Dynamic mics are the oldest types of mics and are generally the most primitive in their design. These mics work by having a diaphragm attached to the metal coil suspended between two magnets. The sound wave hits the diaphragm, which causes it to move and produce an AC current that mimics the sound wave. Due to their design, these mics are rugged and capable of withstanding reasonably loud noises. They’re great options for using on live guitar amps that can produce high volumes. Dynamic mics have become the standard recording mic for amps in recording studios.
Condenser microphones
If you’re attempting to try and capture the full frequency range, use a large-diaphragm condenser microphone. Condenser mics are generally more expansive than dynamic mics, while they’re also more delicate. It means that they’re not the most ideal in a live setting, but they’ll work well in home studios.
Ribbon microphones
The third type of microphone that you’ll come across is the ribbon microphone. These mics are the most delicate and are the most expensive options available. You probably don’t have to spend so much money until you’re more experience and get fussy over the tone. It is true that you can get amazing-sounding tones through ribbon mics, but they will cost you a fortune.
Placement and positioning of microphones and guitar amps
When finding out how to record guitar amps, it’s important to consider the microphones’ placement and positioning. They need to be carefully placed in relation to the speaker and amplifier.
Traditional setup with a single dynamic mic
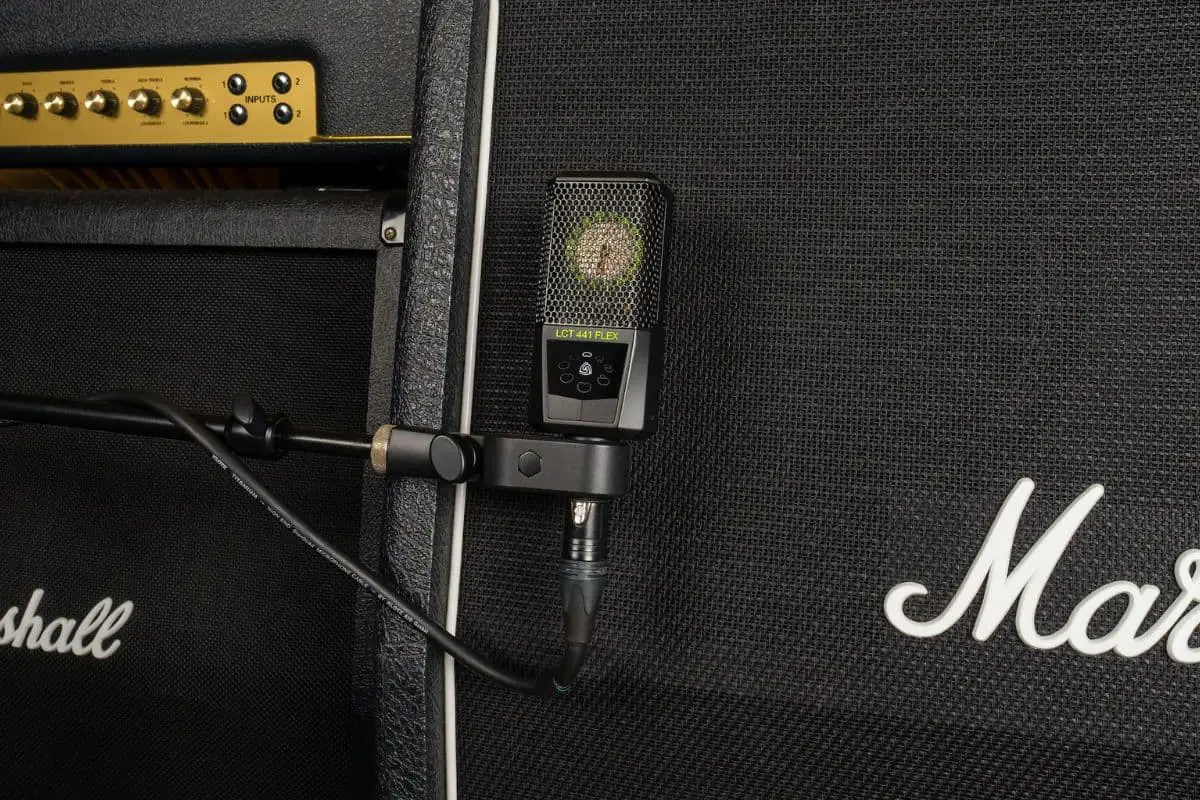
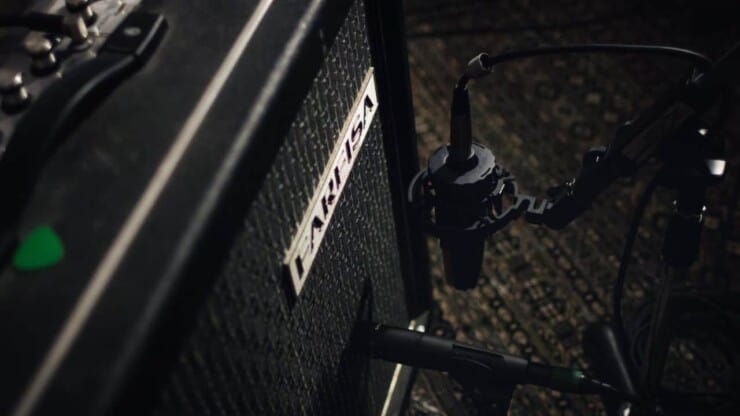
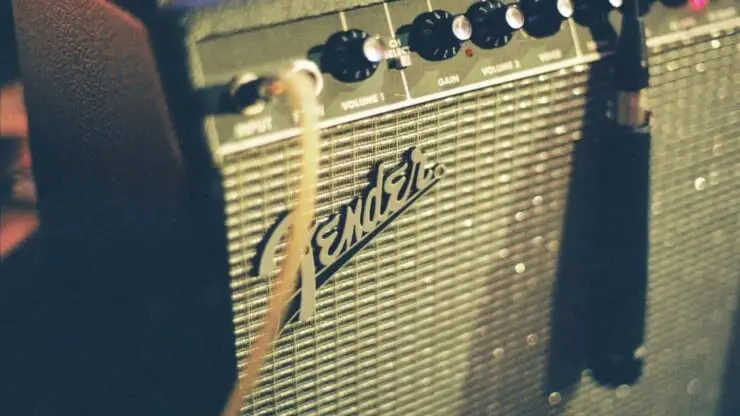
If you’re a beginner, the best advice for you would be to keep things simple. Not only will it save a lot of energy and effort, but it’ll also save you time and money. You can start off with a single dynamic microphone, such as the Shure SM57. The general rule of thumb is that the brightest tone out of the speaker cone comes from the center.
If you have a small amp with one speaker, place your mic on a floor mic stand while pointing towards the speaker. The mic should be a few inches back from the amplifier grille and not directly up against it. If you don’t want extremely bright tones, move the mic a bit to the left or right to the centre.
Using multiple microphones
Once you’re more confident and want to get complex tones in when recording the amp, you can add multiple mics. The problem when you’re adding a second mic is that you need to be careful of the phase cancellation issue. Also known as phasing, it occurs when the two mics aren’t picking up the sound waves in sync. Say that you have the first mic slightly further away from the speaker than the second mic. The sound waves will take slightly longer to reach the diaphragm of the first mic.
Phasing aside, there are many advantages to using multiple mics for recording the guitar amp. By placing a second mic at the rear end of the amp, you’ll pick up those low-end sounds that sometimes get lost.
Isolate the amp when recording
If you’ve been to a professional recording studio, you’ll notice that the mixing desk is kept isolated from the recording room using soundproof glass. This will allow the person mixing to hear what is actually getting recorded. Moreover, doing it without the distraction of hearing live amplifier sounds.
In a home studio, you’ll have to get creative as a lot of time, you’re recording alone. Not everyone has the luxury of soundproofed mixing rooms. One solution would be to get a long microphone lead and place the amp and mics outside the door. While it isn’t ideal, it’ll help you hear the recorded sound properly in the headphones.
How to record guitar amp?
There isn’t a standard way that must be followed to get an outstanding guitar sound from the amp. However, there are a few different ways you can record your guitar, so you shouldn’t be afraid to try them out. Without further ado, here are many ways how to record guitar amp.
1. Record direct from the guitar into the instrument input on an audio interface
Connect the audio interface to your PC (or to your smartphones or iPads). Ensure that you’re following the right instructions with the audio interface. Then, you should connect the guitar directly to the instrument input on the interface. You might not love the sound, in most situations. However, what you can do is enhance the dry signals from the guitar with various plug-ins. These will allow you to experience a decent guitar sound by adding delay, distortion, chorus, and more by simulating amps. The great thing here is that you can keep tweaking and changing the sound of the guitar once you’ve recorded.
2. Record directly from the guitar via a guitar-USB interface
Other than your guitar, you’ll only require a guitar-USB interface for recording. These devices are designed to be the one-stop solution such that you can record the guitar directly on your PC. This is a great budget solution while also being quick and easy. You will find that these devices aren’t as highly preferred as audio interfaces; however, they’re comparatively cheaper. For recording vocals and other instruments, you’ll want to purchase an audio interface or a USB mixer for extra versatility.
3. Connect the guitar into the amp while connecting the amp’s line output to the audio interface’s line input
This is a great way of recording your guitar if you love the sound of your guitar amp. It is useful when you don’t want to go through the expenses and trouble of mic-ing up the speaker. You can connect the guitar to the guitar amp as usual. Then, connect the line out of the amp and into the interface. You’ll then be ready to record in your preferred software.
In this method, you’ll have three volumes to tweak and control – your amp, your guitar, and your interface. You’ll need to take some time to tweak the settings until you’ve got the sound that you’re looking for.
4. How to record guitar amp without a mic
It is possible to record the guitar amp using a line-out cable directly into the interface instead of using a mic. Almost all amps have a “line-out” located on the back. If not, they’ll have a headphone-out, which will serve the same function. You can plug a cable from the output directly into the audio interface, and you can record right away.
This method comes with the benefits of being more convenient, as you don’t need to worry about the mic placement. It’ll also be comparatively cheaper as you won’t need to buy any mics. The final advantage is that you can record late at night or without disturbing your neighbors.
Important tips to remember when recording guitar amps
Position the mic close to the amp
Your primary mic needs to be very close to the amp. This will reduce any unwanted noise and reflections from the room. It’s the easiest place for you to find the right tone. Generally, distances between 0-5” (0-12.5cm) will work best. Many guitarists prefer using two microphones – one up close to the amp and another one further back. The second “room microphone” can be blended in to get a roomier tone.
If you have a second mic, you can give it a try. However, it is very rarely needed. You can instead go for a dynamic mic again and check the phase during the mixing. You might have to delay the close mic slightly when mixing as you’ll get to prevent phase issues. If it sounds too complicated, you shouldn’t worry. You can decide in the mix if the room microphone enhances the sound or worsens it.
Find the right tone in the guitar amp
Many people get overexcited during the recording phase, and it makes them rush. However, you should look to avoid this mistake. You should spend a lot of time adjusting the EQ on the amp and also tone controls on the guitar. A goal could be to record a guitar tone that requires zero equalization in the mix phase. It can be achieved and this should be your aim. As a rule of thumb, you can turn the bass knob down a couple of notches. You won’t need plenty of low ends in the guitar.
Look for the tone in the context of the mix
While you’re adjusting the mic around to find the best possible position, you should ask someone to play along with the track. Check the gain on the interface. In your headphones, adjust the level of the guitar with the channel fader until it’s sitting properly in the mix. Now, you’ll be able to move the mic around and listen to how the guitar sounds in the context of the mix. This is a far greater way of working. No one will ever hear your guitar in solo, so it doesn’t really matter if you’re sounding bad in solo. All that matter is that it should sound great in the context of the mix.
Make use of reference tracks
If you’re struggling to find the right tone, use a reference track as the basis for comparison. Look for a track that has a guitar tone that you like. Find a track that has a guitar tone that you like. You should import it into your DAW or keep it ready to play through the speakers/headphones.
Listen to the track’s guitar tone. Is it warm? Is it bright? Is it clean or distorted? Compare the tone that you’re capturing to the reference track. If your guitar portion sounds slightly dull in comparison, boost the highs and move them near the center of the speaker cone. If it is sounding too bright, do the opposite.
Change the tone when you’re overdubbing
It is very common for a guitarist to overdub and play many parts within a piece. For instance, you may play the same chord progression twice. One part to pan hard right while the other to pan hard left. A great way of achieving separation and space within the mix is to change the tone slightly each time you’re recording a new part.
Use less distortion than you normally would
Distorted guitars sound much sound too distorted on recordings than they do live. When you’re playing live, having a loud and distorted guitar will sound great. On recordings, heavy distortion could quickly fill up space in the mix, creating a wide range of problems. If you decide in the mix phase that you’re looking for more distortion, you can make use of an amp simulator for adding more.
Turn off the amp reverb
This is something that will be great to add to the mix. If you’re recording the guitar with reverb from the amp or pedals, you’ll be stuck with it. Instead, you should record clean and add reverb when you’re mixing if needed.
Record guitar directly
If you’re looking to produce radio-worthy mixes in a home studio, you’ll need to make some compromises. Recording guitar directly and using an amp simulator is the simplest and easiest way of capturing professional, studio-quality guitar at home.
Some guitarists believe that amp simulation lacks the “mojo”. Sometimes, it is true. If you’ve got a favorite amp, you may not be able to replicate the sound digitally. In most cases, you can get far better results by recording the guitar directly and using an amp simulator. If you’re doing this, ensure that you’re using a proper DI box.
Record with a lot of headroom
If you’re recording direct, it’ll be important to ensure that you have a lot of headroom when recording. A clean guitar can be quite dynamic. You shouldn’t try to go any higher than -10dB. There is no need to record hot when you’re working with digital audio.
Record direct and re-amp if needed
Even if you’re recording direct, and then you wish you had directed through an amp, it isn’t too late. You can use a re-amping box for playing dry recording guitar tracks out of the DAW and into an amp. This will allow you to spend as long as you wish tweaking the tone of your amp before recording. There are many benefits to re-amping, but it is rare that you’d want to do it in a home studio. Re-amping boxes are expensive, and you will be better off making the decision early on and sticking to it.
Conclusion
Thank you for reading. Hopefully, now you know a lot more about how to record guitar amp, what size of guitar amp to choose, which microphone you should choose, how to record a guitar amp without a microphone, and much more. Figuring out how to record guitar amp, what size of guitar amp to choose, which microphone you should choose, how to record a guitar amp without a microphone, and much more is easy, and you’ll be glad to know that there are multiple ways to do that. For recording properly, you’ll need to choose the right type of amp, have the proper type of mic, have proper positioning at a proper distance, and use the correct settings for recording.

