Are you learning to play the guitar, and you bought a new tube amp or got gifted an old tube amp from your grandfather, but you don’t know how to turn it on? Don’t worry, you will get to know all about it here.
Turning on a tube amp is a tricky and dangerous process, as it involves voltage and other dangers. However, knowing the right way to turn on a tube amp will make things easier for you. All you’ll need to do is plug in the amp, turn the standby switch on, install the preamp tubes, connect the speakers, and play.
In this article, you will get to know all about how to turn on a tube amp, how to use a tube amp after a long time of inactivity, and more. Stick around to read the amp startup procedure manual for how to properly turn on a tube amp.
Amp startup procedure manual – How to turn on a tube amp
1. Plug in the amp
2. Turn the Amp Power Switch “On”
If your guitar amp has a solid-state rectifier and no standby switch, proceed to Step 4. Otherwise, you should turn the Amp Power Switch on. You need to be prepared to turn the amp off immediately and watch out for any smoke or arcing.
If you’re using a light bulb current limiter when turning the power switch on, the limiter light bulb will glow initially as the power transformer is coming up to voltage. It’ll then dim, as without the tubes in place, no current is getting used. If you’re using a high-wattage light bulb, you might not even see the bulb glowing. If the bulb burns near its rated brightness, there will be a short in the power transformer, power cord, or their connections.
>>> Click here to read our review about the Top 15 Best Tube Amps <<<
You should carefully measure the AC voltage on the power transformer connections. You must have a wall voltage at the fuse and power switch. Moreover, you need to have about 5V AC on the rectifier tube heater wires. You’ll have to have 6.3V AC on pre preamp and power tube heaters. The 6.3V pilot light has to light up. If it doesn’t, the bulb might be burned out or there wouldn’t be 6.3V AC at the bulb socket’s terminals.
You’ll also need to have high voltage AC at the rectifier input (be it tube or solid-state rectifier). It is recommended that you should measure the high voltage wire to ground on the power transformer high voltage secondary wires. This is the case as wire-to-wire can easily expose the meter to more than 700V AC RMS. If the power transformer is rated around 325-0-325V, it’ll mean that you’ll have about 325V AC from each wire to the ground but 650V wire-to-wire.
If you’re using a variac and the amp has a standby switch, you should turn the variac voltage back to 0 and head over to the next step.
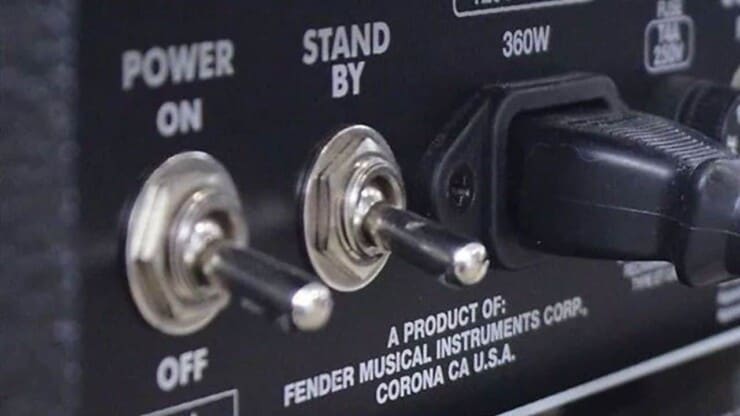
3. Turn on the standby switch
If your guitar amp has a solid-state rectifier, proceed to step 4a. If your amp has a tube rectifier, head over to step 4b.
4a. Solid state rectifier
If your guitar amp is using a solid-state rectifier, then the filter capacitors will use DC power and charge up. The entire amp will be receiving DC power, so watch out for sparks or smoke.
If you’re using a light bulb limiter without variac, start with a low-wattage bulb, something like 15W. This will slow down the rate at which the new filter caps are charging while helping form them for longevity. When you’re turning the standby switch on, the bulb will glow bright initially as the filter capacitors are charging. Eventually, the bulb will then dim. If it doesn’t dim after a while, then there could be a short in the amp downstream of the switch.
If you’re using a variac, you’ll want to bring up the amp’s voltage slowly to form the electrolytic capacitors. Bring it up from 0V to 10V while monitoring the amp for arcing or smoke. Leave the variac on 10V for a while and bring the voltage up to 20V while continually monitoring the amp. Wait 10 minutes and repeat it until you’ve reached the full wall voltage (120V in the USA). Doing so allows the new electrolytic capacitors to form in a controlled manner while helping them live a longer life.
Turn off the amp power and standby switches while removing the variac at this time as the filter caps have been formed. If you’ve got a light bulb limiter, you should prefer using it. Proceed to step 5 now.
4b. Tube rectifier
If your guitar amp has a tube rectifier, then you should install the rectifier tube. With the variac voltage set at zero, turn both the power switch and standby switch on. The amp starts receiving DC power, so watch out for sparks and smoke as you’re adding voltage with the variac. If you’re having a light bulb limiter but no variac, start off with a low-wattage bulb (15W). This slows down the rate at which your filter caps will fill while helping them with longevity.
If you’re using a variac, you’ll want to bring up the amp’s voltage slowly to form the electrolytic capacitors. Bring it up from 0V to 10V while monitoring the amp for arcing or smoke. Leave the variac on 10V for a while and bring the voltage up to 20V while continually monitoring the amp. Wait 10 minutes and repeat it until you’ve reached the full wall voltage (120V in the USA).
Doing so allows the new electrolytic capacitors to form in a controlled manner while helping them live a longer life. Turn off the amp power and standby switches while removing the variac at this time as the filter caps have been formed. If you’ve got a light bulb limiter, you should prefer using it.
If the light bulb stays bright once the standby switch is turned on, there could be a short in the rectifier tube, tube sockets, filter caps, wiring, or the power distribution wires to the circuit board.

If the bulb goes dim, then you should switch the meter to DC volts. Then, measure the voltage at every filer capacitor. With no load, the filter capacitors might charge up to the power transformer’s AC peak voltage output. This will see the number going up to 700V DC on the filter caps.
You should measure the DC voltage where the output transformer is connecting to the power tube sockets. The voltage must be about the same as what will be measured at the filter capacitors.
Turn the standby switches and power switch off and measure the DC voltage on the filter caps. You should make sure that it eventually bleeds down to 30V DC or lower. If the amp doesn’t have filter cap bleeder resistors, the voltage would stay high, so you’ll need to drain out the filter caps manually. It’ll be best if there is under 30V DC on the tube sockets for the power tube to be installed. When the filter capacitor voltage goes below 30V DC, you can proceed to the next step.
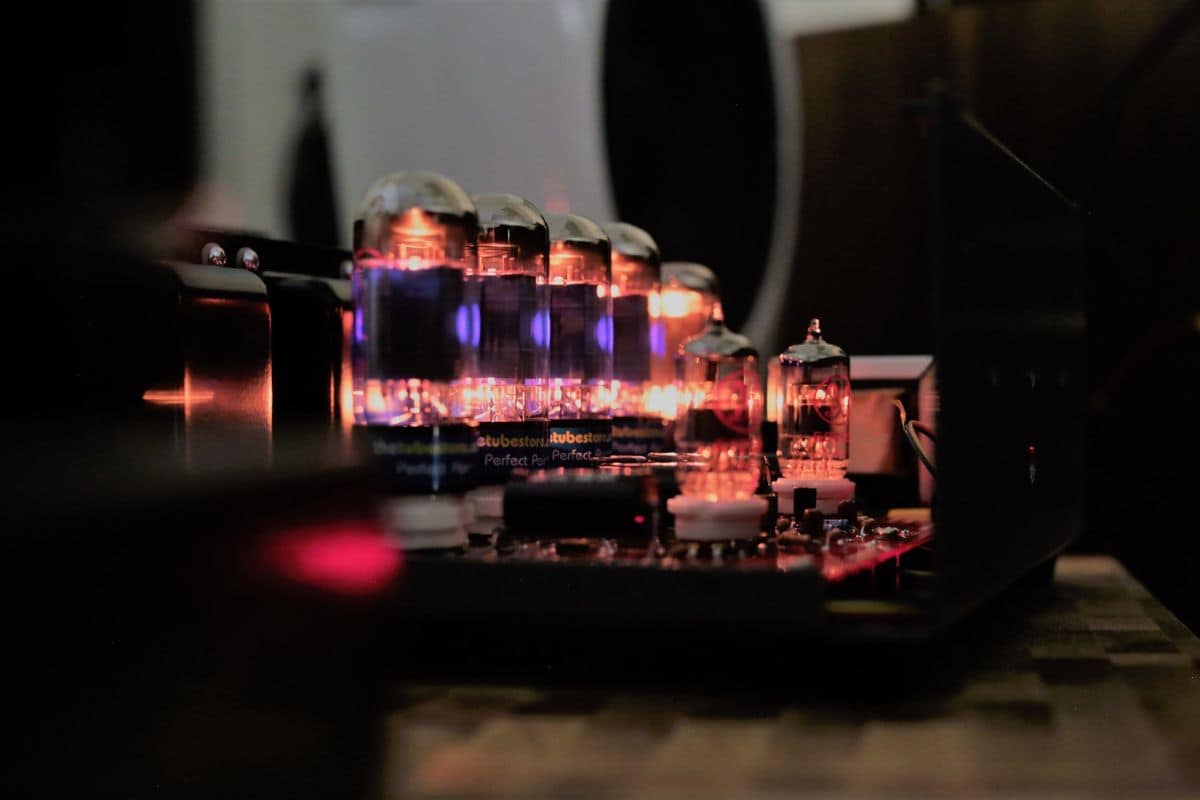
5. Install the preamp tubes (except the power tubes)
Now, you should turn on the Power Switch. If the light bulb is burning near its rated brightness, a bad preamp tube or a miswired socket could short the heater circuit. Then, turn on the Standby Switch.
In case the bulb stays bright, there could be a shorted preamp tube. Otherwise, there might be an issue with the preamp wiring. You should remove the preamp tubes except one and then try it again. If the bulb stays bright, you should replace the tube with another one. If the light bulb goes dim, the original tube was bad. You should try out the good tube in all the sockets. If the bulb remains bright, you’ve got a problem with the socket wiring or the circuit.
If the light bulb dims with the preamp tubes installed, measure the voltages at the preamp pin tubes. Normal preamp gain stages need to have voltage on their cathodes and plates, but not on the grids. Cathode followers might get high voltage on plates, cathodes, and grids.
6. Measure the DC bias voltage at the power tube grid pins
If the amp has a fixed bias, you should carefully measure the DC bias voltage at the power tube grid pins. Amps having fixed bias will likely show negative voltages on the power tube grid pins. If the bias voltage isn’t present at any of the power tube grids, you should inspect the bias circuit. -30 to -60V DC (negative voltage) will be present on all the grid pins.
If the amp has a bias pot, you should adjust it to the largest negative DC voltage possible (-60 will be better than -40V). This sets the coolest and safest power tube bias. Then, turn both the power and standby switches off.
7. Connect the speaker and install the power tubes
You will then have to connect a speaker to the amp. You should prefer connecting an inexpensive speaker for preventing damage to your nice speaker. Turn the volume and gain controls all the way down.
If you’re using a light bulb current limiter, remember that all the amp’s voltages will likely be lower than spec. How low you can go will depend on the current demand from the amp and the light bulb’s watt rating. If you’re playing the guitar through the amp with the current limiter attached, it’ll sound funky. After successfully starting with all the tubes in place, you may remove the light bulb limiter. Then, set the bias for the fixed bias amps and test the guitar amp’s tone with a guitar.
Moreover, measure the amps voltages for comparing it to other well-known voltage values. If you’re testing the amp’s tone with the bias set to full cold, it could sound cold and sterile.
Now, turn the power switch on. If the bulb burns near the rated brightness with the amp still on but standby switch off, a wrongly wired socket or a bad power tube could cause a heater short.
In case the bulb goes dim, you should turn the standby switch on. You should be prepared to turn the power or standby switch off.
If your guitar amp emits a squeal, it might be caused by the positive feedback in the negative feedback circuit. If the amp squeals and has a negative feedback loop, turn the standby and power switch off. You should verify less than 30V DC at the filter caps and swap out the output transformer wires of the power tube sockets. Then, head over to the next step. Swapping the power tube output transformer wires changes the polarity of the negative feedback signal and stops the squeal.
Verify that the power tubes are showing a yellow heater glow but not showing red plating. Dimming the room lights helps in seeing glowing red spots on the plates. If the bulb is going dim with the tubes in place, then congrats, you’re almost done starting the tube amp. Test the amp with a guitar and a speaker. Remember that the amp will probably sound bad with the light bulb limiter still in place. You should power down your amp and remove the light bulb limiter carefully.
If the light bulb limiter stays bright, you should power down the amp and remove a power tube. If your amp only has one power tube, replace the tube with another power tube and give it another try. If your bulb goes dim, the other power tube was probably bad. In case it stays bright, then there might be a problem with the wiring, socket, or power amp circuit.
If the bulb goes dim after removing the power tube, the problem was with the socket or the removed tube. Power down the amp and then move the power tube in the amp to another socket. If the bulb goes to them, then it means the other power tube was bad. If it stays bright, then the socket, wiring, or the circuit is shorted.
8. Turn on the amp and put the standby switch to play
With the light bulb limiter being removed, turn on the guitar amp and put the standby switch to play. Calculate and set the power tube bias and then test it again using a guitar. Make sure that you’re recording the voltage readings for future reference. You can now start playing your guitar because the tube amp has been switched on.
Tips to remember when turning on an old, inactive tube amp
You’ve got a great deal on Craigslist or dug up an old tube amp that your grandpa used to have. You will probably wonder how to turn on a tube amp and how to use a tube amp so old. There are certain tips that you need to keep in mind when starting an old tube amp that has not been used for a long time.
Don’t just plug it in and expect it to work normally
This is a recipe for disaster, as you’ll have smoking capacitors and resistors in your studio. The terrible smell of smoke will make things worse. You cannot bring out an old amp, plug it in, and expect it to work.
Don’t turn on a tube amp without a speaker load
On websites like Craigslist and eBay, you’ll see amps listed with the tubes glowing and without any speakers connected. The output transformer of the tube amp expects to see a certain impedance on the tube side of the amp and a reflected impedance on the speaker’s side. Most old amps are forcing loads +/- 100% of the expected load. In simple words, an amp expecting a speaker impedance of 8 ohms will generally be safe at 4-16 ohms. If there isn’t a speaker load, then you should probably keep away from the tube amp.
Visually inspect the innards of the amp
You should look for potentially fried resistors or blown-out electrolytic capacitors. Then, check out the filter caps and other big-value caps with an ESR meter. You should replace any bad ones before powering up. Moreover, check the important grid and coupling caps and resistors. Replace the ones that are out of spec before you power up the amp.
Check the tubes on a tube tester
The tubes don’t have to come out as new, but if they’re gassing, flat shorted, or below minimum spec, you should replace them before you power up the amp. In push-pull amps with 2 or 4 power tubes, you should ensure that the output tube pairs are closely balanced.
Remove the tubes except the rectifier tube
Fire it up on a variac starting at a low voltage AC. Note that you don’t need to have the amp hooked up to a speaker load yet, as you have removed the output tubes.
You should look to increase the voltage to around 20V every 20 minutes. Do this until you’ve reached full voltage. If nothing is smoking, and you haven’t blown out a fuse yet, you’re ready to start playing.
Load up the amp with tubes
At this point, you should ensure the amp is hooked up to the speaker load. You will also want to run the amp through a visual over-current protection device, like a light bulb. The bulb needs to be an old-fashioned incandescent of around 150-300W.
For amps that have not been in use for a long time, you can start off on the variac at about 90V for a while. Then, slowly bring the power up to full line voltage (as long as there are no pops, smokes, crackles, etc.) Listen for any unusual noises as you are turning the controls through different ranges. A little “warm heater” smell should be expected at this point. You should keep your eyes and nose alert. If you smell something burning or see smoke, instantly cut the power.
Conclusion
Thank you for reading. Hopefully, now you know a lot more about how to turn on a tube amp, how to use a tube amp after a long time of inactivity, and more. When you are using a tube amp, turning it on can be tricky and dangerous as there are voltages, electricity, short-circuiting, fuse, and other dangerous elements involved. However, the step-by-step guide mentioned here will make things easier for you. All you’ll have to do is plug in the amp, turn the standby switch on, install the preamp tubes, connect the speakers, and play through the amp.
Image Credit:
Featured Image: Finale Audio
Images: Reverb, Airtight

