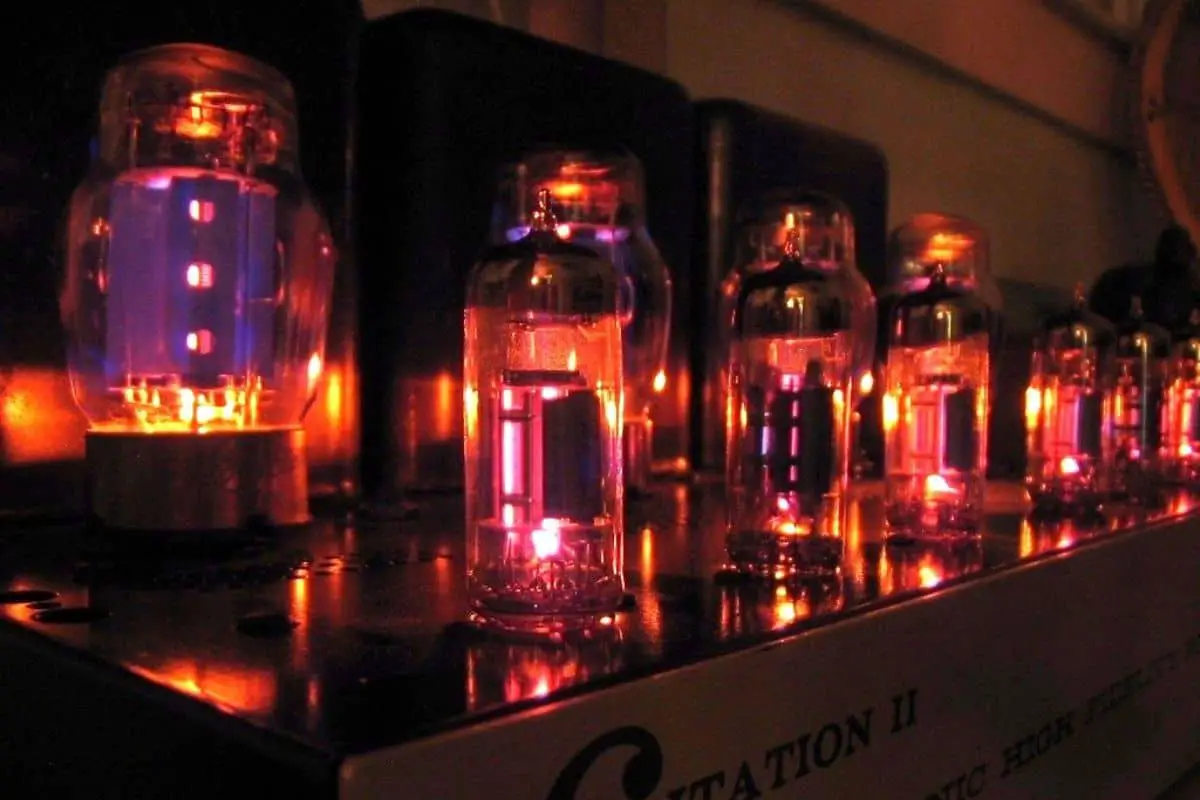
Has your tube amp started giving you crackling noises during warm-up? If so, then you shouldn’t worry, as it’s a common problem with very easy fixes.
Tube amp crackles when warming up due to a wide variety of reasons. Some of them include loose connections, faulty preamp tubes, faulty output tubes, and more. Studying the problem and applying the appropriate fix will quickly resolve the crackling noise issue.
In this article, you’ll get to know all about tube amp crackling, tube amp crackles when warming up, fixes for tube amp crackling when turned on, how to fix guitar amp making noise, things to look for when tube amp crackles, and more. Stick around to get all the answers that you’re looking for.
Different types of tube amp crackling
If your tube amp has suddenly started crackling, it’s only a matter of time before you start feeling frustrated. There are several different factors that play a role in this annoying little problem. Isolating the issue can turned out to be difficult unless you know what you’re looking for. Troubleshooting tube amp crackles when warming up will first involve understanding different types of tube amps. Before doing anything, you should turn down any internal effects that your amp has, such as reverb or tremolo. After that, turn down all the volume controls too.
Moreover, hit the top of the amp with a bit of force. If the sound occurs, study the different types of crackling mentioned below. If no sound occurs, turn up the volume controls to the normal settings and try it again.
>>> Click here to read our review about the Top 15 Best Tube Amps <<<
1. Rumbling crackle
In this type of crackle, if the sound is rumbly, your amp might be having a faulty output tube. To fix this, you’ll need to replace the amp’s power tubes using a new set of matched spares. If the problem still persists, you should put back the original tubes and keep on troubleshooting.
2. Glassy/high-pitched crackle
In this type of crackle, you’ll likely be having a faulty preamp tube. To fix this, you should start by working your way across the preamp tubes closest to the output tubes. Tap each tube using a pencil. If one of them produces the noise, you should replace it, as it might resolve the issue. Otherwise, you should continue this process and replace other preamp tubes that are causing the sound. It can also be used for output tubes that might potentially be causing the issue.
3. Load and static-like crackle
For this type of crackle, you should check all the amp’s connections. You’ll need to check your speaker/input cables and your tube sockets while cleaning them thoroughly. A dirty, oxidized, or compromised connection inside your amp could cause static sounds.
4. Random crackle and pops
With this type of crackle, it means that your tube amp likely has faulty preamp tubes or power tubes. You should try to swap them one by one with spares or replace them in full. If replacing the tubes doesn’t resolve the issue, you’ll need to have a qualified technician come and check the preamp’s plate or cathode resistor.
What are the reasons for the tube amp crackling when turned on?
Here are some of the reasons that you should look out for if your amp is making intermittent crackling-type noises. These pesky crackling noises could come and go or get triggered by certain notes. There are a couple of things that could make a tube amp “crackle”. Knowing these reasons will give you a better chance of diagnosing the issue and fixing it yourself. On tube amps, intermittent crackling can be caused due to a few reasons.
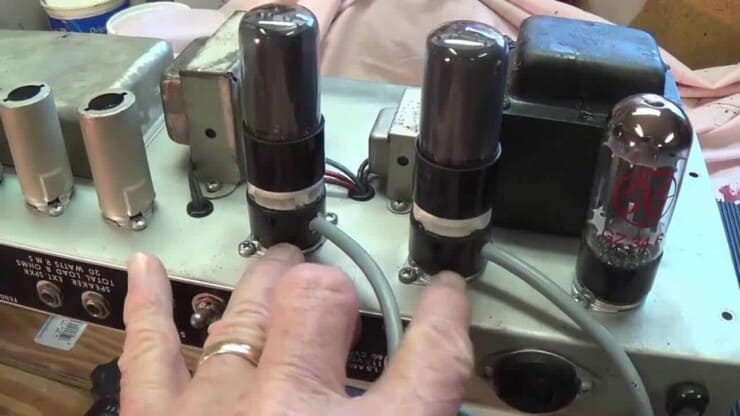
1. Breakage of tubes
On a tube amp, the first and most obvious reason to look for will be the tubes. You should always keep a decent set of backup tubes in your amp. This will reduce the chance of any noise or crackling, while also offering the best sound and reliability. In vintage Fender amps, tweed disease can cause this unwanted crackling to spoil the fun. Remember, you should always clean your tube sockets regularly and thoroughly.
2. Tube resistors
Another thing that you should look for would be plate load resistors. They are usually at a 100k value and are the resistors that’ll connect the DC supply to the plates of the preamp tubes present on pins 1 and 6 of 12AX7s or similar tubes in most amps. The same thing will apply to older 6SL7 tubes or other similar models. Usually, the plate load resistors back in the day were carbon composition types. Moreover, they come with an inherent hiss-type noise when brand new out of the box.
As Plate load resistors age, they start making more noise and can even sound like frying bacon in the background. If you change them with modern carbon composition equivalents, the crackling problem will go away. You can even use metal film or carbon film resistors and not have to worry about the crackling or hiss again. The tone and to an extent the feel of your amp will eventually change.
3. Low-quality tube sockets
Some modern tube amps exhibit sporadic crackling through the lower-quality tube sockets. This issue is more common than expected, as brand-new amps can make all types of weird crackling noises. This is a laborious job that needs patience and steady hands by changing sockets with high-quality phenolic or ceramic. You should be sure that you greatly reduce this variable.
4. Aluminum foil on the back panel of the amp
Another reason for crackling to look for will be the aluminum foil on the back panel of the amp. This foil could end up driving you crazy if you don’t know how to look for the problem. Most beginners are unaware of this potential reason, and it can be quite maddening.
For instance, say that you’ve got the amp on your bench with the back panel off and the amp is playing fine. Yes, it sounds amazing, plays amazing, and doesn’t give any noise. You might wonder if the amp’s owner is crazy, or if it was a fluke and your tube socket cleaning attempts cleared it up. You mount the pack panel on the tube amp and fire up the amp again.
A few minutes later, when you feel that the problem is just a fluke, the crackling noise is back again. This foil needs to shield RF and any other extraneous noise. All it’ll do is cause a headache, and a small piece of metal screen that you’re getting from a hardware store will be a lot better. Metal screen material was previously used on vintage amps, especially the Fender models beginning in the 1960s. The problem here is that the foil isn’t making proper contact with the chassis. It’ll cause the crackling, and it can come and go after a few minutes or even days.
For troubleshooting this issue, replace the foil with a metal screen or put tape on the stripping around the open edge of the chassis where it’ll come in contact with the foil on the back panel.
5. Loose components
Loose components will be another potential reason for the crackling or the signal dropping out, which sounds like crackling. Some come components that you should check will be jacks, transformers, pots, and mechanically connected grounds. Ensure that all the components are secure and the mounting nuts present are tight.
On the Fender blackface and silverface amps, the mechanical ground lugs are mounted to the chassis on the power transformer studs with locking nuts. They can easily come loose from years and years of constant vibration, making an intermittent connection. The ground lug connections are inside, so you’ll need to open up the amp and check them.
6. Bad solder joints
One of the last factors to consider will be bad solder joints. Over the years, the solder joints can oxidize and the connection can become either bad or intermittent. It’ll probably give you a lot of trouble unless you reflow almost every solder joint on the tube sockets. Sometimes, you can struggle to find the problem, as you may not be able to identify the exact joint. During such a situation, you should touch up every single joint.
Guitar amp crackling when nothing is plugged in
If you’re getting crackling from your amp with nothing plugged in, then it’s likely established that the noise is coming from the amp itself. Of course, this goes without saying that it’s incredibly dangerous to work on guitar amps if you’re not experienced. Even when amps are unplugged from the power outlet, the capacitors will still hold a charge for quite some time.
With that said, many times this won’t be necessary. You may very well be able to resolve unwanted noise without having to touch a screwdriver. Here are some of the solutions for tube amp crackling when turned on.
Gain and EX settings
It only makes sense to start off with the simplest solution. All amps produce some crackling and noise to an extent. High-gain amps tend to produce more noise naturally than low-gain amps. Take it and add other potential noise factors. Turning up the gain will increase the input signal while amplifying the noise. Many guitarists and musicians use more gain than necessary for achieving the desired effect without even realizing it.
On a clean channel, you’ll be able to run the volume from 0 to 10 and then back without getting any noise in the signal. If there is any crackling noise, you should check and see if the EQ settings are dimmed. Aside from producing background noise, too much gain could produce feedback. So will happen when you’ve got too much treble (especially with lower bass settings). You’ll have to experiment, and when in doubt, you should try to boost the mids after backing off the treble and gain settings.
High-quality speaker cable
If you’ve got a stack, you’ll definitely need a cable connecting your amp to your speaker cab. Even many combo amps come with a 1/4″ speaker cable, which splits off the wire where it’ll meet the speaker. Ensure that you’re using a well-shielded speaker cable. You shouldn’t even think of substituting an instrument cable for the speaker cable. Not only will you get bad audio with noise, but it might damage your amp as well.
Better tubes
With tube amps, the tubes are another key component that could cause potential problems. Bad quality tubes will make themselves apparent in multiple ways. In terms of audio, you may hear a crackling noise, badly distorted signals, a reduction in volume, or even experience a loss of headroom.
Fix the electronic device interference
As with your guitar, your tube amp can also experience electronic device interference. Your amp can be affected by anything from fluorescent lights to mobile phones. Moreover, your amp could also start picking up radio waves from local radio stations. One way of troubleshooting this problem would be to adjust the placement of the amp in the room. Try to move it away from lights and other electrical devices.
Clean dusty components
The problems with your amp could be caused by having dusty components on the inside. Dirty wires, pots, and circuits can all wreak havoc on the clean guitar signals. A proper can of contact cleaner or compressed air can potentially resolve this issue for you. However, you should be cautious if you intend to open the amp’s casing.
How to fix guitar ground noise in tube amps
Having a solid ground connection will be an important part of your guitar’s internal wiring. The guitar’s ground wiring will connect the internal electrical components and the bridge and return the signal to your amp. From there on, the connection will get sent to earth ground.
Although an improperly grounded amp can potentially kill you, the guitar’s wiring is unlikely to lead to death or serious injuries. Mostly, it’ll help remove any unwanted noise, and it is a necessity to do that. A great way of telling this would be to touch the guitar strings and notice if the noise has reduced. If it has, then your guitar has grounded properly.
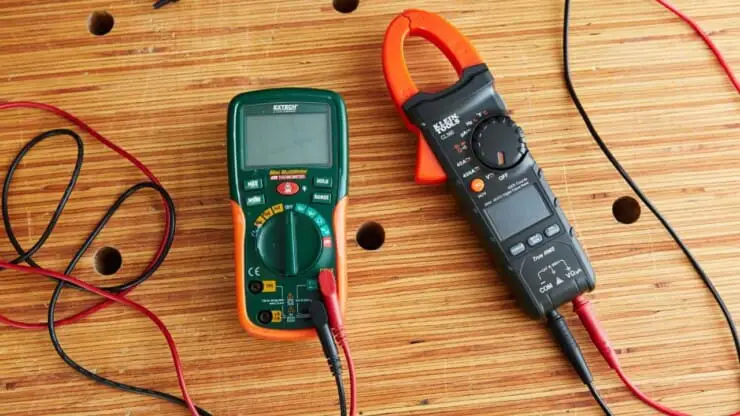
There are certain straightforward ways of solving grounding noise issues with your guitar. If you want to resolve the problem yourself, you should probably invest in a high-quality multimeter. A multimeter is a tool that can be used for measuring electric current, resistance, and voltage. You can use the multimeter for locating bad grounding connections inside the guitar.
Opening the body cavity of the guitar and removing the output jack carefully will expose the wiring and solder joints. Most grounding issues can immediately become obvious. You should look out for any loose wires or broken solder joints. Generally, the ground wire in the guitar is black. The guitar gets shielded using shielding paint (black) instead of copper tape. Notice that all the components, the bridge, and the shielding paint will be connected to the ground. The ground signal will then run to the guitar jack and then into the amp.
Troubleshooting noise in the effects chain
The final kink in the chain of diagnosing noise issues in your tube amp will lie in the effects chain. You’ll now know that your guitar, amp, and main instrument cable have all been assessed. A deduction will probably tell you that the issue lies somewhere between the instrument cable and the amp in your signal chain.
Power supply
You should ensure that you’re using clean and dedicated power to the effects chain. If you’re using a daisy-chained power supply, you will need to scrap it. Whichever power supply you’re choosing, ensure that you check all the pedals’ current types, polarity, amperage, and voltage ratings. There are many power banks that have 9V, 12V, and 18V adaptor ports. Ensure that you’re plugging into the correct slot. If you’re using 9V batteries, ensure that you all are in well-charged working condition.
Patch cables
While you have probably tested your guitar cable, you should still test out the other patch cables. Start off with the cable which is running from your pedalboard or effects processor to the amp. Plug it from your guitar directly into the guitar amp. Remember that you should use a multimeter for checking each cable if you’ve got one at your disposal. The shorter your patch cables are, the better it will be. Meanwhile, the longer the patch cables are, the more will be the opportunity for loss of signal and electrical interference.
Once you’ve determined that the cable is good, you’ll need to test all the smaller patch cables. If you have eliminated all of them as faulty, then you’ve only got one option left. There will be an issue with one or more pedals.
Isolating pedals for troubleshooting unwanted noise
It is unlikely that crackling is caused by faulty pedals, however, there are other noise issues that might arise. Unless you are making use of a multi-effects pedal, you’ll have to isolate each pedal one by one and check which one is giving you trouble. Once you’ve found the problematic pedal, you can just go ahead and plug everything else in to test it out. Once you have located the issue, you should now be getting a clean signal now.
Depending on the pedal, you will be able to decide whether to take it to a technician, repair it yourself, or buy a new one. If it’s a cheap pedal and worth a gamble repairing yourself, a multimeter and soldering iron can possibly help you.
Fix the crackling noises in guitar pedals
It is not all that rare for a guitar pedal to start making crackling and popping noises. Similar to cables and guitar pots, pedal jacks can get dirty, loose, and damaged. Fortunately, these fixes are rather simple as well. You can generally test the input and output jacks by just wiggling the cord back and forth at the junction.
If you are hearing a crackling noise, you might have just found the problem. You will need to fix the solder joint to the jack or even replace it altogether. Wiggle the tone/volume pots too. If the problem seems to be arising from there, you might be able to fix that with a few squirts of contact cleaner.
Noise gates to stop the noise
A popular choice for taming amps and guitar noise, especially among hard rock and metal players, is to add a noise gate or noise suppressor to their pedal chains. Noise gate pedals tend to set a baseline level for the noise. When the guitar signal passes above a certain threshold, the pedal will allow the signal to pass. Once the signal passes back under the threshold, the pedal will block the signal.
The idea here is that you should set the threshold slightly above the level of your background noise. Generally, anything that you play will come above the volume level, which allows you to eliminate this problem entirely. You should remember that most people will tell you that this will be the last resort. It’s a popular opinion among most guitarists that the natural integrity of the tone will be better preserved without the noise gate. If you play high-gain metal, you will likely be owning one already.
Conclusion
Thank you for reading. Hopefully, now you know a lot more about tube amp crackling, tube amp crackles when warming up, fixes for tube amp crackling when turned on, how to fix guitar amp making noise, things to look for when tube amp crackles, and more. Tube amps can often give crackling noise when warming up or being used. This happens due to a variety of reasons including having loose connections, faulty preamp tube, faulty output tube, and more. It’s important to consider all the factors that might cause crackling, and then resolve the issue with the appropriate solution.

