Are you a beginner still getting to grips with the settings on your guitar amp, especially the amp contour? If so, then this article is just what you need.
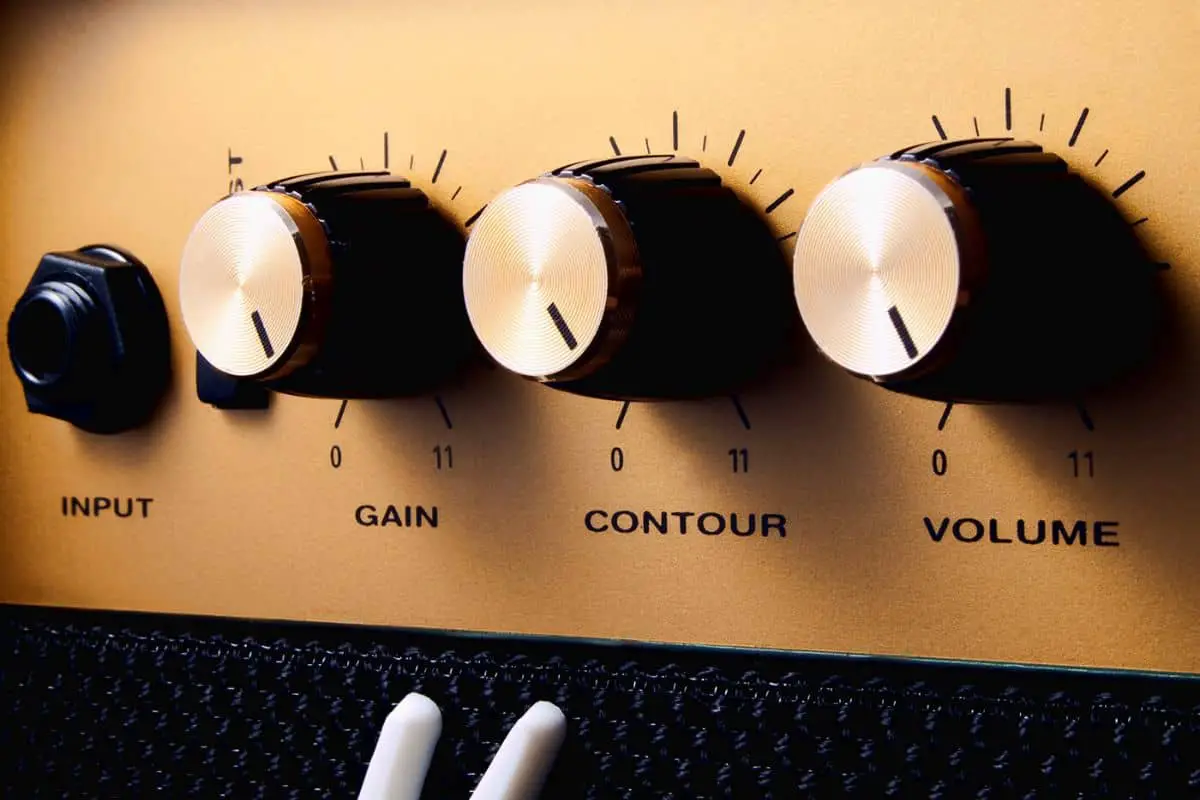
Contour on a guitar amp is responsible for lowering the mid-frequencies. If you’re increasing the contour, you’re decreasing the mid-range frequencies and vice versa. It’ll make the mid-range frequencies more scooped, which is why it is often referred to as a low-budget EQ.
In this article, you’ll get to know all about contour on a guitar amp, what is contour on a guitar amp, how to use the contour knob to dial in the bass tone, and other basic settings on a guitar amp. Stick around to find out all the answers that you’re looking for.
What is contour on a guitar amp?
The higher the contour is, the lower will be the mid-range frequencies. This is arguably the simplest way of understanding what amp contour is. The contour will make the mid-range frequencies more scooped, and it is commonly known as a low budge EQ. It’ll do a fantastic job as a single knob, helping you reach the Smile EQ.
This control is commonly found on most Marshall amps, and it generally refers to the mids. However, it’ll actually be the opposite way to what you’d normally expect. If you increase the contour in your amp, you’ll be decreasing the mid-range frequencies. Meanwhile, if you decrease the contour, you are increasing the mids. A high contour setting will sound rather scooped. Many amps have contour control as an active wide band sweeper that maintains preamp tone control settings.
How to use the contour knob to dial in the bass tone?
Similar to the standard EQ controls, a contour knob can help you find a better bass tone that perfectly sits in the band’s mix. The function and engineering of each contour knob might vary. However, the general purpose of a contour knob will be to offer an extra tool to tone shape mid-range frequencies. Moreover, it’ll also provide the classic scooped mids sound.
Scooped the mids using the contour knob
Scooping out the mids is just what it sounds like. It’ll remove the mid-range content from the signal at specific frequencies. This practice often gets a bad reputation for being too detrimental to the bass tone, and it’s quite understandable. The guitars and cymbals occupy the high end, while the kick drum competes with it for holding down the low end. Meanwhile, the bass guitar’s mid-range is what will make it cut through the mix.
So, why would one want to scoop out the mids? Many guitarists enjoy dialing in the sound, as it’ll accentuate the low-end thump and high-end attack of the bass. It’ll also remove some clutter and the nasal sound of the mid-range. It’s an amazing option for slap styles and guitarists who want tones that sit a particular way in the mix. Surprisingly, a subtly scooped mid will play very well in mellower rock music. It’ll define the low-mid and low-note groves without offering any extra note noise that mixes with cleaner guitar tones.
Up steps the contour knob
With contour control, it’ll be possible to change the nature of the mids without completely removing them. This will open up the doors to many new tone sculpting possibilities. In many instances, the contour knob allows gradual scooping of the mids for taming the clutter in the midrange. When the knob is set in the leftmost position, the mids will remain unchanged. Turn the knob to the right, and you’ll scoop out the mids incrementally at about 250Hz. This is basically the range where a ton of body and low midrange heft of the bass is.
Too much sound in this range could easily be detrimental and end up muddying the mix. However, the contour knob will let you find that sweet spot. At full clockwise, the mid-range frequencies at 300Hz will be reduced by 9dB.
If you’re a fan of the sound of the scooped mids, it’ll be very useful to find equipment. It needs to let you implement it directly into the sound gradually through the knob instead of all at once. Some amps feature a handy on/off switch for the mid-scoop function. Remember, you shouldn’t be afraid to experiment with the contour content the next time you’re playing with your band. This is an important yet overlooked tool to help bassists find the right tone.
The basic control settings of a guitar amp
If you’re new to guitars, and you’re looking to figure out how the amp controls work, it can be overwhelming. Some amps have countless controls that can do plenty of things that can confuse you. Others are much more basic, but they have different terms used for describing what the amp settings do. Even moving from one amp to the other requires adjusting and a period of getting used to.
The main amp settings
Although some maps are loaded with knobs, there are five common settings that you’ll find on most amps. These settings are gain, bass, treble, middle, and volume. Even the simplest amps will have these five controls, allowing you to adjust your preamp and the sound they make.
1. Gain in the amp
The gain knob is a basic yet one of the most important amp settings that you’ll use. It’ll adjust the level of distortion present in the sound. If you’ve set the gain too low, the tone will be cleaner with almost minimal distortion.
If you’ve set the gain a bit too high, your sound will be distorted and saturated. This might not be good with some guitar amps. Not every guitar amp has the same potential to produce distortion. For some amps, this will not be an issue. On amps that are comparatively low in gain, this control is referred to as “drive”. If you’ve got an amplifier with this term, it’ll alter the distortion level in the same manner as well.
The drive or gain setting on an amp will affect certain frequencies as well. For instance, the highest the settings, the more likely you’ll have an increase in thickness or bass. It’ll be a good idea to take enough time and experiment with the gain settings to find out the right amount of distortion for your tone.
2. Treble in the amp
The treble control will be used for fine-tuning the high frequencies. The benefit of having a higher treble setting will be the way it can cut through the mix. It means that the sound will be sharper or brighter and will be less dark. It’ll be paramount to have the right treble setting so that it isn’t overly bright or harsh. Generally, higher treble settings will be used for lead guitar parts that involve soloing, while the rhythm will be darker.
3. Middle in the amp
The middle knob is used for adjusting the mid-range frequencies in the sound. The benefit of having higher middle settings is that it’ll help the guitar sit better in mixes with other instruments. It will make the guitar tone richer and fuller. These are the primary frequencies that are produced by this instrument. They’ll offer the perceived thickness or depth you’d want for filling out the sound.
Some types of heavier music turn this setting down low for getting the desired sound. This is commonly known as a scooped tone. You’ll also find that this control is labeled as “mids” on many amps.
4. Bass in the amp
The bass control will change the perception of low frequencies from the guitar amp. The biggest benefit of having a higher bass setting will be that it’ll help in filling out the low-end of your guitar’s sound. It can even make the amp sound larger or have more depth than it will with lower settings.
Be careful that you don’t overdo it, though. Too much bass could end up making the guitar tone muddy. It’ll lack clarity while making the guitar sound lifeless and dull. You must be using the control in conjunction with the amount of gain used. It’ll help you in keeping clarity and maintaining a good tone.
5. Volume in the amp
The volume knob will do exactly what it sounds like it does. It will adjust how loud your guitar is playing through the amp. While some may say that you need to adjust it last, that isn’t always the best way forward. It is always preferred that you should adjust the EQ when the volume is turned up to your preferred level. This way, the other frequencies can easily be heard and adjusted at this level. If you’re doing it last, some frequencies may become overwhelming once the volume is turned up. You’ll then need to start all over again. It’s also worth noting that the volume knob doesn’t really affect the tone like the other controls.
Sometimes, this control is also referred to as “master”. In case of some amps, you might even have multiple masters, allowing you to switch between them for different levels. It can be great when a solo guitarist needs a higher volume level.
How to adjust the primary controls
Now that you’ve understood all the basic control, it’s time to learn how to set them. As a general rule of thumb, start by setting the EQ controls to the halfway point. This will be a great starting point from where you can move forward. Most of these controls range from 0 to 10, which means the halfway is 5. Sometimes, it is also called “noon”. The volume control on many amps when set to the halfway point could be too loud. This is why you should keep the knob at zero and slowly turn it up until you’ve found the volume level that you’re comfortable with.
Ideally, your guitar amp settings should start with something like –
- Gain – 5
- Treble – 5
- Bass – 5
- Mids – 5
- Volume – 0
From there on, you can start fine-tuning the individual frequencies and get the tone that you are after. You should consider beginning with the gain control and then finding the preferred distortion level. It’ll be best if you experiment and find out what sounds good for you.
Contour and additional preamp controls
There are some exciting preamp controls that you’ll come across on your amps. They can be quite helpful to help you get the exact tone that you’re looking for in your guitar. In some cases, they can be channel-specific. It means that if your amp has more than one channel, you’ll only find certain controls on some of them.
Some of these preamp controls are labeled as contour, bright, fat, boost, tone, and wattage.
Contour switch
The contour switch is generally used for shifting the mid-range frequencies from low to high. This makes the presence of the guitar seem either brighter or darker. Ultimately, it’ll depend on how the guitar is set.
A contour switch will be the perfect way of scooping the sound for heavier music, while it’ll add fullness for others. It is a handy switch that’ll add more versatility to your guitar amp.
Bright switch
The bright switch is a fairly common preamp control on most guitar amps. It is present on many channels of a guitar amp. The purpose of this switch will be to add brightness or treble to the tone, apart from many other controls. This is a good thing when you’re using a guitar that has got a darker sound. It’ll be a good way for brightening up things during a solo or a lead section.
Fat switch
The fat switch is commonly found on high-gain channels. Its main purpose is to add depth or fullness to the sound by increasing the bass content. It’ll be perfect to give your tone much more body. Moreover, it helps in filling out the sound of a guitar that is on the thinner side, such as a Stratocaster with a single-coil pickup.
Wattage switch
A wattage switch is a relatively new feature that has been added to amps. It’ll allow you to choose the wattage that your amp will run at. It can be great if you want different power levels from the amp. You can commonly find this switch at the back of the amp.
Boost switch
A boost switch is usually found on the lead channels of guitar amps. What it does is that it’ll increase the amount of gain or distortion that you’ve got available. It can be great to give your solos much more punch or make them stand out in a mix. It’ll help if you tighten up the tone of an amp that may be sounding too loose in certain circumstances.
Tone control
Tone controls are generally found on lower gain amps. They’ll typically take the place of bass, mids, and treble controls, which allow you to dial in the desired tone. These are the basic amps, only having 3-4 controls, but they’re easy to adjust and won’t require much to make them sound good.
Power amp settings
The power amp takes the signals from the preamp and then amplifies the signals to drive the speakers. This is where most of the magic happens in terms of getting the tone. The power amp will also have a bit of control over the final sound. The power section generally comes with 2-4 controls, depending on the type and size of the amplifier. The most common ones are presence, bias, and resonance/depth.
These controls are very different base on what type of amplifier you’re using. Solid-state amps may have different controls than tube models, depending on the amp’s brand and model. However, they serve the same purpose, which will be to shape the sound of your amp.
Presence control
The presence control is used for adding or removing high frequencies from the sound of your guitar amp. This is normally done using the signals of the opposite polarity and is known as negative feedback. The signals will be sent from the speaker output to another area of the amp that can tailor the sound based on the presence control setting. This control can be quite helpful and is commonly present in the power section of the guitar amp circuit.
Resonance/Depth control
The resonance/depth control will work similarly to the presence. With this control, it’ll be the low frequencies that get adjusted. It can be very powerful and add a serious thump to the guitar amp’s sound. If, at any point, you feel like the tone is too thin, you should try and adjust the depth control. Moreover, take full advantage of everything that it has to offer.
Bias settings
When it comes to the bias settings of an amp, this must be done by a professional or a qualified technician. It’s important because many amps use it for certain adjustments in DSP or modeling. In that regard, it’ll be fine and can be adjusted as it’ll be a way to change the sound. In a tube amp, you should leave this control to the professionals.
Guitar amp effect settings for a better sound
Many guitar amps come equipped with effects that are built into them. These effects are usually things like reverb, chorus, delay, tremolo, and more. In certain cases, there will be a few others, but these are easily the most common ones.
Reverb
Reverb is an effect that will simulate the sound of an echo. It can be a subtle effect or one that is highly pronounced. Different types of reverb come with amps like spring, hall, plate, and room.
- Spring reverb is the most common type of reverb in tube amps. They have what is known as a spring tank equipped that will run the guitar signals through them. It creates the entire wobbly sound that they produce.
- Plate reverb is slightly more unnatural sounding for reverberation. The sound waves will be very close together comparatively. This kind of reverb is smoother, which is what makes it so popular. It’ll also make the tone brighter as a result of how it is produced.
- Hall reverb is used for simulating the sound of playing in a massive hall. This is a natural-sounding reverberation and it can consume a lot of space.
- Room reverb is exactly what it sounds like as it simulates the effect of reverberation that smaller rooms will exhibit. This is a bit more subtle effect but it can still be very effective when used properly.
It’ll all depend on how you’ve set up the reverb and what sounds nice to your ears. Generally, a little will go a long way with reverb so you should start off with small settings. Then, you should adjust as needed.
Delay
Delay creates an almost echo-like effect. Unlike reverb, it can be quite pronounced and last for long periods. It can be an amazing effect when performing solos and lead playing. It can be used for creating different sounds and textures in your guitar playing. Different types of delays come with amps, like Digital and Analog.
- Digital delay is the most common type of delay, and it is extremely versatile as well. It can be set for short or long delay times and have a clear sound.
- Analog delay isn’t as common, but it’ll still offer an amazing tone. They can be slightly noisier than digital delays as well. It will come down to what type of sound you’re going for. Try out different settings and see which setting you like the best.
Chorus
Chorus is an effect that’ll take your signal and split it into two. The signals will then be slightly out of phase with each other, which will give the chorus a unique sound. This effect adds depth to the tone, using the two signals of similar intensity for overlapping at certain intervals.
Tremolo
Tremolo is an effect that’ll modulate the amplitude of the signal. It gives the impression that the sound is repeating itself and will feel like the tremolo system is being used on a guitar. Tremolo can be quite effective when it is used sparingly.
Conclusion
Thank you for reading. Hopefully, now you know all about contour on a guitar amp, what is contour on a guitar amp, how to use the contour knob to dial in the bass tone, and other basic settings on a guitar amp. The contour control on a guitar amp is responsible for lowering the mid-range frequencies. If you’re increasing the contour, you’re decreasing the mid-range frequencies and vice versa. It’ll make the mid-range frequencies more scooped, which is why it is often referred to as a low-budget EQ.
Image Credit:

