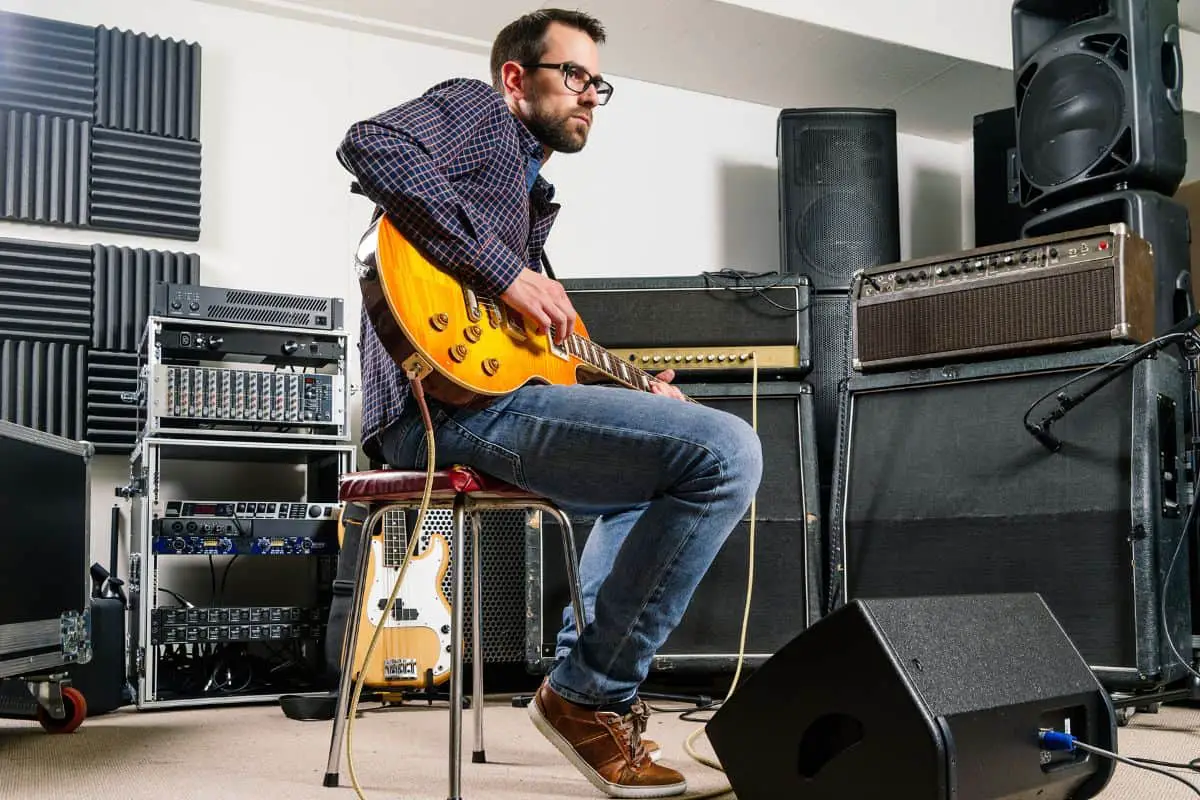
Are you creating a room studio, and you need to know the best place to put your guitar amp to get the best sound? If so, then this article will definitely be of great use to you.
Putting guitar amp in room involves placing the amp and the mic in the right position and at the right distance. Remember, having the wrong calculations can significantly alter the sound that your guitar amp is producing. Everything needs to be perfect to get the best sound.
In this article, you’ll get to know all about microphone position, where to put guitar amp in room, how near or far to place the microphone and amp, and important tips to remember to turn your bedroom into a professional-sounding studio. Continue reading to get all the answers that you’re looking for.
Where to put guitar amp in room and capture the best sound?
A question that most guitarists wonder about is where to put guitar amp in room to get the best sound. Almost every musician and guitarist has experienced some degree of shock after hearing themselves played back through monitor speakers. The sound is never quite the same as what you had imagined. Standing in a room having a cranked-up guitar amp and hearing the sound bouncing off the walls can be different from hearing the same amp through a set of Hi-Fi speakers. You cannot overcome it entirely, but there are recording tricks that could close the gap.
The right Microphone positioning
Whether you’re recording guitar amps, vocals, or drums, most studio engineers choose to go for close-miking. In situations where they’re looking to minimize spillage between instruments, it makes total sense. However, when you’re overdubbing and separation isn’t a problem, there is forcing you to adopt this approach.
Many people prefer a closed mic’d, in-your-face guitar sound without any audible room ambiance. To get aggressive rock tones, anything different will sound odd these days. For earthier and more natural tones, you should consider this. When you’re listening to the amp, are you in the habit of sticking up your ears against the speaker cloth? Assuming that you’re not, it’s unreasonable to expect the mic to capture anything resembling the sound you’re used to hearing. This is the case if the placement of the mic is so far removed from the listening position.
There isn’t any law that states that you must absolutely close-mic your guitar amp. Some mics are specifically designed for close-miking, with the Shure SM57 being the most obvious example. Theoretically, flat-response coil and condenser mics could sound boomy if placed too close due to the proximity effect. Ribbon mics exhibit a proximity effect as well. Placing them close to a loud guitar amp could damage or even break the ribbon mic.
Condenser and ribbon mics will be ideal for recording with a little more distance between the speaker and the mic. The closer the microphone, the drier and more aggressive will be the sound. Moving the microphone further away will soften the tone, allowing for more room ambiance in the mix. If you can get an expert to help you, try to move the mic slowly away from the speaker. Then, listen to the way the tone is changing. You’ll hear areas where the guitar would sound clear and full. Moreover, you’ll hear the sound get thinner and far less distinct.
The idea will be to try and find a sweet spot with a full tone and the right balance of directness and ambiance that works with the track. Most ribbon microphones have a bi-directional and figure-of-eight pickup pattern, so they hear it from the front and back. This will make them ideal for this type of miking.
Another trick would be to maintain a rather close microphone placement but alter the pickup pattern. It’ll allow for more ambiance in the sound. If you’re having a multi-pattern condenser, try to switch it up a notch or two away from cardioid towards omnidirectional. Moreover, try Omni and figure-eight if these options are available, and remember that there’s no proximity effect with Omni microphones.
Rear microphones
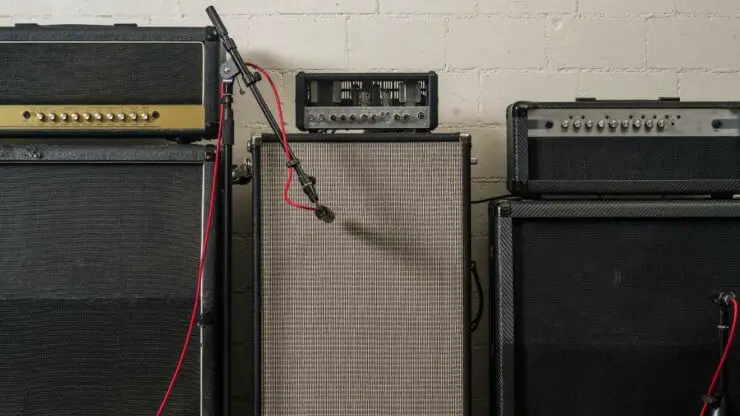
Speaker cones tend to move forward and backward. If your speaker cabinet is having an open back, it’ll generate sound waves from the rear and the front. When you’re listening to that cabinet, you’ll be hearing the total sound. However, a mic close to the front speaker will only be able to capture half of it.
The solution is pretty simple. You’ll need to place a mic on the back of the cab and on the front. Remember, you’ll likely be 180° out of phase, so you’ll have to check that when you’re mixing the mic signals. Try to flip the polarity switch on one of the mic preamps and notice how the sound changes.
The setting that sounds loudest and fattest will be the one that is in phase. You’ll need to balance the two signals for achieving the sound that you like the best. You’ll then be able to combine them onto one track when recording or separately record them. Furthermore, you can then balance them later when mixing.
Near and far
Instead of trying and getting the close/ambient balance right using a single mic, take the pressure off yourself by using multiple mics. Place one of them close while having the other one further away from the cabinet. It’ll be a best-of-both-worlds solution that’ll give you total control over the eventual sound. You’ll need to do a bit of experimenting. It’ll help you find the best location for two distinct microphones, as they might sound slightly underwhelming. Placing a microphone a couple of meters away from a cab results in the mic detecting soundwaves traveling from the speaker alongside soundwaves that are reflected off floors, ceilings, and walls.
Timing the differences between the direct and reflected soundwaves can result in phase issues. Moreover, some frequencies could be canceled out whereas others are reinforced. For making effective use of ambient mics, set to the omnidirectional mode. You’ll have to find the sweet spot where the direct, reflected soundwaves combine and create a pleasing effect. Moreover, it’ll help if you’ve got an expert to move the mic around as you’re listening to the sound change.
How to turn your bedroom into a professional-sounding studio
There’s a general idea that you need a professional-sounding studio to get great recordings. There are more than enough examples of songs that support this claim. If you’re reading this article, chances are you’ve got a bedroom that you want to turn into a professional-sounding studio. By taking a critical look at what separates home studios from commercial studios, it’ll be easy to pinpoint the differences. Here are some of the ways you can turn your bedroom into a professional-sounding studio.
1. Create an interesting digital space
A high-quality live room will be a major factor separating a professional recording space from a bedroom setup. In case you’re trying to capture some live room mojo on a limited budget, reverb plugins will likely be your best bet to help you get going. The goal isn’t that you should necessarily be using obvious, long-tailed reverb (like hall, plate, spring). Instead, you should be looking to recreate the air and depth of a high-quality tracking environment. Chamber reverbs and shorter rooms will work best in this regard.
Plugin recommendations
IK Multimedia’s Sunset Sound, Eventide’s TVerb, and UAD’s Ocean Way are wonderful recreations of legendary live rooms. They come loaded with useful features such as mic choice and placement, alongside emulations of other studio gear. UAD’s Capitol Chambers and Waves’ Abbey Road Chambers are great recreations of reverb chambers that have given countless classic records. They boast very similar tweakability through a microphone and speaker placement. For people on a tighter budget, Valhalla’s Room and Vintage reverbs will perform admirably well, especially given such a modest price tag.
Tip for mixing
Try to create an AUX bus for all the instruments that you would put in the live rhythm section. Then, use your favorite room emulations there. Mix it in enough to glue the instruments in a realistic space. Remember, similar to actual glue, a bit will go a long way. When you’re using a reverb with delay control, it’ll be essential to set delay times for avoiding long tails.
2. Use a variety of preamps and emulations
Of all pieces of gear you’ll find in a high-end studio, the most important ones (apart from mics and instruments) are the preamps and consoles. The stock preamps that come with many low-to-mid-grade audio interfaces often leave a lot to the imagination. At best, these tend to be quite clinical and somewhat sterile.
If you’ve got a selection of preamps, you should learn which ones are suited for which purpose and use them. If you don’t, there are many great software emulations out there as well. While adding a plugin channel will strop to a track recorded on uninspiring preamps will not be the same as recording through high-quality preamps. The sonic difference between both source hardware and emulations is smaller than the gap in price may suggest.
Plugin recommendations
Truthfully, there are essentially too many preamp emulations out there for creating a satisfying list. For recommendation, you can go for the Waves Scheps 73. It is a very popular and reliable emulation that gets on most shortlists of notable emulations. A decent starting point will be to research which preamps or consoles have been used on your favorite recordings. You can hunt down the emulations from there. For guitarists on a budget, Kazrog’s True Iron and Kush’s Omega Transformer Series will offer analog warmth. They’re imbued by high-quality transformers in vintage consoles in an idiot-proof package that comes at a reasonable price tag.
Mixing tip
Many vintage consoles show you their best selves when they’re in the danger zone between healthy signals and overt distortion. Crank up the input gain so that the hottest moments on the track push the meters a bit. Listen for the overpowering distortion, though. It might be just what you’re after. Aggression distortion that sounds great on studio monitors will commonly translate poorly on consumer systems.
3. Clean up any unwanted resonances
Even in well-tuned spaces that have high-end microphones, it’ll be possible to end up with resonances that could hurt clarity in the recordings. In a bedroom setup that has a limited selection of budget microphones, these types of resonances are almost guaranteed.
Careful microphone choice and placement will always be the best first step toward helping you deal with such issues. Still, many musicians, especially beginners, just go and start working in spaces and with gear that’ll create resonance despite their best efforts.
Narrow EQ cuts are generally the best remedy for this kind of issue. However, you should be careful as cutting deeply in a frequency range is important to the character of the track. Dynamic EQ and multiband compressors can be great compromise options when resonance lives in a range that’s vital to the character of the track.
Plugin recommendations
The FanFilter Pro-Q3 is one of the best surgical EQ plugins thanks to its intuitive metering, interface, and a long list of helpful features. These features include variable slops, dynamic EQ, mid-side functionality, and more. The Sound Radix SurferEQ and TDR Nova will be great options to tame resonances, with the SurferEQ following problem frequencies. Oeksound’s Soothe, however, will be the most specifically tailored plugin for this kind of use. It’ll bill itself as the dynamic resonance suppressor.
Mixing tip
Oeksound’s Soothe has managed to become a wonderful, game-changing plugin for musicians and guitarists. This plugin is capable of producing soothing resonances caused by mics, rooms, overdriven preamps, and almost everything else in between. It is often a magic bullet when you’re looking to bring DIY recordings up to pro-quality.
4. Use noise reduction software
Superior isolation will be a huge factor that potentially separates professional setups from DIY ones. Moreover, it is a huge driver in the increase in price between the modest room setups and a commercial studio. The same will be said for clean power.
Fortunately, consistent ambient noise and electrical hum will be some of the easiest audio issues that you can clean up with noise reduction software. Rumbling street sounds, buzzing fridges, electrical hum, passing helicopters, noisy vents, and computer fans – all of these issues are easy to take care of with the restoration software available these days. You should not expect any miracles though, but you should not be all that surprised either if you witness any.
Mixing tips
Most noise reduction software are designed to work best once you give them a sample of pure noise. It is for this reason that you should lay off the gate until after cleaning up the noise. Otherwise, you might make your job significantly harder down the road. As always, you should be careful that you don’t push things too far. Noise reduction software can just as easily start introducing artifacts that you do not need.
5. Record Bass DI and Electric Guitar and re-amp or use an amp sim
If you’re reading this article, you’re more than likely the guitarist, musician, and producer in the recording session that you’re conducting at home. If your studio recordings include an electric guitar, then chances are you’re probably juggling too many jobs simultaneously when recording. You should dial-in the amp tone, play the part, keep track of the takes for an eventual comp, make decisions about microphone placement, and make in-the-box mix decisions.
Even for veterans and seasoned pros, it can be quite hard to do all of these things at the same time. It is suggested that you should make the job easier on yourself by recording parts using DI first. There’s a legitimate argument in favor of tracking, when you’re hearing the tone that you will use on the recording. With that said, there are compelling reasons for capturing a clean DI recording too, especially for those recording at home.
Clean DI guitar recordings are fairly easy to comp and edit as the transients are very visible. It is even more so than distorted guitar. From there on, re-amp the DI comp and dial in amp tone, microphone placement, and other processing to taste. All this without the added pressure of thinking over the quality of the take. Of course, all of it requires an amplifier and at least a mic that you actually like. If these are not available, you should take comfort in the knowledge that there are many great amp sims available.
Plugin recommendations
Very similar to mic preamps, there are far too many amp sims options to come up with a list. Neural DSP (Cory Wong) and Emulations by UAD (Ampeg B15, Fender Tweed) are among the best options. Guitar Rig by Native Instruments is yet another one that many producers absolutely love. It offers a wide selection of amps, microphones, speaker cabinets, and stompbox effects. A great starting point would be to research amps used by your favorite guitarists and musicians. It’ll help you find out if there are any great sims out there.
Mixing tip
When you’re planning on re-amping, you should choose to route your clean guitar to an amp. Listen to it while you’re playing the part. Leave out any stompbox/outboard effects between the interface and the amplifier so that you can get a clean signal. Then, you should continue monitoring the part through the amp, tweaking the effects as you’re editing for timing. It’ll eliminate the risk that you’ll be playing something that isn’t jiving with the intended effects chain. It’ll give you extra time to listen to the tone and have everything dialed just right. This means you’ll be able to record and comp the take without needing to put on headphones.
6. Make the most of the monitors
If you’re a musician, you’ll know that room treatment and the ideal placement of studio monitors are essential. Acoustic treatment and monitor setups are topics that stand on their own. They’re essential and shouldn’t be overlooked for other aspects of bedroom setups.
If you’re recording music in your bedroom, then the ideal placement of the listening station might not be your biggest concern. Sometimes, you aren’t certain whether you’ve done everything possible to observe the best practices regarding monitor placement and acoustic treatment and monitor placement. It is recommended that you should do your homework and make the possible upgrades wherever possible. If you absolutely have to live with a compromised monitor setup, then there is still a bit of hope.
Plugin recommendations
It is recommended that you should use something like Sonarworks Reference 4 in your bedroom setup. Add it to your setup and the improvement will be noticeable from the very beginning. IK Multimedia’s ARC works similarly, and it’s a great alternative. For guitarists and musicians who have to work on headphones, Waves NX will be a highly innovative plugin. It can easily recreate, on cans, the sonic experience of listening to music in a very well-tuned mix room.
Mixing tip
Sonarworks offers amazing monitors and as a paying customer, you’ll be impressed with the results. Yes, there are many detractors of room correction software like this. Yes, it’s true that there are a few acoustic issues like flutter echo that this software cannot address. Still, Sonarworks can easily work wonders when it comes to reliable monitor setups in a limited space. For the best possible results, you should do everything possible to get the monitor placement right. But before that, you should treat your room via traditional methods.
Conclusion
Thank you for reading. Hopefully, now you know a lot more about microphone position, where to put guitar amp in room, how near or far to place the microphone and amp, and important tips to remember to turn your bedroom into a professional-sounding studio. It is important to know where to put your guitar amp in the room as it greatly influences the sound. Putting a guitar amp in a bedroom setup involves placing the amp and the mic in the right position and at the right distance. Remember, having the wrong calculations can significantly alter the sound that your guitar amp is producing. Everything needs to be perfect to get the best sound.

