Have you recently incorporated a guitar amp in your guitar rig, but don’t know how to mic a guitar amp? If so, then don’t worry because it’s easier than you may think.
Mic-ing a guitar amp involves setting it in a way that perfectly captures the essence of the guitarist’s feel, the sound of the room, and the fullness of the sound of the amp. Find a mic position that best represents the amp’s sound and creates the tone you want to hear.
In this article, you’ll get to know all about mic-ing guitar amps, how to mic a guitar amp, why do you mic a guitar amp, where to place mic on guitar amp, and important tips to remember when mic-ing up a guitar amp among others. Continue reading to get all the answers you’re looking for.
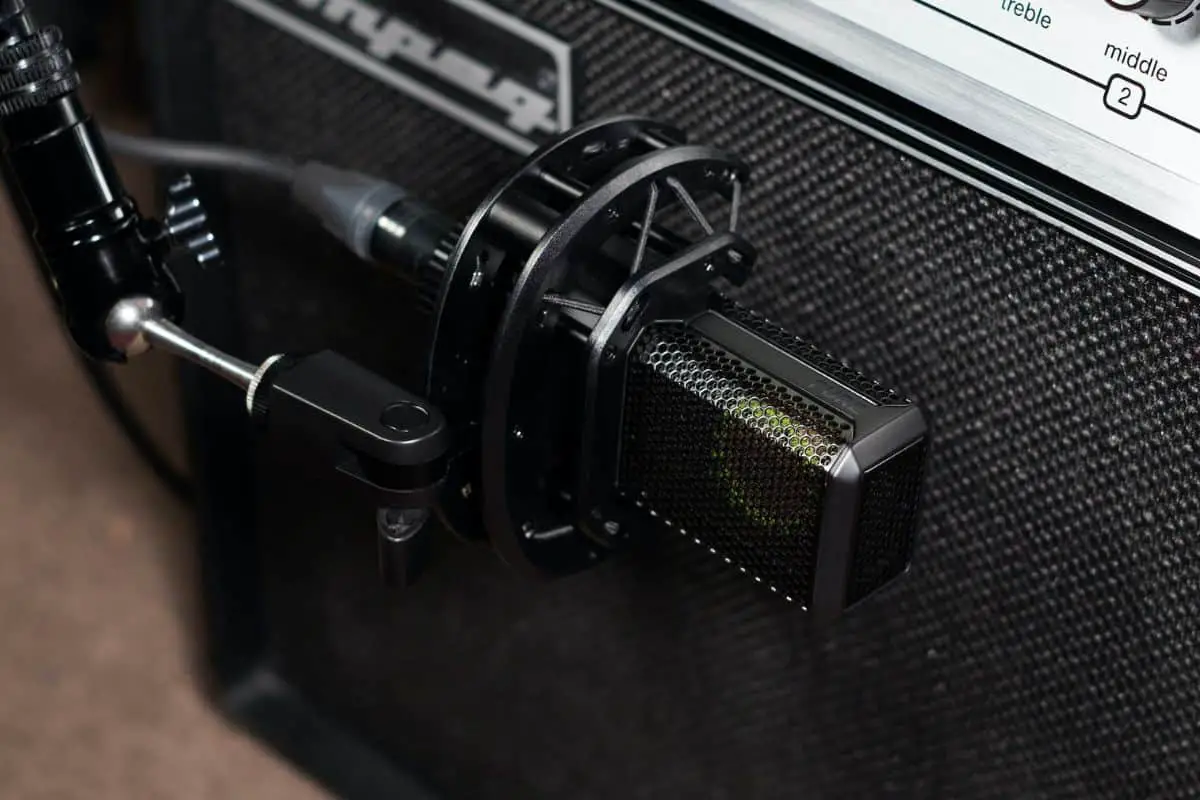
Mic your guitar amp
Technology has evolved to the point where creating a wonderful track is possible by anyone if they have a PC, recording software, and a recording device like a portable audio interface. But back in the day, these elements didn’t exist. For creating a great-sounding song, you’d require a professional studio where you’d utilize quality mics for recording instruments.
For such situations, questions like why do you mic a guitar amp and how to mic a guitar amp commonly arise. You’ll need to mic a guitar amp so that you can perfectly capture the essence of the guitarist’s feel and the sound of the room where the music is recorded. Lastly, you should also be able to capture the fullness of the sound that the amp is providing. For getting the best sound, it’ll be important to have the right mic, the right placement, and the right recording technique.
Why do you mic a guitar amp?
In the glory days of rock music, guitarists and engineers used to spend hours dialing in the right amp settings. All this while getting the appropriate mics and placing them in different positions. It was done so that the guitarist could capture the unique sound for enhancing the sound being produced. It’ll be important to understand that there isn’t a right way of doing this. Instead, you should understand that the guitar’s sound needs to serve the song properly and not the other way around.
Another key aspect of why do you mic a guitar amp is because the mics are designed for capturing frequencies from all over the spectrum. An untampered human ear can perceive frequencies between 20Hz and 20,000Hz. A decent quality mic can capture the main frequencies a guitar has in its overtones, giving you the richest-possible sound courtesy of the guitar. Additionally, there are live performances as well. Mic-ing amps in live situations will allow you to have more control over the balance of the instruments being used.
In live performances, where the instruments are mic’d up, they’re sent to a set of speakers. This will be the main output source for the listeners. This will hold specifically true for stadiums and big arenas. In such areas, it can be impossible to crank the amp up.
Different types of microphones for recording a guitar amp
Dynamic microphones
The first thing that you’ll need to understand about dynamic mics is that they aren’t sensitive to sound. This makes them ideal for loud sources like guitar/bass pedals, snare drums, and toms. They’re quite resistant as well and can easily handle bumps and bruises. They’re also among the cheaper options, which is a big plus point.
An important thing to know about mics is their polar pattern. A mic’s polar pattern will dictate how a mic will capture sound and from which directions it’ll reject sound. Dynamic mics have a unidirectional polar pattern (commonly known as cardioid). This means that a dynamic mic can only capture the sound that it’s pointed towards, while rejecting everything else. This will make it an ideal mic for live performance situations and small home studios. In such situations, all sorts of unwanted sounds could mess with what you’re recording.
Out of the three mic types to be used with a guitar amp, dynamic mics are easily the most preferred option for recording guitar amplifiers.
Condenser microphones
Condenser mics are considerably more complex than dynamic mics, while also being more expensive. This is the case because condenser mics can capture clearer frequencies. Moreover, they give the sound more balance and sweetness than dynamic mics would. They’re great for recording guitar amps. However, you’ll need to be careful about how loud the source is because of its high sensitivity.
Extreme blows of volume can end up damaging the condenser mic. This is definitely something that you don’t want. Another important thing to know about is that condenser mics will have more polar patterns available. As mentioned above, dynamic mics are unilateral. This means that they can capture sound from the front of the capsule.
Meanwhile, condenser mics have what is known as a Figure-8 polar pattern. It’ll allow you to capture the sound coming from the front and the back of the capsule. Lastly, there is also the Omnidirectional polar pattern. It’ll capture the sound from all possible directions. This pattern is a great feature when capturing the sound of a room.
Ribbon microphones
Out of the three mic options, ribbon mics are the ones having the greatest ability to give you the ideal sound and the organic, vintage, and warm feel. They’re also the most sensitive microphones around. You should ensure that you’re cautious when using them.
Ribbon microphones come with a Figure-8 polar pattern, which is a wonderful way of giving you different recording techniques. However, the downside will be that ribbon mics will give you a harder time isolating the source of the sound. This will be less than ideal in live situations or in untreated rooms with all kinds of unwanted frequencies. With that said, pairing a dynamic mic with a ribbon mic will be a great way of capturing the unique sound of the amp.
How to mic a guitar amp?
When talking about how to mic a guitar amp for recording, there are multiple creative ways to do that. Here are a few common ways of mic-ing a guitar amp when recording the guitar amp.
Paired Microphone technique
This is by far the simplest and most common way of mic-ing an amp out of them all. The idea behind this technique will be to put two dynamic mics very close together while pointing them toward the speaker. One of the key things to consider when arranging the mics is that you’ll experience phase issues. This means that if the mic’s distance with the amp and among themselves isn’t accurate, the two sounds getting captured could get canceled out. This will make the sound thin.
The best way of avoiding this would be to follow the 3:1 rule. This room dictates that you’ll need to place the mics three times farther apart from each other regarding the amp’s distance. The best way of doing this would be to place them in front of the amp’s cloth. This makes the distance small enough to put the two mics close to each other. Moreover, you will also be able to prevent any phase issues.
X/Y Stereo Recording technique
Stereo recording techniques are definitely a great tool to give the guitar’s sound more depth and clarity. Stereo recordings are one of the simplest and most common techniques used for instruments like guitar, piano, and drums. The way this technique works is by utilizing two dynamics or condensers. They should be set at an angle of 90-135° between them, such that their capsules coincide at a single point.
Mid/Side Stereo Recording technique
Out of the three mic-ing techniques mentioned, this is definitely the most interesting one to experiment with. For this method, you’ll need a dynamic mic with a cardioid pattern and a condenser/ribbon mic with a Figure-8 pattern. The Figure-8 mic needs to be placed at a 90° angle from the amp, functioning as the “side” in the term mid/side. Meanwhile, the cardioid mic will be placed in front of the amp, and it’ll function as the “mid”.
The tricky part will be that after the recording, you’ll use the DAW to duplicate the side recording. Then, pan them both hard left and right. You’ll then need to reverse the phase of the duplicate for creating a Mid/Side Stereo sound. It might sound more complex than it actually is, but it’ll give your guitar’s sound an interesting spin.
Move the mic and know where to place mic on guitar amp
Moving the mic even an inch could have a major impact on your guitar amp’s sound. So, how does one dial in a good sound quickly and without spending hours moving the mic in circles? Keep the fundamentals of the mic in mind, and it’ll help you find the mic’s sweet spot with the amp. Moving the amp closer to the amp’s speaker increases the bass frequencies.
Meanwhile, moving it farther away reduces the overall bass response of the recorded tone. Moving the mic sideways and closer to the surround edge of the speaker reduces the mid-range and upper-mid frequencies.
Moving the mic towards the speaker’s center will emphasize the midrange frequencies. Angling the mic at a 45° angle can easily tame harsh high frequencies. However, its effectiveness will be determined by which specific microphone you’re using. To have a decent start, point the microphone directly at the speaker. Do it at least until you have found the right mic position and distance on the cone.
Use your ears for finding the right spot
Assuming that the guitar amp is putting the tone that you want to achieve, your goal would be to find the right mic position that represents perfectly what the amp sounds like when you are standing in front of it. Where you’re initially placing the mic is less important than the act of hearing. You should properly hear what the mic is capturing. Then, decide if any changes need to be made and move the mic according to your needs.
Too boomy? Bring back the mic an inch or two. Are the lows and highs sounding decent, but not giving enough midrange growl? Move the microphone closer to the speaker’s center while pulling it farther away from the edge.
Remember, that moving the mic means moving them in inches and not shifting them multiple feet. Even small changes in the mic’s position can result in huge sonic differences. You should start close, from a few inches away to the right, on top of the grille cloth. This will help reduce the chances of capturing unwanted ambient sounds.
Important tips to remember when connecting a mic to a guitar amp
Even though the tried and tested techniques make decent starting points, you should be open to experimentation. Moving the mic slightly can sometimes result in a huge change in the way it hears the amp. The key would be to listen critically to how the mic is impacting the sound. To help you with that, there are certain tips that you should keep in mind. Here are some of the important tips to consider when connecting a mic to a guitar amp.
1. Place the mic towards the center
Place a dynamic mic pointed towards the center of the amp’s speaker cone and against the grille cloth. If the cab features multiple speakers, find the speaker that’s sounding the best and then point the mic towards it. This placement will be good to get a driving, punchy sound. Some guitarists prefer to point the mic about a third of the way towards the rim of the speaker. Again, you should experiment to see what works best for you in this situation.
2. Place the mic at angle in front of the speaker
Put a condenser mic at around a 45° angle from the front of the speaker cabinet, 8-12 inches away. Set the microphone to a cardioid pattern. Usually, the mic gets placed directly in front of the speaker, but it could be set higher. This placement will be good for clean guitars when you’re looking to have numerous highs and mids.
3. Try micing at different distances from the amp
Try to mic at different distances from the amp, around three feet to the length of the room. Large diaphragm mics are great for this as they can pick up more low-end. If your condenser mic can switch to Omni-directional and if you’re recording in square or rectangular rooms, place the amp a foot or two from the wall. Meanwhile, place the mic at the center of the room. As you’d expect, you’ll be getting a lot of room ambiances this way. You could even pick up sounds from the environment like dogs, birds, and cars.
4. Mic multiple microphones at the back or in front of the amp
If you’re having two microphones and an open-back amp, try to mic both the front and back of the amplifier. You can either use two condensers, two dynamics, or one condenser and one dynamic. If you’re using a condenser, you should set it to cardioid. Try to position each mic around eight inches from the cabinet. Moreover, place one of the microphones slightly towards the left and the other towards the right. Experiment until you’ve got the sound you desire.
Point the microphone at or near the center of the speaker cone, at a short-distance away. This will result in some of the room’s ambiance getting mixed with the amp tone. Experiment with different differences. If you’re using a cardioid mic, prefer moving it away from the cab, as it’ll decrease the bass response.
5. Place a dynamic mic close to the speaker to pick up dry signals
Another two-mic tip is to place a dynamic microphone close to the speaker for picking up dry guitar sounds. For adding room ambiance, you should place the condenser around 10 feet from the front of the amp, while keeping it 6 feet high. Moreover, it needs to be pointed towards the middle of the speaker’s cabinet.
6. Use both dynamic and condenser mics with multiple speakers
If the cab has multiple speakers, you should use a dynamic mic on one of the speakers and a condenser mic on the other. A large diaphragm dynamic mic would be the best. It’ll be able to pick up more bass than small diaphragm dynamic mics. The condenser will be for the highs. You should place each microphone as close to the speaker as possible. This will allow you to get the dry sound, emphasizing the differences between the highs and lows.
However, you can also end up winding with phase cancellation. In case the volume is quiet when both the channels are panned center, you should reverse the phase of one of the microphones. Often, when multiple mics are used, one will be panned hard left while the other will be hard right.
7. Try recording in different environments
Try to record the amp in different environments/rooms. Rooms with hard, reflective surfaces will give longer reverb time compared to one that is carpeted and has upholstered furniture. Ultimately, there are no hard and fast rules. Feel free to experiment and never settle for anything less than the best sound.
Conclusion
Thank you for reading. Hopefully, now you know a lot more about mic-ing guitar amps, how to mic a guitar amp, why do you mic a guitar amp, where to place mic on guitar amp, and important tips to remember when mic-ing up a guitar amp among others. For mic-ing a guitar, you should set it in a way that it can perfectly capture the guitarist’s feel, the room’s sound, and the fullness of the sound of the amp.
Ultimately, there aren’t any strict rules when it comes to how to mic a guitar amp. With that said, there are definitely a few tried and tested techniques that are regularly used in recording studios. This article would have given you an insight into some of these techniques and how they help you get different sounds.

